
📑 Table of Contents ▶
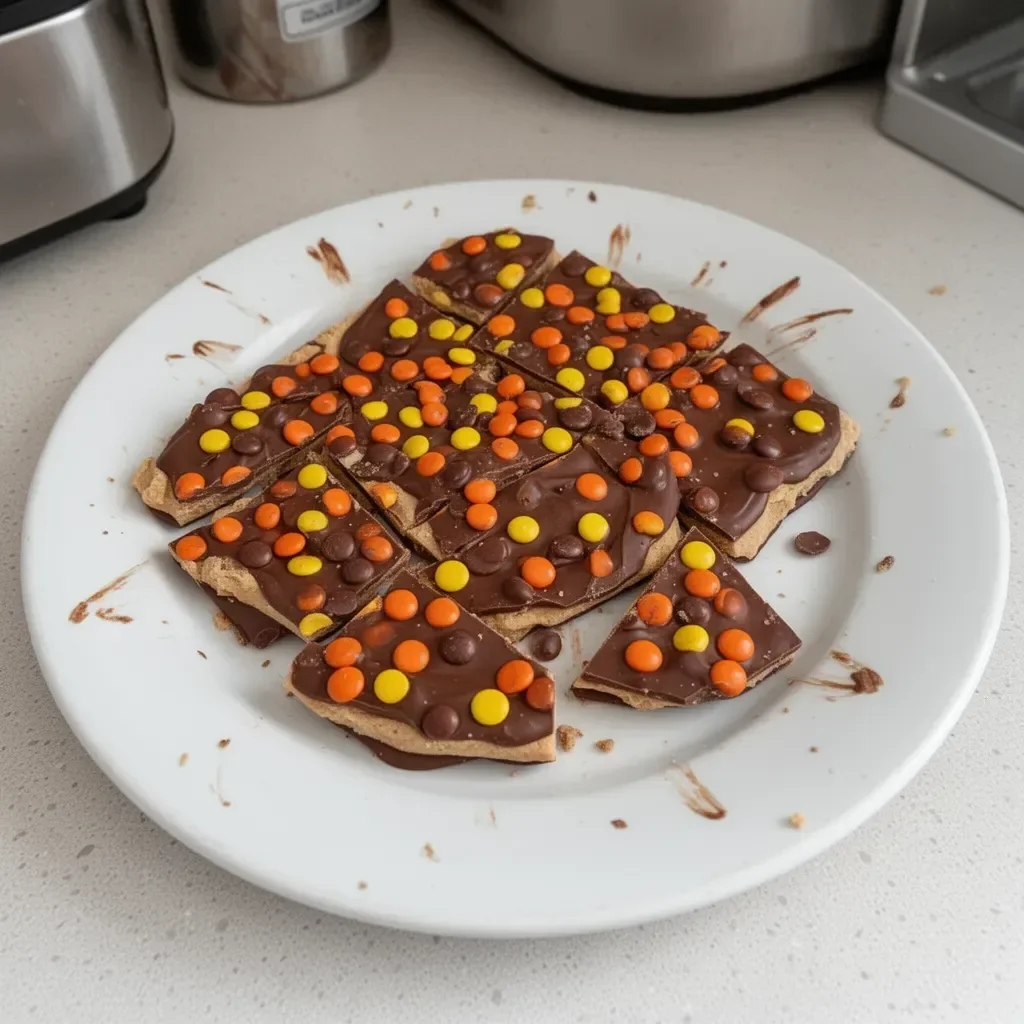
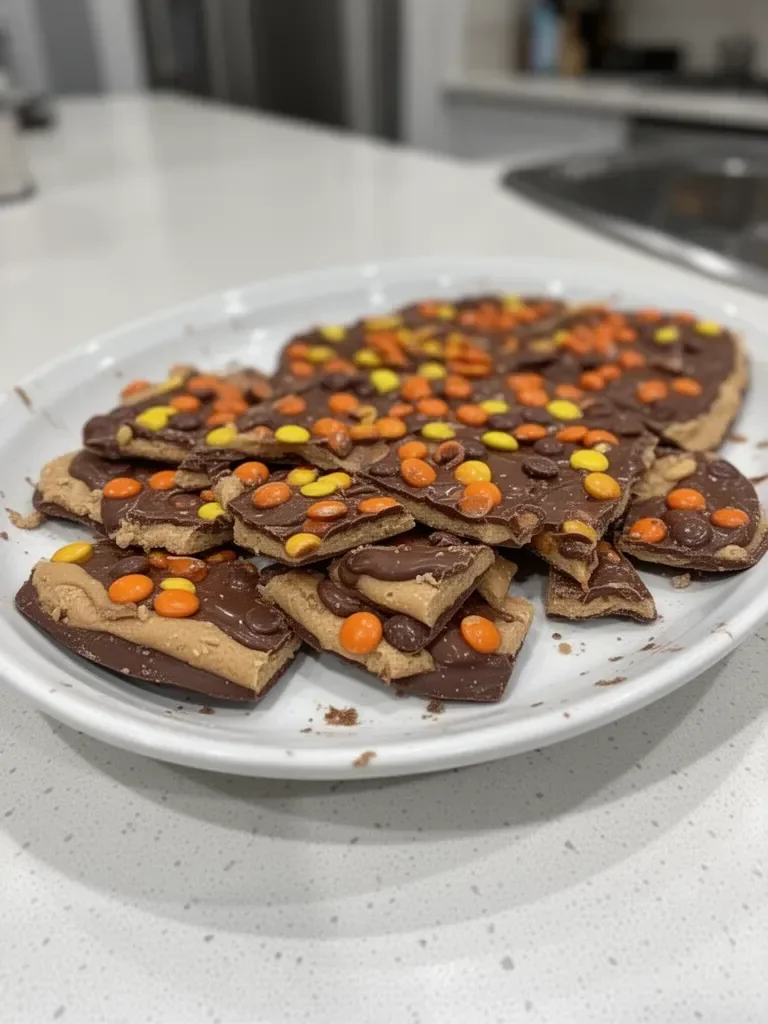
Reese’s Bark
There’s a certain joy that comes with the first bite of something sweet and indulgent, especially when it combines chocolate and peanut butter. Memories flood in of childhood treats shared after school, the scent of melting chocolate wafting through the kitchen, and the excitement of creating something delicious with friends or family. That’s where Reese’s Bark enters the picture.
This irresistible recipe encapsulates nostalgia perfectly. With layers of semi-sweet chocolate, creamy peanut butter, and delightful Reese’s pieces, each bite delivers a burst of flavor that brings smiles to faces. Reese’s Bark becomes more than just a treat; it embodies the joy of coming together with loved ones to savor tasty sweets.
Creating this delectable bark doesn’t just fill bellies; it crafts memories, carelessly tossed together with laughter and excitement. Impress friends and family with your culinary skills while relishing every rich flavor this dessert has to offer. Reese’s Bark isn’t just a dessert; it’s an experience.
Reese’s Bark Essentials
Fundamentals
Reese’s Bark serves as a delightful dessert that appeals to chocolate and peanut butter lovers alike. The harmony of flavors captures the essence of a sweet treat but remains simple enough for anyone to whip up in the kitchen.
This dessert offers tons of versatility. Each layer contributes a different texture: the creaminess of peanut butter, the smooth melt of chocolate, and the delightful crunch of Reese’s pieces on top. It invites creativity, letting you experiment with various toppings or even different types of chocolate. Making this bark satisfies sweet cravings and allows for creative expression through a delightful dessert.
Preparation and Setup
Prepare your surface and ingredients before diving into this delicious adventure. Line a baking sheet with parchment paper or a silicone baking mat for easy removal of the finished product. Gathering everything beforehand makes the cooking process seamless and enjoyable.
The beauty of Reese’s Bark lies in its quick setup. It comes together in two main steps: a layer of melted chocolate followed by a creamy peanut butter filling. The cooling time in between allows for easy assembly and helps achieve that perfect layer structure.
Ingredients
For this scrumptious Reese’s Bark, make sure to have the following ingredients on hand:
- 2 cups semi-sweet chocolate chips
- 1 cup peanut butter chips
- 2 tbsp vegetable oil
- 1 1/2 cups creamy peanut butter
- 3 tbsp softened butter
- 1 tsp vanilla extract
- 1 1/2 cups powdered sugar
- 1 cup Reese’s pieces
Directions
- Line a baking sheet with parchment paper or a silicone baking mat and set aside.
- In a microwave-safe bowl, combine chocolate chips, peanut butter chips, and vegetable oil. Microwave in 30-second intervals, stirring in between, until melted and smooth.
- Pour half of the melted chocolate mixture onto your prepared baking sheet and spread it into a rectangle roughly 9×13 inches in size. Transfer to the fridge or freezer to harden.
- In the meantime, combine creamy peanut butter, softened butter, vanilla extract, and powdered sugar in a bowl. Mix until well combined.
- Drop pieces of the peanut butter mixture all over the layer of chilled chocolate, then press into an even layer.
- Pour the remaining melted chocolate mixture on top, spreading to cover the peanut butter layer completely.
- Sprinkle Reese’s pieces candies on top, then transfer back to the fridge or freezer to set completely before breaking into pieces.
Crafting the Perfect Reese’s Bark
Technique
Preparing Reese’s Bark involves simple techniques that anyone can master. Melting the chocolate in intervals helps prevent overheating, ensuring a smooth consistency.
When layering, spread the chocolate evenly for a uniform bark. Dropping the peanut butter mixture and pressing it down gently creates a delightful contrast in textures. Finally, ensure the top chocolate layer encapsulates the peanut butter filling completely for a cohesive final product.
Tips and Tricks
- Use high-quality chocolate chips to enhance the flavor.
- Stir the chocolate after every 30 seconds in the microwave. This not only helps with even melting but prevents any possible scorching.
- For a fun twist, try layering in crushed graham crackers or other candies for added flavor and texture.
Perfecting Your Reese’s Bark
Perfecting Results
Achieving the perfect Reese’s Bark requires some attention to detail. Ensuring both chocolate layers are evenly spread helps create a visually appealing treat. Refrigerate the bark long enough for it to harden, resulting in clean cuts and a satisfying crunch.
Experiment with different chocolates—dark chocolate, milk chocolate, or even white chocolate can each create a unique twist on this classic treat. Adjust the sweetness by modifying the amount of powdered sugar as well.
Troubleshooting and Variations
If your chocolate seizes up while melting, add a teaspoon of vegetable oil for smoother results. If the bark is too soft after setting, ensure you chill it long enough.
Consider adding extra ingredients like chopped nuts or a sprinkle of sea salt on top, giving your Reese’s Bark a gourmet touch. Get creative by incorporating flavor extracts, like almond or coconut, into the peanut butter layer for a unique taste experience.
Serving and Presentation
Serving Reese’s Bark
Presenting your Reese’s Bark is just as important as making it. Once set, use a sharp knife to cut it into squares or irregular pieces for a rustic appearance. Arrange them on a decorative platter, adding a sprinkle of Reese’s pieces around for charm.
Consider pairing it with milk or coffee for a delightful experience. The combination elevates the treat, making it perfect for gatherings or cozy moments.
Pairing and Storage
For storage, keep your Reese’s Bark in an airtight container at room temperature for up to a week or refrigerate for longer-lasting freshness. Check for firmness before serving, and serve at room temperature for the best texture.
Different audiences may enjoy this delightful dessert in various ways; consider gifting it in decorative tins during holidays. Combine flavors and appearances to make this unique bark your own.
Creating Reese’s Bark introduces joy into kitchens everywhere. With a harmonious blend of chocolate and peanut butter, it captures a moment in time that delivers happiness with every bite. Each layer offers a delightful surprise, making every piece a favorite. Simple to make yet endless in possibilities, Reese’s Bark provides the foundation for cherished memories and sweet moments down the road.
Print
Reese’s Bark
- Prep Time: 15 minutes
- Cook Time: 10 minutes
- Total Time: 25 minutes
- Yield: 12 servings
- Category: Dessert
- Method: No-Bake
- Cuisine: American
- Diet: Vegetarian
Description
A delightful dessert combining layers of chocolate, peanut butter, and Reese’s pieces for a sweet and nostalgic treat.
Ingredients
- 2 cups semi-sweet chocolate chips
- 1 cup peanut butter chips
- 2 tbsp vegetable oil
- 1 1/2 cups creamy peanut butter
- 3 tbsp softened butter
- 1 tsp vanilla extract
- 1 1/2 cups powdered sugar
- 1 cup Reese’s pieces
Instructions
- Line a baking sheet with parchment paper or a silicone baking mat and set aside.
- Combine chocolate chips, peanut butter chips, and vegetable oil in a microwave-safe bowl. Microwave in 30-second intervals, stirring in between, until melted and smooth.
- Pour half of the melted chocolate mixture onto your prepared baking sheet and spread it into a rectangle roughly 9 x 13 inches. Transfer to the fridge or freezer to harden.
- Mix creamy peanut butter, softened butter, vanilla extract, and powdered sugar in a bowl until well combined.
- Drop pieces of the peanut butter mixture all over the layer of chilled chocolate, then press into an even layer.
- Pour the remaining melted chocolate mixture on top, spreading to cover the peanut butter layer completely.
- Sprinkle Reese’s pieces candies on top, then transfer back to the fridge or freezer to set completely before breaking into pieces.
Notes
Use high-quality chocolate chips for the best flavor. Feel free to get creative with toppings.