
📑 Table of Contents ▶
Easy Strawberry Cheesecake Cups – Delicious No-Bake Recipe
Imagine a warm summer afternoon where the sunlight spills into the kitchen as you prepare something special. Those moments often inspire the best desserts. Strawberry cheesecake cups bring back fond memories. From family picnics to backyard celebrations, these delightful treats have a way of making any occasion sweeter.
The creamy filling blends harmoniously with the buttery crust, creating the ideal bite-sized dessert. The freshness of strawberries adds a bright flavor, while the no-bake preparation makes it stress-free. That’s what makes strawberry cheesecake cups an instant favorite.
This recipe transforms basic ingredients into delightful treats everyone will love. Ideal for any gathering, they show off vibrant strawberries and creamy cheesecake filling, making them not just tasty but also visually appealing.
With just a few steps, you can craft these indulgent strawberry cheesecake cups. Let’s get started on creating this enticing dessert!
Perfecting Strawberry Cheesecake Cups
Fundamentals
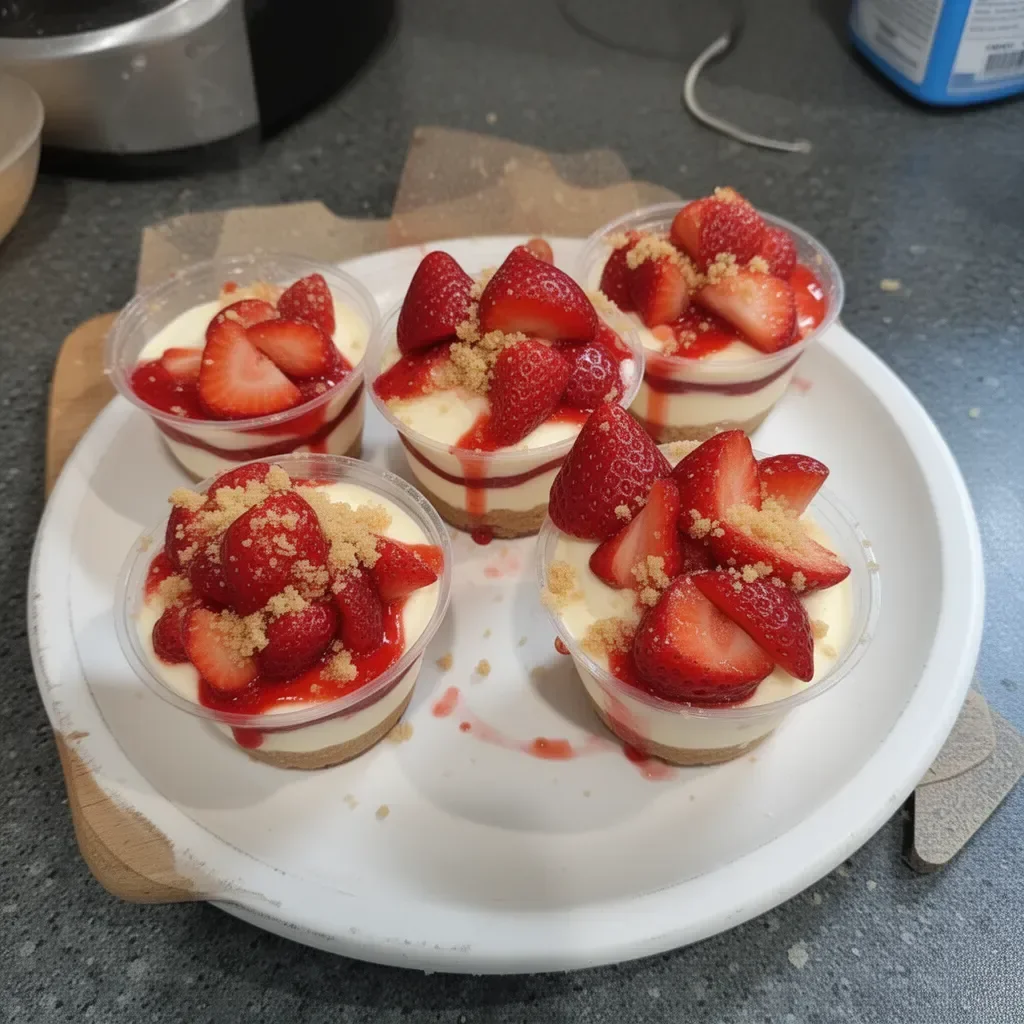
Strawberry cheesecake cups bring an unforgettable flavor that makes dessert feel special. These cups layer a buttery graham cracker crust with a luscious cheesecake filling, crowned with fresh strawberries. Understanding a few basics will set the foundation for perfecting this recipe.
The crust comes together from graham cracker crumbs, sugar, and melted butter, which forms a delightful base. The cheesecake filling requires careful mixing of softened cream cheese, sugar, and a touch of lemon juice for brightness. The sweet strawberry topping adds freshness and color, elevating the overall presentation.
Using quality ingredients plays a significant role in the final result. Opt for full-fat cream cheese for richness and flavor. Fresh strawberries ensure natural sweetness and vibrant color, making them the star of this dish.
Preparation/Setup
There’s something satisfying about preparing a no-bake dessert like strawberry cheesecake cups. Begin by preheating the oven to 350°F (175°C) to bake the crust. Line a 12-cup muffin tin with paper or foil liners to make removal easier later.
Gather all ingredients before starting. Keeping everything within reach streamlines the process, allowing for a smooth flow from crust to filling. Take time to ensure cream cheese is softened, as this will make blending the ingredients easier and more effective.
Ingredients
- 1 ½ cups (180g) graham cracker crumbs
- ¼ cup (50g) granulated sugar
- ½ teaspoon ground cinnamon (optional)
- 6 tablespoons (85g) unsalted butter, melted
- 2 (8-ounce/226g each) blocks full-fat cream cheese, softened to room temperature
- ½ cup (100g) granulated sugar
- ¼ cup (60ml) heavy cream
- 1 teaspoon pure vanilla extract
- 2 tablespoons fresh lemon juice
- Pinch of salt
- 2 cups (300g) fresh strawberries, hulled and diced
- 2 tablespoons granulated sugar (for topping, adjust to taste)
- 1 tablespoon fresh lemon juice (for topping)
- ½ teaspoon pure vanilla extract (optional, for topping)
- Fresh mint sprigs (optional, for garnish)
- Additional whole fresh strawberries or slices (optional, for garnish)
- Whipped cream or cool whip (optional, for garnish)
Directions
-
Prepare the crust: Preheat the oven to 350°F (175°C). Line a 12-cup muffin tin with paper or foil liners for easy removal.
-
Make the crust mixture: In a medium bowl, combine graham cracker crumbs, ¼ cup granulated sugar, and optional ground cinnamon. Pour in the melted unsalted butter and mix thoroughly until all crumbs are moistened and resemble wet sand.
-
Bake the crusts: Evenly distribute the crumb mixture (about 1 to 1.5 tablespoons per cup) among the 12 lined muffin cups. Press firmly into the bottom of each liner using the back of a spoon or a tart tamper. Bake for 7-8 minutes. Remove from oven and let cool completely on a wire rack.
-
Prepare the cheesecake filling: Ensure the cream cheese is very soft at room temperature. In a large mixing bowl, beat the softened cream cheese with an electric mixer on low to medium speed for 2-3 minutes until incredibly smooth, fluffy, and lump-free. Scrape down the sides and bottom of the bowl.
-
Flavor the filling: Gradually add ½ cup granulated sugar to the beaten cream cheese, mixing on low speed until just combined. Stir in the heavy cream, 1 teaspoon pure vanilla extract, 2 tablespoons fresh lemon juice, and a pinch of salt. Continue mixing on low speed until all ingredients are just combined and the mixture is smooth and creamy. Do not overmix.
-
Assemble cheesecake cups: Once the graham cracker crusts are completely cool, evenly divide the cheesecake filling among the 12 muffin cups, filling each about ¾ of the way full. Gently smooth out the tops of the filling with the back of a spoon or a small offset spatula. Gently tap the muffin tin on the counter a few times to release any trapped air bubbles.
-
Chill thoroughly: Carefully place the muffin tin into the refrigerator and chill the strawberry cheesecake cups for a minimum of 4 hours, or ideally overnight, until the filling is fully set and firm.
-
Craft a fresh strawberry topping: While the cheesecake cups chill, prepare the vibrant strawberry topping. In a small bowl, gently combine the diced strawberries, 2 tablespoons granulated sugar, 1 tablespoon fresh lemon juice, and optional ½ teaspoon pure vanilla extract. Toss gently to coat all pieces.
-
Macerate the topping: Let the strawberry mixture sit at room temperature for at least 15-20 minutes. This process allows the flavors to meld and the strawberries to release their delicious juices, forming a natural syrup. If not using immediately, store in the refrigerator.
Perfecting Flavor and Texture
Technique
Creating the perfect strawberry cheesecake cups requires attention to detail in technique. When preparing the crust, make sure to press it firmly into the bottom of each cup. This step helps ensure the crust holds together once chilled.
For the cheesecake filling, the mixing speed and duration matter. Using a low speed helps prevent overmixing, which keeps the filling light and fluffy. Always scrape down the sides of the bowl to ensure even blending and smooth texture.
Chilling the cheesecake cups is crucial for the right consistency. Leaving them in the refrigerator for an extended time strengthens the filling and sets the flavors. Patience will yield delightful results.
Tips and Tricks
To elevate the strawberry cheesecake cups, try including a touch of creativity in your toppings. Adding a handful of diced strawberries along with the syrup adds texture and freshness. For an extra layer of flavor, a sprinkle of ground cinnamon in the crust can lend a warm, comforting note.
Be mindful during assembly. Smooth the tops gently and ensure even filling to promote a beautiful presentation. A little extra care creates a visually appealing dessert that impresses without effort.
You can also personalize these cheesecake cups by swapping strawberries for other fruits. Consider blueberries or raspberries for a vibrant twist. Each fruit will bring its distinct flavor, making every batch uniquely delicious.
Troubleshooting and Variations
Perfecting Results
Handling ingredients properly helps achieve perfect results. Ensure the cream cheese warms up to room temperature before whipping. Cold cream cheese can lead to lumps, affecting the overall texture of the cheesecake.
If the filling feels too loose after chilling, it may require a bit more time in the refrigerator. The chilling process helps firm it up, creating that delightful cheesecake consistency.
For an especially rich flavor, consider using some lemon zest in the filling. This addition brightens the overall taste and enhances the freshness of the strawberries.
Storage
Make sure to store leftover cheesecake cups in an airtight container in the refrigerator. They will last for about 3-4 days. The fresh strawberry topping can be stored separately to maintain the texture of both components.
If you plan to prepare these ahead for a special occasion, consider assembling the crust and filling the day before. The next day, add the strawberry topping for a fresh finish. This method saves time and allows the flavors to deepen while chilling overnight.
Serving and Presentation
Serving
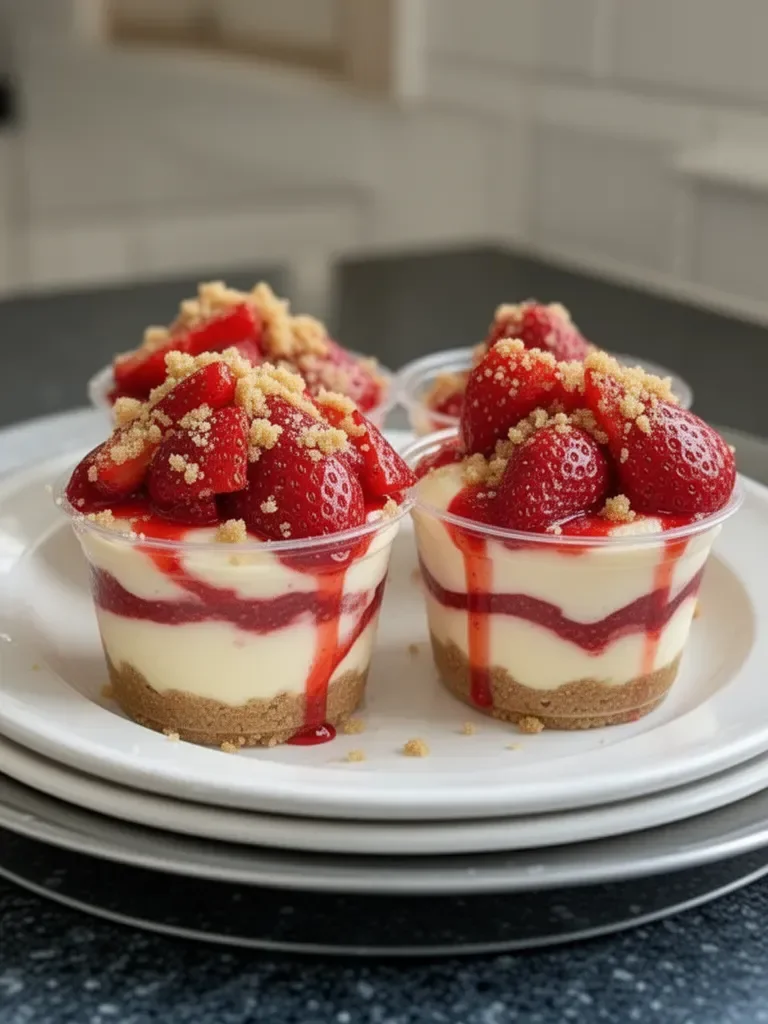
Serving strawberry cheesecake cups is simple and rewarding. Carefully peel away the liners to reveal the beautiful layers. Place them on a decorative serving plate for an inviting presentation.
Before serving, top each cheesecake cup generously with the fresh strawberry mixture. Garnish with fresh mint sprigs or additional strawberry slices for a pop of color.
Consider adding a dollop of whipped cream or Cool Whip on top for an extra touch of creaminess. Guests will appreciate the added indulgence and notice the effort put into this delightful dessert.
Pairings and Storage
While enjoying these cheesecake cups, consider pairings like a refreshing fruit salad or a light, citrusy sorbet. These choices help balance the richness of the cheesecake while complementing its flavors beautifully.
As for storage, keep leftover cups in the fridge for snacking over the next few days. These treats make for a great sweet surprise after dinner or a midday pick-me-up. With their simple preparation, everyone can enjoy the taste of homemade desserts with ease.
Conclusion
Strawberry cheesecake cups stand out as a delightful no-bake dessert that combines simplicity and flavor. With fresh ingredients and straightforward steps, anyone can create this indulgent treat. Bringing together a buttery graham cracker crust, creamy filling, and vibrant toppings makes these cups perfect for any occasion. Enjoy the harmonizing flavors and stunning presentation that will captivate every dessert lover. Revel in the joy these strawberry cheesecake cups bring, making moments sweeter and creating cherished memories.
Print
Easy Strawberry Cheesecake Cups
- Prep Time: 15 minutes
- Cook Time: 15 minutes
- Total Time: 240 minutes
- Yield: 12 servings
- Category: Dessert
- Method: No-Bake
- Cuisine: American
- Diet: Vegetarian
Description
Delicious no-bake strawberry cheesecake cups with a buttery graham cracker crust and fresh strawberry topping.
Ingredients
- 1 ½ cups (180g) graham cracker crumbs
- ¼ cup (50g) granulated sugar
- ½ teaspoon ground cinnamon (optional)
- 6 tablespoons (85g) unsalted butter, melted
- 2 (8-ounce/226g each) blocks full-fat cream cheese, softened
- ½ cup (100g) granulated sugar
- ¼ cup (60ml) heavy cream
- 1 teaspoon pure vanilla extract
- 2 tablespoons fresh lemon juice
- Pinch of salt
- 2 cups (300g) fresh strawberries, hulled and diced
- 2 tablespoons granulated sugar (for topping, adjust to taste)
- 1 tablespoon fresh lemon juice (for topping)
- ½ teaspoon pure vanilla extract (optional, for topping)
- Fresh mint sprigs (optional, for garnish)
- Whipped cream or Cool Whip (optional, for garnish)
Instructions
- Prepare the crust: Preheat the oven to 350°F (175°C). Line a 12-cup muffin tin with paper or foil liners.
- Make the crust mixture: In a bowl, combine graham cracker crumbs, ¼ cup granulated sugar, and optional cinnamon. Pour in melted butter and mix until moistened.
- Bake the crusts: Distribute the crumb mixture among the muffin cups and press firmly. Bake for 7-8 minutes, then cool on a wire rack.
- Prepare the cheesecake filling: In a mixing bowl, beat cream cheese on low to medium speed for 2-3 minutes until smooth.
- Flavor the filling: Gradually add ½ cup granulated sugar, mixing until just combined. Stir in heavy cream, vanilla extract, lemon juice, and salt.
- Assemble cheesecake cups: Once cooled, divide filling among muffin cups and smooth the tops.
- Chill thoroughly: Refrigerate for at least 4 hours or overnight until set.
- Craft a fresh strawberry topping: Combine diced strawberries, 2 tablespoons sugar, lemon juice, and vanilla extract in a bowl.
- Macerate the topping: Let the strawberry mixture sit at room temperature for 15-20 minutes to develop flavors.
Notes
Store leftovers in an airtight container for 3-4 days. For best results, chill overnight to enhance flavors.