

📑 Table of Contents ▶
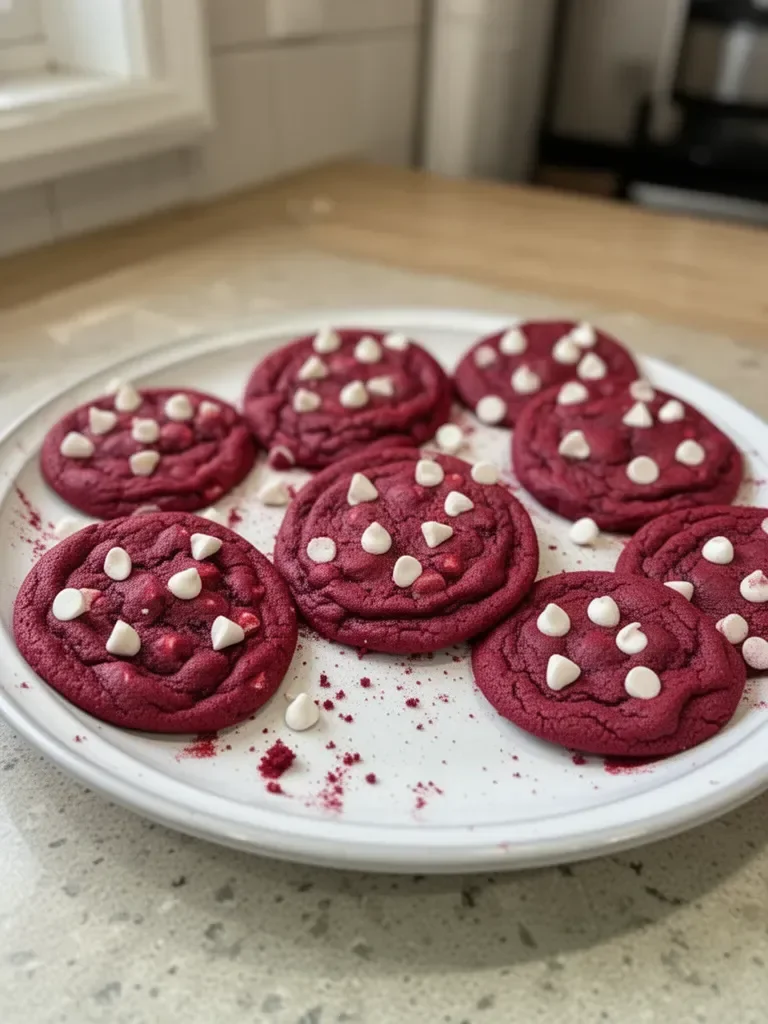
Red Velvet Cookies
A cherished memory surfaces whenever I think of red velvet cookies. Long afternoons in the kitchen with family, laughter mixing with the scent of freshly baked treats, created a warm atmosphere that’s hard to forget. The vibrant color and rich flavor of red velvet always seemed to bring everyone to the table.
Red velvet cookies hold a special place in my heart as they combine the best of both worlds: soft, chewy cookie goodness with a hint of chocolate. The luxurious appearance and delightful taste make them perfect for celebrations or cozy gatherings. Each bite reminds me of those treasured moments.
The combination of sweet white chocolate chunks with the bold red hue creates cookies that not only look stunning but also taste divine. Sharing these cookies often leads to smiles and joyful conversations. Baking these treats has a special way of transforming a regular day into a memorable occasion.
Inspired by that nostalgia, let’s dive into making these vibrant red velvet cookies. With just a few simple ingredients and an easy process, you can fill your kitchen with the incredible aroma of baking cookies, just like those memorable afternoons.
Perfecting Red Velvet Cookies
Fundamentals
The foundation of any great red velvet cookie starts with understanding the ingredients. Each component plays a vital role, creating that signature flavor and texture. You’ll rely on all-purpose flour, cocoa powder, and a touch of baking soda for the perfect cookie structure. Salt enhances the sweetness, ensuring a balanced bite.
But it’s really the combination of sugars that creates that irresistible chewiness. A mix of granulated and brown sugars will give your red velvet cookies a depth of flavor that simply cannot be beaten. The brown sugar adds moisture and softness, while the granulated sugar contributes to that slight crisp at the edges.
Preparation/setup
Before diving into the mixing, preparation is essential. Begin by preheating your oven to 350°F (175°C). This step ensures that your cookies bake evenly and achieve the perfect texture.
Line your baking sheets with parchment paper, which will make it easier to transfer your cookies once baked. Take a moment to assemble your ingredients: 2 1/2 cups of all-purpose flour, 1 tablespoon of cocoa powder, 1 teaspoon of baking soda, 1/2 teaspoon of salt, 1 cup of softened unsalted butter, 1 cup of granulated sugar, 1 cup of packed brown sugar, 2 large eggs, 2 teaspoons of vanilla extract, 1 tablespoon of red food coloring, and finally, 1 cup of white chocolate chunks.
Gather all of these elements together, and you’ll be ready to create the magical dough that will become your red velvet cookies.
Ingredients
- 2 1/2 cups all-purpose flour
- 1 tablespoon cocoa powder
- 1 teaspoon baking soda
- 1/2 teaspoon salt
- 1 cup unsalted butter, softened
- 1 cup granulated sugar
- 1 cup brown sugar, packed
- 2 large eggs
- 2 teaspoons vanilla extract
- 1 tablespoon red food coloring
- 1 cup white chocolate chunks
Directions
- Preheat your oven to 350°F (175°C).
- In a bowl, whisk together the flour, cocoa powder, baking soda, and salt.
- In a separate bowl, cream the softened butter with the granulated and brown sugars until the mixture is light and fluffy.
- Beat in the eggs, vanilla extract, and red food coloring until well combined.
- Gradually add the dry ingredients to the wet ingredients, mixing until just incorporated.
- Fold in the white chocolate chunks.
- Drop spoonfuls of dough onto a baking sheet lined with parchment paper.
- Bake for 10-12 minutes or until the edges are set.
- Allow to cool on the baking sheet for a few minutes before transferring them to a wire rack to cool completely.
Crafting Irresistible Red Velvet Cookies
Technique
Creating the ultimate texture in your red velvet cookies requires attention to detail and technique. The creaming process is key. When you cream the softened butter and sugars, watch for that light, fluffy consistency. This stage incorporates air into the mixture, contributing to the cookies’ final texture.
Mixing in the eggs, vanilla, and red food coloring should be done with care. Ensure that you combine these ingredients thoroughly; this promotes even coloring and flavor throughout the dough. When it comes to adding dry ingredients, utilize a gentle folding motion to keep the mixture light.
Tips/tricks
To enhance your red velvet cookies, here are a few tips and tricks to consider. First, chill the dough for about 30 minutes before baking. This helps the cookies hold their shape and prevents them from spreading too much in the oven.
For added decoration, consider rolling the cookie dough balls in granulated sugar before placing them on the baking sheet. This creates a sparkly finish that elevates the looks of your red velvet cookies.
Lastly, don’t hesitate to experiment with the mix-ins. While white chocolate chunks are delightful, feel free to swap in nuts or other types of chocolate depending on your preference.
Troubleshooting Red Velvet Cookies
Perfecting results
Achieving that soft, chewy bite in your red velvet cookies can sometimes be a challenge. If your cookies come out too dry, it’s likely due to overmixing or overbaking. Make sure to remove them from the oven as soon as the edges are set, even if the center looks slightly underbaked. They will continue to cook as they cool on the sheet.
If you notice that your cookies spread too much, consider checking the temperature of your butter. For optimal results, your butter should be softened but not melted. This crucial step contributes to the final appearance and texture of the cookies.
Troubleshooting/variations
If your red velvet cookies don’t turn out as expected, don’t fret. Slight adjustments can elevate your baking game. For a more vibrant color, add a bit more red food coloring until you achieve your desired shade.
Alternatively, if you wish to reduce the sweetness, cut back on the sugars slightly next time. Experimenting with the proportions can lead to a perfectly balanced cookie suited to your tastes.
Serving and Storing Red Velvet Cookies
Serving/presentation
Presenting red velvet cookies can turn a delicious treat into a stunning centerpiece. Stack the cookies on a vibrant platter or arrange them in a decorative jar. Consider garnishing them with a sprinkle of additional white chocolate chunks or even a dollop of cream cheese frosting on the side for an extra indulgence.
Pair these cookies with a warm beverage, such as a cup of coffee or a glass of milk. The combination enhances the overall flavor profile, creating an experience that everyone can enjoy.
Pairings/storage
Red velvet cookies pair wonderfully with a variety of treats. Their rich flavor complements the freshness of fruit, such as strawberries or raspberries. Adding a fruity component can create an enticing contrast and balance the sweetness of the cookies.
When it comes to storage, keep your cookies in an airtight container at room temperature. They will maintain their freshness for several days. If you want to save some for later, consider freezing them. Wrap each cookie tightly in plastic wrap before placing them in a freezer-safe bag. Thaw them at room temperature before enjoying them again.
Red velvet cookies stand out for their irresistible taste and signature appearance. Whether baking them for a special occasion or just for fun, these delicious treats are sure to impress everyone.
Print
Red Velvet Cookies
- Prep Time: 15 minutes
- Cook Time: 12 minutes
- Total Time: 27 minutes
- Yield: 24 cookies
- Category: Dessert
- Method: Baking
- Cuisine: American
- Diet: Vegetarian
Description
Delightful red velvet cookies with white chocolate chunks, perfect for celebrations or cozy gatherings.
Ingredients
- 2 1/2 cups all-purpose flour
- 1 tablespoon cocoa powder
- 1 teaspoon baking soda
- 1/2 teaspoon salt
- 1 cup unsalted butter, softened
- 1 cup granulated sugar
- 1 cup brown sugar, packed
- 2 large eggs
- 2 teaspoons vanilla extract
- 1 tablespoon red food coloring
- 1 cup white chocolate chunks
Instructions
- Preheat your oven to 350°F (175°C).
- Whisk together the flour, cocoa powder, baking soda, and salt in a bowl.
- Cream the softened butter with the granulated and brown sugars until light and fluffy.
- Beat in the eggs, vanilla extract, and red food coloring until well combined.
- Gradually add the dry ingredients to the wet ingredients, mixing until just incorporated.
- Fold in the white chocolate chunks.
- Drop spoonfuls of dough onto a baking sheet lined with parchment paper.
- Bake for 10-12 minutes or until the edges are set.
- Allow to cool on the baking sheet for a few minutes before transferring to a wire rack to cool completely.
Notes
Chill the dough for about 30 minutes before baking to help the cookies maintain their shape.