
📑 Table of Contents ▶
Oreo No-Bake Cheesecake Cups
Walking through the kitchen, the sweet scent of crushed Oreos fills the air, instantly transporting me back to my childhood. Those casual weekends spent at home, devouring treats made from beloved cookies remain crisp in my memory. The joy of indulging in dessert has never changed. Oreo no-bake cheesecake cups blend nostalgia with creativity, combining the classic flavors of cream cheese and whipped topping for a dessert that delights both kids and adults.
Imagine hosting a gathering where dessert steals the show. Everyone gathers around, excitedly digging into tiny cups brimming with rich, creamy goodness layered over a crunchy cookie base. Each bite provides the perfect balance of sweetness and texture. Whether it’s a family celebration or a cozy movie night, these Oreo no-bake cheesecake cups deliver both flavor and fun.
Creating these delicious cups is incredibly simple, bringing joy into the kitchen. Just a few steps lead you to a delightful dessert that impresses. An invitation to savor, share, and create memories fills each one. Join in the fun and prepare to enjoy the magic of Oreo no-bake cheesecake cups.
Delightful Layers of Flavor
Fundamentals
Oreo no-bake cheesecake cups embody the perfect balance of creamy and crunchy that satisfies any sweet tooth. This dessert doesn’t require any baking, making it a practical option for anyone, even those who might shy away from traditional baking. The key lies in the creamy filling made from softened cream cheese, combined with whipped topping, powdered sugar, and a touch of vanilla. These elements come together to form a smooth and rich cheesecake mixture, creating a luscious filling that everyone loves.
The Oreo cookie crust serves as the ultimate foundation for this dessert. Simple yet effective, it adds crunch and depth to each layer. Choosing the right dessert dishes matters, too; small cups that hold about 3/4 to 1 cup of dessert work well. This allows guests to enjoy controlled portions while maintaining a visually appealing presentation that sparks excitement.
Preparation/Setup
Preparing the Oreo no-bake cheesecake cups involves a few easy steps that anyone can follow. Start by gathering your ingredients, including an 8 oz block of softened cream cheese, a tub of Cool Whip, powdered sugar, vanilla, and, of course, those beloved Oreo cookies. A sturdy plastic bag and a rolling pin will serve you well for crushing the Oreos, ensuring the crust has the perfect texture.
Make sure your workspace is cleared and set up for success. Lay out the six dessert dishes, ready to receive the crushed cookie base and scrumptious filling. This will streamline the assembly process and ensure that everything flows smoothly as you create each layer. The simplicity of the setup invites creativity, allowing you to add your flair to this already enjoyable dessert.
Ingredients
For these delightful Oreo no-bake cheesecake cups, you will need:
- 1 8 oz block of cream cheese, softened
- 1 8 oz tub of Cool Whip or whipped topping
- 2/3 cup powdered sugar
- 1 tsp vanilla extract
- 24-26 Oreo cookies (extra for garnish)
Gathering these fresh ingredients brings the excitement of making a delicious dessert into your kitchen. Prioritize the quality of your ingredients, particularly the cream cheese, as it lends itself to the creaminess of the filling.
Directions
- Begin by placing the Oreo cookies into a plastic bag and sealing it tightly.
- Using a rolling pin or sturdy wooden spoon, crush the Oreos until they resemble fine crumbs.
- Spoon 1.5 to 2 tablespoons of the crushed Oreos into the bottom of each dessert dish and set aside.
- In a mixing bowl, using a hand or standing mixer, whip together the softened cream cheese and powdered sugar until it becomes creamy and smooth.
- Add the vanilla and mix until incorporated.
- Gently fold in the Cool Whip until well combined.
- Fold in the remaining crushed Oreos into the cheesecake mixture.
- Divide the cheesecake filling evenly across each dessert dish and gently press it on top of the crushed Oreos.
- Chill the cups in the refrigerator for at least 1 hour or until ready to serve.
- Before serving, top each cup with a dollop of whipped cream and additional crushed Oreos for added flair.
Mastering the Craft of No-Bake Desserts
Technique
Creating the perfect Oreo no-bake cheesecake cups requires finesse and a few handy techniques. When crushing the Oreos, aim for a consistency that resembles fine crumbs but still has some texture. Too large and the crust won’t adhere, too fine and it’ll become a sandy mess. Take the time to ensure the crumbs are just right; this foundational layer greatly impacts the overall dessert.
Watch your mixing when combining the cream cheese and sugar—over-mixing can introduce air, creating unwanted bubbles in the filling. Aim for a smooth and creamy consistency, but do not overmix. Folding in the Cool Whip involves a gentle hand to maintain the light, airy texture of the cheesecake.
Tips/Tricks
A few tricks can elevate your Oreo no-bake cheesecake cups to an extraordinary level. Consider chilling your mixing bowl and beaters for the cream cheese filling beforehand; this adds an extra chill and allows the cream cheese to whip up even smoother.
When layering the filling, take care to spread it evenly across the tops of the crushed Oreos. This not only ensures a beautiful presentation but improves the distribution of flavors in each bite. Additionally, don’t shy away from getting creative with toppings—think crushed nuts, drizzles of chocolate or caramel, or even sprinkles for festive occasions.
Perfecting Your Dessert
Perfecting Results
Crafting Oreo no-bake cheesecake cups is a joyful experience. Achieving the perfect texture involves ensuring your cream cheese is adequately softened to allow for easy mixing. Don’t rush this step, as a chilled block of cream cheese will resist blending smoothly with the sugar.
Chilling the assembled cups allows the layers to meld together nicely. The longer the cups chill, the more the flavors develop, creating a rich and delectable dessert. Aim for at least an hour of chill time, but if you can plan ahead, allowing them to rest overnight will yield even better results.
Troubleshooting/Variations
Should any issues arise while making your Oreo no-bake cheesecake cups, don’t worry. If the cheesecake mixture seems too thick, adding a tablespoon of milk can help loosen it, making folding easier. If it appears too loose after incorporating the Cool Whip, consider re-chilling the mixture before serving.
Explore variations by introducing different cookie flavors for the crust or switching out the Oreos for other favorites, like chocolate or peanut butter cookies. Experimenting with flavors can refresh this classic recipe, creating unique twists that keep everyone excited.
Serving With Style
Serving/Presentation
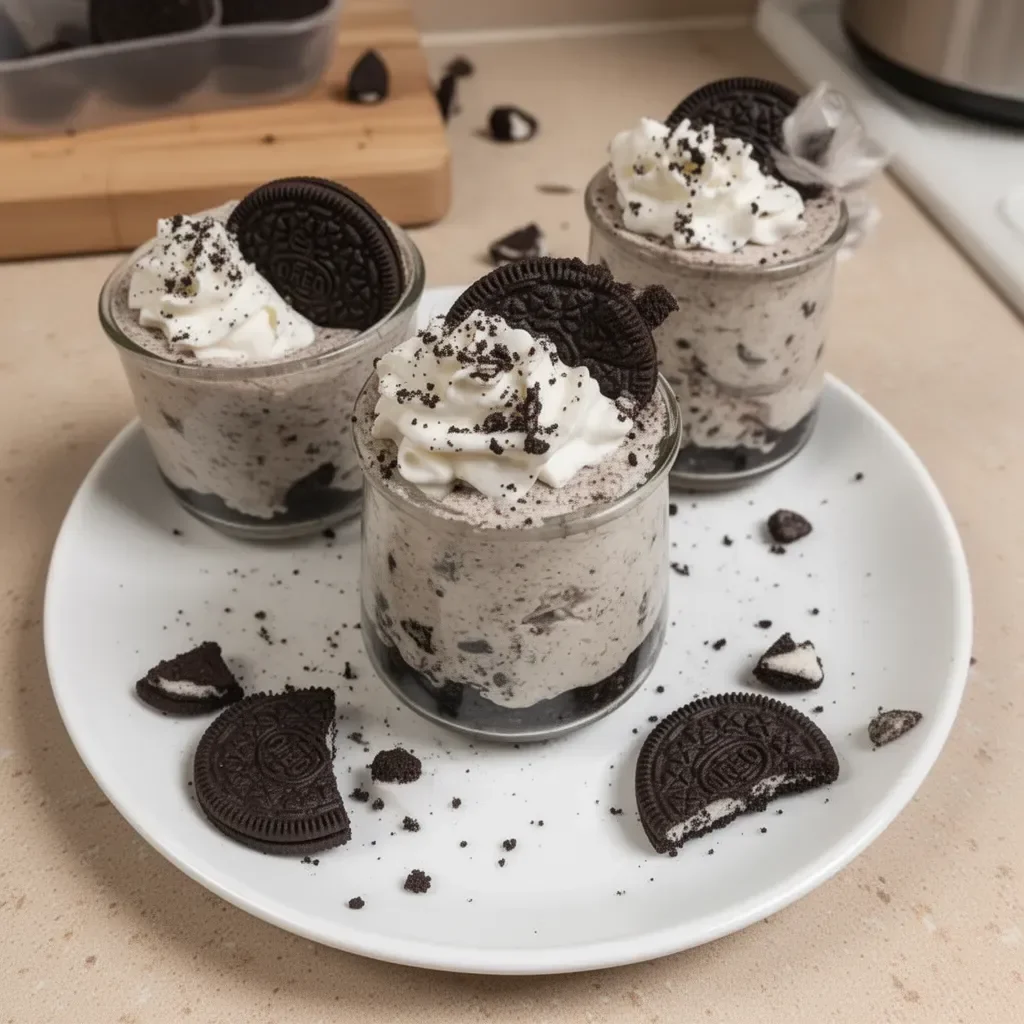
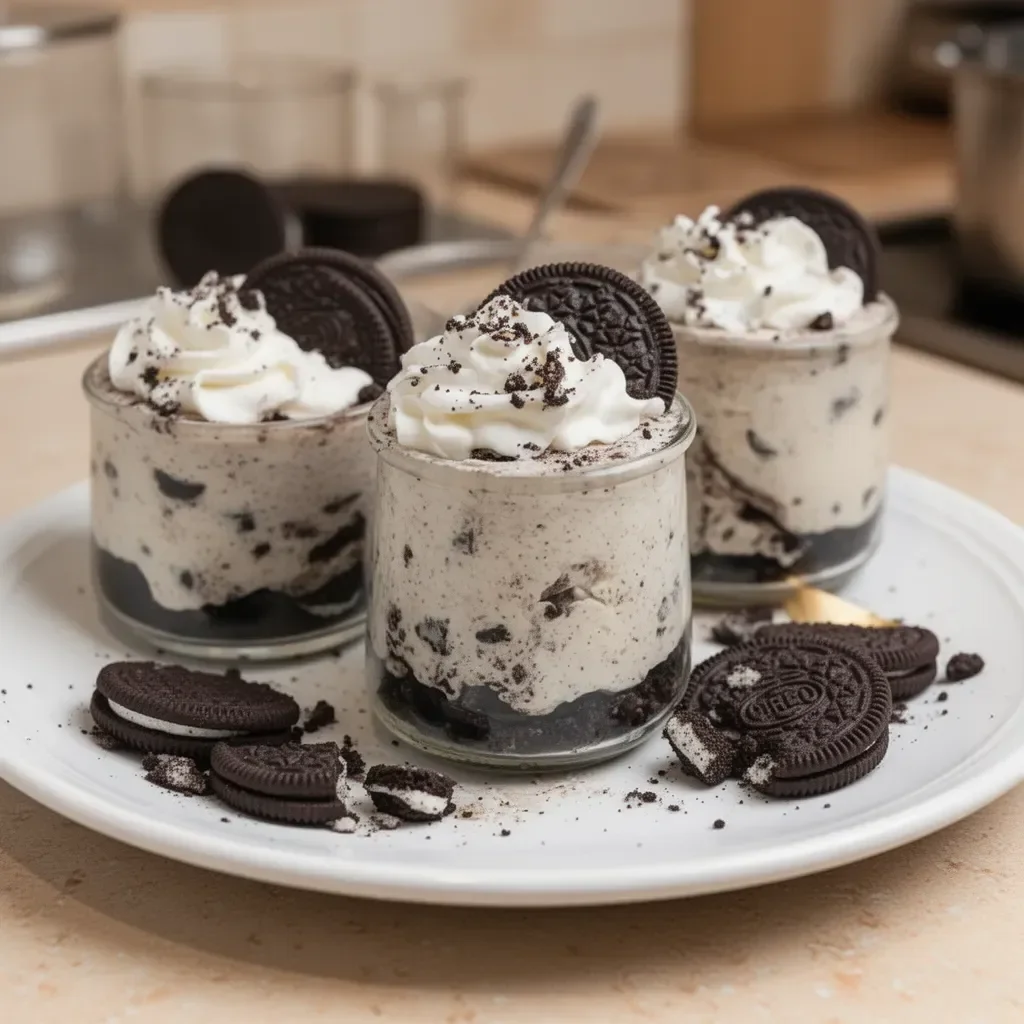
Presentation enhances enjoyment, particularly with desserts. The layered look of Oreo no-bake cheesecake cups invites admiration and interest from guests. Consider using clear or glass dessert dishes. This showcases the layers beautifully, showcasing the creamy filling and crushed cookie crust.
Add an extra touch by garnishing each cup with a sprig of mint or neatly piped whipped cream. These details enhance the visual appeal and make the dessert feel extra special, ensuring it stands out on any table or buffet.
Pairings/Storage
These delightful Oreo no-bake cheesecake cups pair beautifully with fresh berries, like strawberries or raspberries for a splash of color and freshness. For those who prefer a more traditional approach, serve with a scoop of vanilla ice cream.
Storing leftovers? These cups keep well in the fridge for up to 3 days, allowing the flavors to meld further. Ensure they remain covered to preserve freshness.
Creating and enjoying Oreo no-bake cheesecake cups is a rewarding baking adventure filled with flavor and creativity. Enjoy the delicious rewards of this no-fuss dessert.
Print
Oreo No-Bake Cheesecake Cups
- Prep Time: 15 minutes
- Cook Time: 0 minutes
- Total Time: 60 minutes
- Yield: 6 servings
- Category: Dessert
- Method: No Bake
- Cuisine: American
- Diet: Vegetarian
Description
Delicious Oreo no-bake cheesecake cups that blend nostalgia and creativity, perfect for any gathering.
Ingredients
- 1 8 oz block of cream cheese, softened
- 1 8 oz tub of Cool Whip or whipped topping
- 2/3 cup powdered sugar
- 1 tsp vanilla extract
- 24-26 Oreo cookies (extra for garnish)
Instructions
- Begin by placing the Oreo cookies into a plastic bag and sealing it tightly.
- Using a rolling pin or sturdy wooden spoon, crush the Oreos until they resemble fine crumbs.
- Spoon 1.5 to 2 tablespoons of the crushed Oreos into the bottom of each dessert dish and set aside.
- In a mixing bowl, using a hand or standing mixer, whip together the softened cream cheese and powdered sugar until it becomes creamy and smooth.
- Add the vanilla and mix until incorporated.
- Gently fold in the Cool Whip until well combined.
- Fold in the remaining crushed Oreos into the cheesecake mixture.
- Divide the cheesecake filling evenly across each dessert dish and gently press it on top of the crushed Oreos.
- Chill the cups in the refrigerator for at least 60 minutes or until ready to serve.
- Before serving, top each cup with a dollop of whipped cream and additional crushed Oreos for added flair.
Notes
For best results, chill the bowls and beaters before mixing the filling for a smoother texture.