
📑 Table of Contents ▶
No-Bake Oreo Cheesecakes
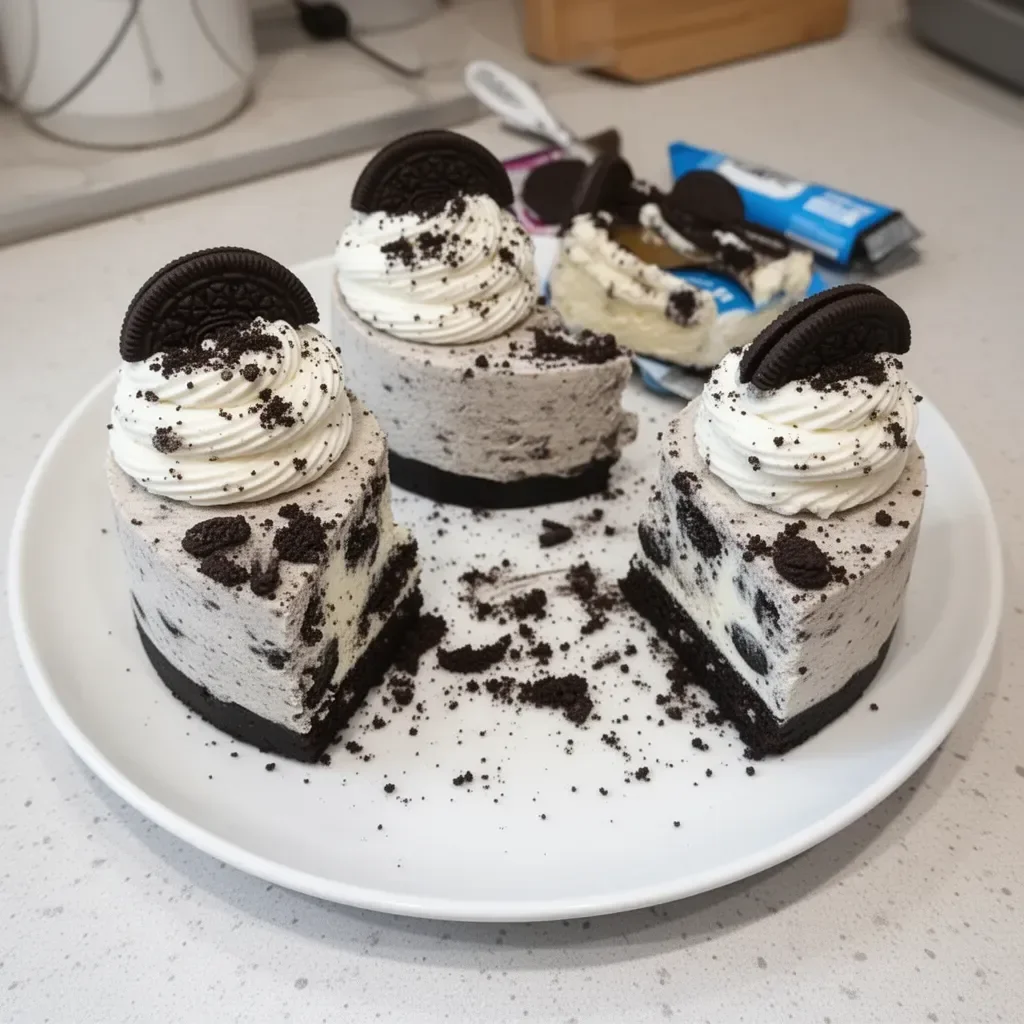
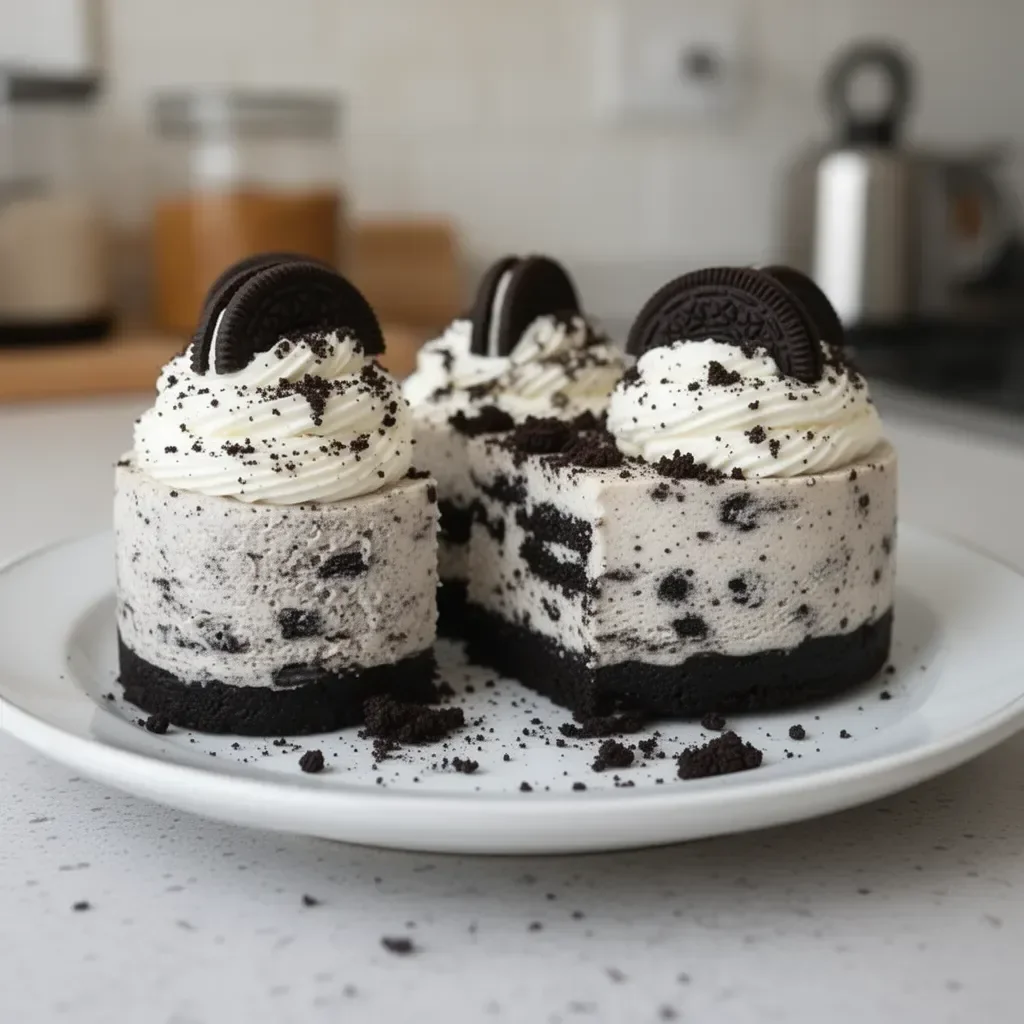
A recent gathering centered around desserts reminded me of my love for No-Bake Oreo Cheesecakes. The joy on everyone’s face as they took their first bite of creamy, dreamy cheesecake, perfectly balanced with the chocolate crunch of Oreo, was unforgettable. It’s remarkable how one dessert can bring people together, creating a moment filled with laughter and delight.
The moment I saw those little dessert cups, effortlessly assembled yet bursting with flavor, I knew this recipe would become a staple in my kitchen. No baking required means minimal fuss, making it perfect for any occasion. Its rich, velvety texture combined with the familiar taste of Oreo biscuits makes the No-Bake Oreo Cheesecakes a beloved favorite.
Creating these charming desserts allows for creativity. Whether you serve them at a barbecue, a birthday party, or just as a sweet treat after dinner, they never fail to impress. Each layer, from the crunchy base to the luscious filling topped with whipped cream and crumbles, invites smiles.
This dessert isn’t just about taste; it’s about simplicity and joy. Let’s dive deeper into how to make these delightful cheesecakes at home.
No-Bake Oreo Cheesecakes Recipe
Fundamentals
Creating the perfect No-Bake Oreo Cheesecakes begins by understanding the fundamental components. The base, made from crushed Oreo biscuits, sets a solid foundation with a delectable chocolate flavor. Cream cheese provides a rich, creamy texture that melds beautifully with the sweetness of powdered sugar and the warm notes of vanilla extract.
The whipped cream adds a lightness to the cheesecake filling, creating a harmonious balance between rich and airy textures. Each ingredient plays a vital role, ensuring that every spoonful delights the palate.
Preparation/setup
Begin by prepping your ingredients and gathering the required tools. Having everything in place makes the process smoother and more enjoyable. Choose small serving cups or jars to give the cheesecakes a charming presentation. It’s essential to crush the Oreo biscuits into fine crumbs to form the base.
A food processor works wonders for this task, but a simple zip-top bag and rolling pin will also do the trick. Prepare the cream cheese filling next; this step sets the stage for a creamy, dreamy dessert experience.
Ingredients
- Oreo biscuits (1 package) for the base
- Cream cheese (8 oz) or vegan alternative
- Powdered sugar (1 cup)
- Vanilla extract (1 tsp)
- Whipped cream (1 cup)
- Oreo cookie crumbles (for topping)
Directions
- Crush the Oreo biscuits and press them into the bottom of serving cups to form a base.
- In a bowl, mix the cream cheese, powdered sugar, and vanilla extract until smooth.
- Fold in whipped cream to the cheesecake mixture until well combined.
- Spoon the cheesecake filling over the crust in the cups.
- Top with whipped cream and sprinkle with Oreo cookie crumbles.
- Refrigerate for at least an hour before serving.
Creating Perfect No-Bake Oreo Cheesecakes
Technique
Mastering the technique is essential for crafting No-Bake Oreo Cheesecakes. Focus on achieving a smooth, creamy filling. Be careful not to overmix when folding in the whipped cream; you want to retain its airy texture, creating a delightful mouthfeel.
While pressing the Oreo base into the cups, ensure it packs firmly to avoid crumbling when served. Using the back of a spoon aids in creating an even layer.
Tips/tricks
Keep a few tips in mind to enhance your No-Bake Oreo Cheesecakes. Chill your cream cheese for easier blending, ensuring a smoother mixture. You can also use vegan alternatives, keeping the dessert accessible for various dietary preferences.
Play around with presentation; adding extra whipped cream and a scattering of Oreo crumbles on top elevates the visual appeal, making them irresistible.
Perfecting No-Bake Oreo Cheesecakes
Perfecting results
To achieve the perfect No-Bake Oreo Cheesecakes, let them chill longer than an hour if possible. Overnight refrigeration allows the flavors to meld beautifully and provides a firmer texture.
Always taste a bit of the mixture before spooning it into the cups. Adjust sweetness by adding a bit more powdered sugar if needed.
Troubleshooting/variations
Don’t fret if things don’t go as planned. If your cheesecake filling seems too soft, add more whipped cream to help stabilize it. Alternatively, a quick chill in the fridge can firm things up.
For variations, experiment with different cookie bases. Try using chocolate graham crackers or even a gluten-free cookie option for a twist on the classic.
Serving No-Bake Oreo Cheesecakes
Serving/presentation
Presentation makes a significant impact when serving No-Bake Oreo Cheesecakes. Use clear cups or jars to showcase the beautiful layers. Garnish with fresh fruit or chocolate shavings for an appealing touch. A sprig of mint can add a pop of color and freshness.
Consider chilling the cups on a decorative platter, inviting your guests to indulge. The vibrant contrast of colors makes dessert time even more celebratory.
Pairings/storage
These cheesecakes pair delightfully with a hot cup of coffee or a chilled glass of milk, making them an excellent end to any meal. Ensure to store leftover cheesecakes in an airtight container in the refrigerator, where they can last for up to three days.
If using vegan alternatives, consume them within two days for the best flavor and texture.
No-Bake Oreo Cheesecakes transform any gathering into a delightful celebration of flavors and textures. Creating this easy, delicious dessert brings joy, satisfaction, and togetherness, making it a perfect recipe for any occasion. Whether you’re sharing them with friends or enjoying a quiet moment to yourself, these cheesecakes deliver happiness in every bite.
Print
No-Bake Oreo Cheesecakes
- Prep Time: 15 minutes
- Cook Time: 0 minutes
- Total Time: 60 minutes
- Yield: 4 servings
- Category: Dessert
- Method: No-Bake
- Cuisine: American
- Diet: Vegetarian
Description
A delightful dessert featuring a creamy cheesecake filling on a crunchy Oreo base, perfect for any gathering.
Ingredients
- 1 package Oreo biscuits (for the base)
- 8 oz cream cheese (or vegan alternative)
- 1 cup powdered sugar
- 1 tsp vanilla extract
- 1 cup whipped cream
- Oreo cookie crumbles (for topping)
Instructions
- Crush the Oreo biscuits and press them into the bottom of serving cups to form a base.
- Mix the cream cheese, powdered sugar, and vanilla extract in a bowl until smooth.
- Fold in the whipped cream to the cheesecake mixture until well combined.
- Spoon the cheesecake filling over the crust in the cups.
- Top with whipped cream and sprinkle with Oreo cookie crumbles.
- Refrigerate for at least an hour before serving.
Notes
For best results, chill overnight for firmer texture and enhanced flavor.