

📑 Table of Contents ▶
- No-Bake Oreo Cheesecake Cups Basics
- Fundamentals
- Preparation/Setup
- Directions
- Elevating Your No-Bake Oreo Cheesecake Cups
- Technique
- Tips and Tricks
- Perfecting Your Oreo Cheesecake Cups
- Perfecting Results
- Troubleshooting and Variations
- Serving and Storing Your Desserts
- Serving and Presentation
- Pairing and Storage
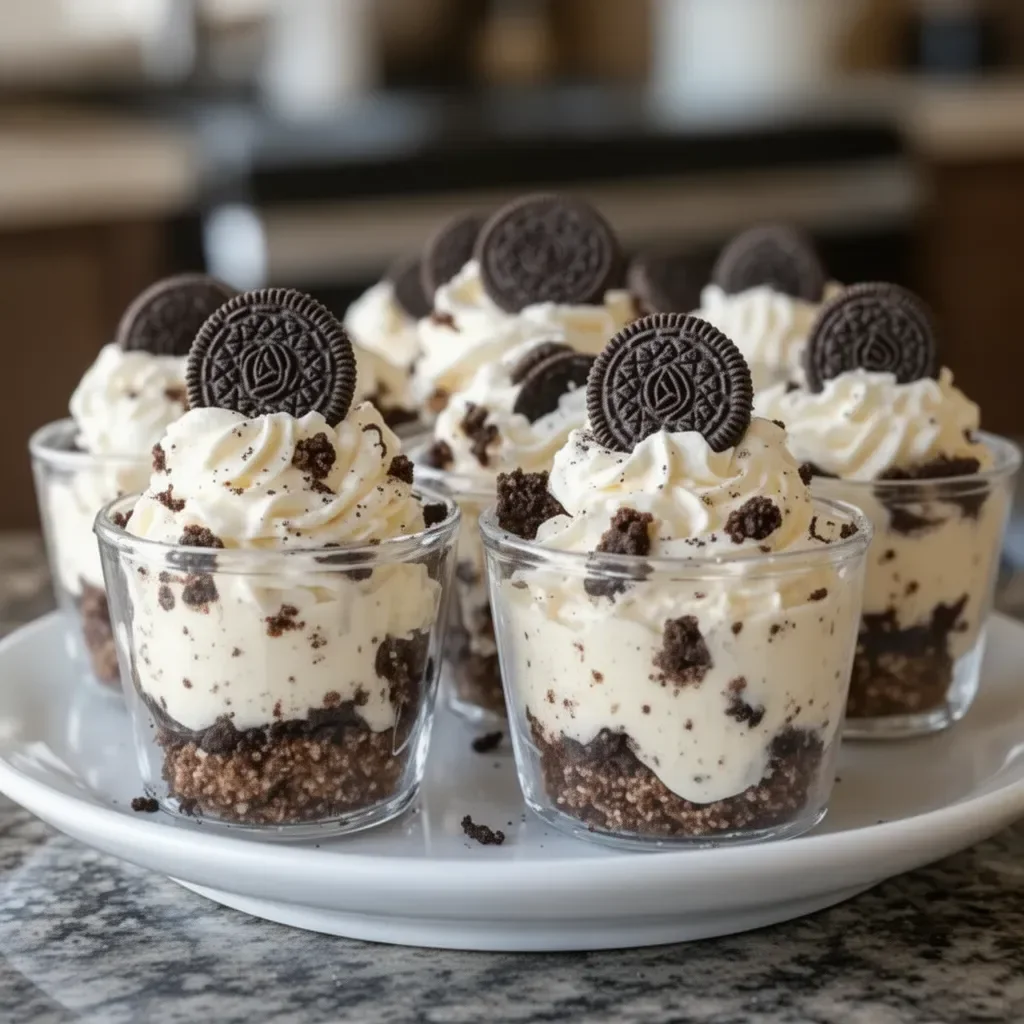
No-Bake Oreo Cheesecake Cups
The first time I made No-Bake Oreo Cheesecake Cups, it was for a gathering of family and friends. Everyone was excited to taste something sweet, and I felt the pressure to impress. I wanted a dessert that would not just satisfy cravings but also spark conversation. As I pulled those adorable little cups from the fridge, decorated with mini Oreos on top, I realized I had struck gold. The creamy, rich filling paired perfectly with the crunchy crust made from crushed Oreos.
No-Bake Oreo Cheesecake Cups quickly became a crowd favorite. Their simple preparation allowed me to spend more time with guests while ensuring a delicious treat awaited them. I couldn’t get over how easy these delectable cups were to make. One bite brought everyone back to childhood, where the combination of cream cheese, sugar, and Oreos brought delight.
With only a few ingredients, this dessert not only makes a statement but also highlights the beloved Oreo cookie. It’s incredible how a classic can be transformed into something new and fun. The No-Bake Oreo Cheesecake Cups offers taste and nostalgia, capturing the essence of family gatherings and shared moments.
No-Bake Oreo Cheesecake Cups Basics
Fundamentals
Creating No-Bake Oreo Cheesecake Cups starts with understanding the fundamentals of this delightful dessert. This recipe requires just a handful of ingredients, all of which blend seamlessly to create a luscious treat. The crunchy Oreo crust balances perfectly against the creamy cheesecake layer.
This dessert is all about quick preparation and maximum flavor. With no baking involved, the No-Bake Oreo Cheesecake Cups make it easy to whip up a dessert that captivates your family and friends. The layers of flavor and texture keep each bite interesting.
Preparation/Setup
To begin, gather all your ingredients in one place. For these cups, you will need 18 Oreo cookies, 3 tablespoons of melted butter, 8 ounces of cream cheese, ½ cup of powdered sugar, 1 teaspoon of vanilla extract, and 1½ cups of whipped topping. Having everything ready makes the preparation smoother and faster.
Next, you will need a mixer to attain that smooth and fluffy cream cheese mixture. For the crust, a food processor works wonders in crushing the Oreos finely. Decide whether to use cups or small bowls for serving. Having your serving dishes on hand simplifies the process.
Ingredients
- 18 Oreo cookies
- 3 tablespoons melted butter
- 8 ounces cream cheese
- ½ cup powdered sugar
- 1 teaspoon vanilla extract
- 1½ cups whipped topping
- Mini Oreos for garnish
Directions
- Crush Oreos into fine crumbs and mix with melted butter.
- Press the mixture into the bottom of your cups.
- Beat cream cheese, powdered sugar, and vanilla until smooth and fluffy.
- Gently fold in whipped topping.
- Layer the cheesecake filling over the crust, adding extra Oreo chunks if desired.
- Top with whipped topping, crushed Oreos, and a mini Oreo for an elegant touch.
- Chill for at least 1 hour before serving.
Elevating Your No-Bake Oreo Cheesecake Cups
Technique
Mastering the technique of creating these No-Bake Oreo Cheesecake Cups elevates the entire dessert experience. Start by ensuring your ingredients are at room temperature, especially the cream cheese. It blends more evenly and provides that smooth consistency essential for cheesecake.
When crushing the Oreos, avoid large chunks; the texture should be uniform. This contributes to a better crust that holds together well. The melted butter acts as the glue, binding the crumbs perfectly.
While mixing the cream cheese and sugar, be attentive to reduce lumps by mixing thoroughly but gently. Finally, folding in the whipped topping introduces air, enhancing the overall texture and making it lighter and fluffier.
Tips and Tricks
No-Bake Oreo Cheesecake Cups are easy to customize. For an added twist, consider using different flavors of Oreos or mix-ins like crushed candies or fruits. If you prefer a lighter dessert, using reduced-fat cream cheese and whipped topping works wonderfully.
Don’t hesitate to include a drizzle of chocolate syrup or caramel over the top before adding the mini Oreos. Presentation counts, and a splash of color makes the cups even more appealing.
Clean up is a breeze, as you can use a mixing bowl and a food processor without grease-laden pans. Enjoying this dessert without the fuss of sponges and scrubbing makes it even more delightful.
Perfecting Your Oreo Cheesecake Cups
Perfecting Results
Perfecting these No-Bake Oreo Cheesecake Cups often comes down to allowing ample chilling time. Chilling the cups for at least one hour lets all flavors meld together, creating a mouthwatering experience. Serve them cold for the best texture and flavor.
Many enjoy experimenting with different garnishes. Aside from mini Oreos, consider chocolate shavings, or fresh berries for a pop of color. Some prefer a touch of fresh mint to complement the dessert’s sweetness.
Troubleshooting and Variations
If you face any challenges while preparing, don’t worry. The No-Bake Oreo Cheesecake Cups are forgiving. If the crust doesn’t hold together, adding a bit more melted butter can help bind the crumbs.
If your filling is too stiff, incorporate a bit more whipped topping for a lighter texture. For adventurers, trying flavored cream cheeses, such as strawberry or chocolate, adds exciting new layers to the classic recipe.
For a gluten-free version, swap traditional Oreos for gluten-free brands, maintaining the same delicious taste.
Serving and Storing Your Desserts
Serving and Presentation
Serving No-Bake Oreo Cheesecake Cups is where creativity shines. Layered cups attract attention and invite guests to dig in. Consider using clear cups to showcase the delightful filling and crust layers.
This dessert is perfect for potlucks and gatherings, where everyone can grab their individual servings. Ensure the cups come chilled and ready to enjoy, making for a no-fuss, enjoyable dessert for all.
Pairing and Storage
While the No-Bake Oreo Cheesecake Cups can easily stand alone in flavor, they pair well with fresh fruit, adding a refreshing element. Fresh berries or a fruit compote provides a fun contrast to the rich cheesecake.
For storage, keep any leftover cups in an airtight container in the refrigerator. They last for about three to four days, maintaining flavor and texture. Enjoy them straight from the fridge, or let them sit at room temperature for a few minutes before indulging.
The journey of crafting No-Bake Oreo Cheesecake Cups will transform the way you view dessert preparation. Each step brings you closer to a creamy, crunchy, delightful treat loved by everyone.
Print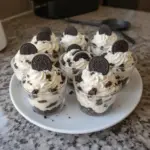
No-Bake Oreo Cheesecake Cups
- Prep Time: 15 minutes
- Cook Time: 0 minutes
- Total Time: 60 minutes
- Yield: 4 servings
- Category: Dessert
- Method: No-Bake
- Cuisine: American
- Diet: Vegetarian
Description
Delightful no-bake dessert cups with a creamy cheesecake filling and a crunchy Oreo crust, perfect for gatherings.
Ingredients
- 18 Oreo cookies
- 3 tablespoons melted butter
- 8 ounces cream cheese
- ½ cup powdered sugar
- 1 teaspoon vanilla extract
- 1½ cups whipped topping
- Mini Oreos for garnish
Instructions
- Crush Oreos into fine crumbs and mix with melted butter.
- Press the mixture into the bottom of your cups.
- Beat cream cheese, powdered sugar, and vanilla until smooth and fluffy.
- Gently fold in whipped topping.
- Layer the cheesecake filling over the crust, adding extra Oreo chunks if desired.
- Top with whipped topping, crushed Oreos, and a mini Oreo for an elegant touch.
- Chill for at least 60 minutes before serving.
Notes
Allow adequate chilling time for the best texture. Consider experimenting with different Oreo flavors or garnishes for customization.