

📑 Table of Contents ▶
- Biscoff Dessert Cups: A Dreamy Delight for Cookie Butter Lovers
- Components of Biscoff Dessert Cups
- Fundamentals
- Preparation/setup
- Directions
- Techniques for Biscoff Dessert Cups
- Technique
- Tips and tricks
- Perfecting Biscoff Dessert Cups
- Perfecting results
- Troubleshooting/variations
- Enjoying Biscoff Dessert Cups
- Serving/presentation
- Pairings/storage
- Final Thoughts
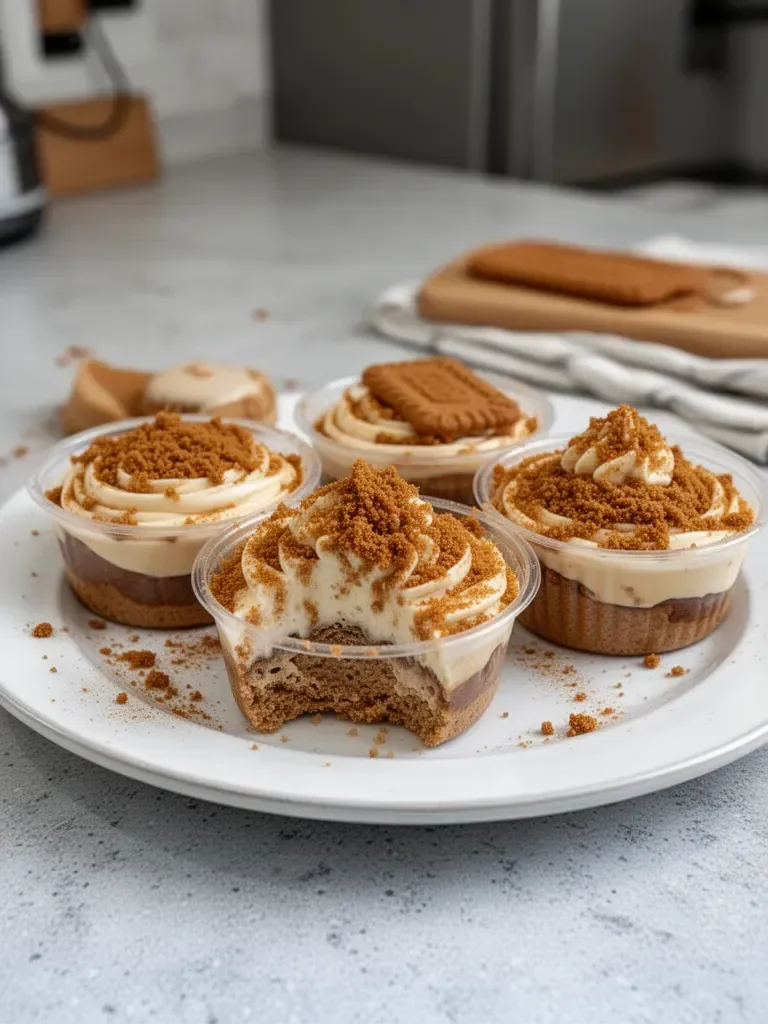
Biscoff Dessert Cups: A Dreamy Delight for Cookie Butter Lovers
The first time I tasted Biscoff spread, it felt like a revelation. It was a random afternoon with friends, and one of them brought a delicious dessert featuring that smooth, caramelized flavor we all fell in love with. Little did I know that this indulgent treat would inspire me to create my own version—Biscoff dessert cups. It combines fluffy cream cheese with rich cookie butter and a crunchy cookie crumb crust.
Each spoonful transports you to cookie heaven, with a delightful texture that balances creaminess and crunch. The joy of preparing these dessert cups lies in how easy they are, yet they impress everyone who tries them. Perfect for gatherings or personal indulgence, they have become my go-to dessert. These Biscoff dessert cups are truly a dream for any cookie butter lover, and the flavor combination makes life just a little sweeter.
Components of Biscoff Dessert Cups
Fundamentals
Creating Biscoff dessert cups may seem daunting, but it’s all about mastering a few key fundamentals. Start with the crust, which is the foundation of this delightful treat. Using Biscoff cookie crumbs combined with melted butter creates a crunchy yet soft base that is simply irresistible. Ensuring that the crust is compacted properly will give your dessert cups stability for holding the creamy filling.
Next, you’ll need to focus on the filling. The combination of cream cheese, Biscoff spread, and heavy cream creates a light, airy texture that perfectly contrasts the base. With just a few simple ingredients, you can achieve a decadent yet easy dessert that leaves everyone wanting more.
Preparation/setup
Preparation sets the tone for how well your Biscoff dessert cups will turn out. Gather all your ingredients and make sure you have the necessary equipment, including an electric hand mixer, mixing bowls, and a piping bag. Having everything within reach streamlines the process and makes baking more enjoyable.
Start with the crust. Combine the Biscoff cookie crumbs and melted butter in a small bowl. Mix until the crumbs resemble wet sand and set them aside. This simple step lays the groundwork for a delicious foundation.
Ingredients
To make the Biscoff dessert cups, you will need the following ingredients:
- 2 cups Biscoff cookie crumbs
- ¼ cup unsalted butter (melted)
- 8 ounces cream cheese (room temperature)
- ¾ cup granulated sugar
- 1 tsp vanilla extract
- ¾ cup Biscoff spread (cookie butter)
- 1 ½ cups heavy cream
- 2 tbsp Biscoff spread (cookie butter), slightly melted
- ¼ cup Biscoff cookie crumbs for topping
Directions
- In a small bowl, combine the Biscoff cookie crumbs with melted unsalted butter, stirring until evenly coated.
- Portion the cookie mixture into the bottom of 28 2-ounce plastic cups and press it down gently using a small spoon to create an even crust.
- In a large mixing bowl, use an electric hand mixer to cream together the cream cheese, granulated sugar, and vanilla extract until smooth.
- Add the Biscoff spread and mix until fully incorporated.
- In a separate bowl, whip the heavy cream on medium-high speed until stiff peaks form, and then gently fold it into the cream cheese mixture.
- Transfer the mixture into a piping bag and pipe it into the cups, filling them about ¾ full.
- Heat 2 tablespoons of Biscoff spread in the microwave for about 10 seconds until slightly melted, and drizzle it over the tops of the filled cups.
- Finish by sprinkling ¼ cup of Biscoff cookie crumbs on top.
Techniques for Biscoff Dessert Cups
Technique
Executing the perfect Biscoff dessert cup involves finesse in several steps. Begin with your crust. It should resemble wet sand and hold together when pressed into the cups. Don’t worry if it’s not perfectly smooth; the little textures add character to your dessert.
When making the filling, focus on folding the whipped cream gently into the cream cheese mixture. This technique keeps the airiness in the whipped cream intact, resulting in a light and fluffy filling.
Tips and tricks
Here are some essential tips and tricks for nailing your Biscoff dessert cups every time:
- Use room-temperature cream cheese to ensure a smooth mixture without lumps.
- Whip the cream just until stiff peaks form. Over-whipping can lead to a grainy texture.
- If you want a thicker crust, consider adjusting the cookie crumb and butter ratio.
- Be creative with your piping: try different techniques or patterns to make the dessert visually appealing.
Perfecting Biscoff Dessert Cups
Perfecting results
Achieving the perfect Biscoff dessert cups requires attention to detail. The cooling period after assembling is crucial. Refrigerate the cups for at least 2 hours before serving to let the filling set. This not only enhances the texture but also allows the flavors to meld beautifully.
Adjust the quantities of the ingredients based on your preferences. If you love a stronger cookie butter flavor, increase the Biscoff spread. Conversely, if you prefer a milder taste, reduce it slightly.
Troubleshooting/variations
Sometimes, even the best recipes can face unexpected challenges. If your filling seems too runny, ensure that your heavy cream is whipped properly and folded in gently without deflating. If it turns into butter, don’t panic; it can still be salvaged, though the texture may change.
Consider variations on the classic recipe. You can add layers of crushed cookies, chocolate shavings, or even chopped nuts for a bit of crunch. Feel free to experiment with flavors by adding a touch of cinnamon or nutmeg to the mixture.
Enjoying Biscoff Dessert Cups
Serving/presentation
Presentation plays a significant role in how a dessert is received. When it comes to Biscoff dessert cups, opt for fun serving cups—like clear plastic or small glass jars—which allows everyone to see the beautiful layers.
You can garnish the tops with extra cookie crumbs or even a dollop of whipped cream. For a festive touch, consider adding a slice of cookie or a mini cookie on top of each cup.
Pairings/storage
Biscoff dessert cups pair wonderfully with coffee or a rich hot chocolate. The creamy filling complements the warm flavors and adds depth to the experience.
Store any leftovers in the refrigerator for up to 3 days. Keep them covered to maintain freshness. These little cups are perfect to make ahead of time. They’re a great choice for gatherings, offering a delightful treat ready to impress your guests at a moment’s notice.
Final Thoughts
The joy of indulging in Biscoff dessert cups lies in their delightful blend of flavors and textures. Each step in the preparation process adds to the experience, from the crunchy crust to the airy filling. The flavor of Biscoff spread brings warmth and sweetness to every bite, making it a dream for any cookie butter lovers. Assembling these simple yet decadent cups will surely turn an ordinary occasion into a sweet celebration.
Print
Biscoff Dessert Cups
- Prep Time: 20 minutes
- Cook Time: 0 minutes
- Total Time: 120 minutes
- Yield: 28 servings
- Category: Dessert
- Method: No-Bake
- Cuisine: American
- Diet: Vegetarian
Description
Indulgent dessert cups featuring layers of creamy filling and crunchy Biscoff cookie crumb crust.
Ingredients
- 2 cups Biscoff cookie crumbs
- ¼ cup unsalted butter (melted)
- 8 ounces cream cheese (room temperature)
- ¾ cup granulated sugar
- 1 tsp vanilla extract
- ¾ cup Biscoff spread (cookie butter)
- 1 ½ cups heavy cream
- 2 tbsp Biscoff spread (cookie butter), slightly melted
- ¼ cup Biscoff cookie crumbs for topping
Instructions
- Combine the Biscoff cookie crumbs with melted unsalted butter, stirring until evenly coated.
- Portion the cookie mixture into the bottom of 28 2-ounce plastic cups and press it down gently using a small spoon to create an even crust.
- Use an electric hand mixer to cream together the cream cheese, granulated sugar, and vanilla extract until smooth.
- Add the Biscoff spread and mix until fully incorporated.
- Whip the heavy cream on medium-high speed until stiff peaks form, and then gently fold it into the cream cheese mixture.
- Transfer the mixture into a piping bag and pipe it into the cups, filling them about ¾ full.
- Heat 2 tablespoons of Biscoff spread in the microwave for about 10 seconds until slightly melted, and drizzle it over the tops of the filled cups.
- Finish by sprinkling ¼ cup of Biscoff cookie crumbs on top.
Notes
Refrigerate the cups for at least 2 hours before serving to let the filling set.