
📑 Table of Contents ▶
- St. Patrick’s Day Cookie Essentials
- Fundamentals
- Preparation/setup
- Directions
- Crafting Your St. Patrick’s Day Cookies
- Technique
- Tips/tricks
- Elevating Your St. Patrick’s Day Cookies
- Perfecting results
- Troubleshooting/variations
- Finishing Touches on Your St. Patrick’s Day Cookies
- Serving/presentation
- Pairings/storage
- St. Patrick’s Day Cookies
St. Patrick’s Day Cookies
The smell of freshly baked cookies wafting through the house creates an atmosphere of joy and festivity. St. Patrick’s Day always brings back those cherished memories of my childhood, where vibrant green cookies adorned our kitchen table. These delightful treats weren’t just desserts; they were part of the celebration. The excitement of mixing batter, shaping dough, and adding sprinkles made each baking session a joyous occasion.
In preparation for the day, our family gathered in the kitchen, donning green aprons and playful smiles. Green food coloring transformed ordinary cookie dough into a vibrant masterpiece. Everyone eagerly awaited the moment when the cookies emerged from the oven, their golden edges signifying readiness.
St. Patrick’s Day Cookies have since become a tradition, shared with friends and family as a way to celebrate our love for good food and good company. Baking these cookies is more than following a recipe; it’s about creating a memory to last a lifetime. Let’s dive into how to bring this fun tradition into your kitchen.
St. Patrick’s Day Cookie Essentials
Fundamentals
Baking St. Patrick’s Day Cookies starts with understanding the essentials. Essential ingredients include softened unsalted butter, granulated sugar, and a couple of key staples you probably already have in your pantry. These cookies are soft and fluffy with a touch of festive color and fun, perfect for any celebration.
The foundation of our cookies relies on the interplay of butter and sugar, which, when creamed together, creates a light and fluffy base. This mix is the heart of the cookie, providing the texture and sweetness needed to make them delightful. The addition of an egg brings richness and moisture, ensuring they are soft without being too crumbly.
Preparation/setup
Preparation begins with a few simple steps. Start by preheating your oven to 350°F (175°C), allowing it to reach the perfect baking temperature. A well-prepared baking sheet lined with parchment paper can save you from sticky situations later on.
In a large bowl, cream together your softened butter and granulated sugar until it becomes light and fluffy. This step takes a little time but is essential for achieving the right texture. Add the egg and vanilla extract, mixing until fully combined. As you move to the dry ingredients, remember to whisk together the flour, baking powder, and salt. Gradually introduce the dry mix into the wet ingredients, creating a beautiful dough that is easy to work with.
Ingredients
For the St. Patrick’s Day Cookies, gather the following:
- 1 cup unsalted butter, softened
- 1 cup granulated sugar
- 1 egg
- 2 teaspoons vanilla extract
- 2 1/2 cups all-purpose flour
- 1 teaspoon baking powder
- 1/2 teaspoon salt
- Green food coloring
- Sprinkles (optional)
Directions
- Preheat your oven to 350°F (175°C).
- In a large bowl, cream together the softened butter and sugar until light and fluffy.
- Beat in the egg and vanilla extract.
- In a separate bowl, whisk together the flour, baking powder, and salt.
- Gradually add the dry ingredients to the wet ingredients, mixing until combined.
- Add a few drops of green food coloring until the desired color is reached.
- Scoop tablespoons of dough and place them on a baking sheet lined with parchment paper.
- If desired, sprinkle with colorful sprinkles.
- Bake for 10-12 minutes, or until the edges are lightly golden.
- Allow cookies to cool before serving. Enjoy your festive treats!

Crafting Your St. Patrick’s Day Cookies
Technique
Technique plays a vital role in cookie baking. The creaming method, which involves combining fat (butter) and sugar until light and fluffy, is crucial. This process incorporates air, resulting in a tender cookie texture. Keeping your butter at room temperature is important; it allows for easy mixing without overworking the dough.
Once you add the dry ingredients, mix just until combined. Overmixing can lead to tougher cookies, so be cautious and gentle. If you’re experimenting with flavors, like mint or chocolate chips, add them towards the end of mixing to distribute evenly without altering the dough’s structure.
Tips/tricks
To achieve the best St. Patrick’s Day Cookies, consider using gel food coloring instead of liquid. Gel colors offer vibrant shades and require fewer drops to reach your desired color, preventing any interference with the dough’s consistency. If you desire a more festive appearance, choose fun, thematic sprinkles that celebrate the spirit of the holiday.
Make sure to check the cookies during the baking process to avoid over-baking. The goal is cookies with slightly soft centers and golden edges. Allow them to cool on the baking sheet for a few minutes before transferring them to a cooling rack.
Elevating Your St. Patrick’s Day Cookies
Perfecting results
Perfecting St. Patrick’s Day Cookies comes down to practice and attention to detail. Each baking session offers lessons. If your cookies spread too much, ensure your butter isn’t overly soft and consider chilling the dough for about 30 minutes before baking.
For chewier cookies, keeping the dough slightly thicker will help. Experiment with baking times, as each oven can vary. Don’t hesitate to take a peek as they bake. A light golden edge indicates they’re done while the centers remain soft.
Troubleshooting/variations
Baking can often require troubleshooting. If your cookies turn out too dry, check the flour measurement. It’s easy to add too much if you scoop directly from the bag. Instead, spoon the flour into your measuring cup and level it off for accuracy. For variations, consider substituting part of the white flour with whole wheat flour or adding in a dash of almond extract for a nutty twist.
If you wish to customize your food coloring, try mixing different shades of green to create an ombre effect. Marbling can also provide a fun visual twist to the classic cookie shapes.
Finishing Touches on Your St. Patrick’s Day Cookies
Serving/presentation
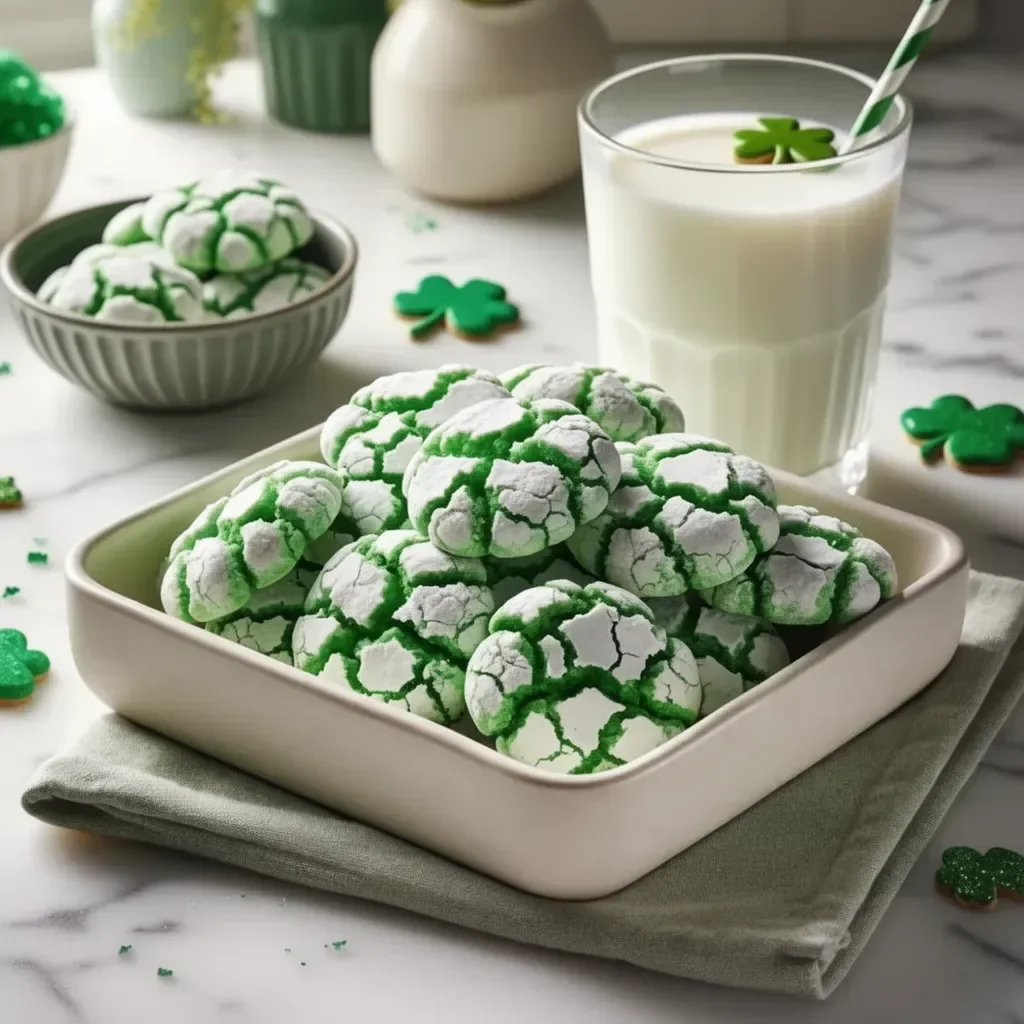
Presentation adds an extra layer of enjoyment. Serve the St. Patrick’s Day Cookies on festive trays lined with shamrock-themed napkins. Their vibrant green color is sure to catch everyone’s eye. Arrange them artfully, perhaps alongside other holiday-themed treats to create a beautiful spread.
Consider pairing these cookies with milk or a fun green drink to match the festive spirit. For gatherings, you can even package them in treat bags tied with a bright ribbon, making them perfect for gifting to friends and family.
Pairings/storage
St. Patrick’s Day Cookies pair excellently with milk, coffee, or a refreshing herbal tea. Store them in an airtight container at room temperature for up to a week to keep them fresh. If you’re planning ahead, freezing the dough is also an option. Form the dough into balls, freeze them, and bake directly from the freezer when the craving hits.
For longer storage, consider placing layers of parchment paper between the cookies in your container to prevent sticking. Happy baking!
Print
St. Patrick’s Day Cookies
- Prep Time: 15 minutes
- Cook Time: 12 minutes
- Total Time: 27 minutes
- Yield: 24 servings
- Category: Dessert
- Method: Baking
- Cuisine: Irish
- Diet: Vegetarian
Description
Festive green cookies perfect for celebrating St. Patrick’s Day with family and friends.
Ingredients
- 1 cup unsalted butter, softened
- 1 cup granulated sugar
- 1 egg
- 2 teaspoons vanilla extract
- 2 1/2 cups all-purpose flour
- 1 teaspoon baking powder
- 1/2 teaspoon salt
- Green food coloring
- Sprinkles (optional)
Instructions
- Preheat your oven to 350°F (175°C).
- Cream together the softened butter and sugar until light and fluffy.
- Beat in the egg and vanilla extract.
- Whisk together the flour, baking powder, and salt in a separate bowl.
- Gradually add the dry ingredients to the wet ingredients, mixing until combined.
- Add a few drops of green food coloring until the desired color is reached.
- Scoop tablespoons of dough and place them on a baking sheet lined with parchment paper.
- Sprinkle with colorful sprinkles if desired.
- Bake for 10-12 minutes, or until the edges are lightly golden.
- Allow cookies to cool before serving. Enjoy your festive treats!
Notes
For vibrant colors, consider using gel food coloring. Store in an airtight container for freshness.