
📑 Table of Contents ▶
Oreo Milkshake
Growing up, no treat felt more indulgent than a thick Oreo milkshake. On hot summer days, my friends and I would gather around the blender, each vying for the chance to create the ultimate mix of creamy goodness and crunchy cookie. We would pile in the Oreos, scoop in the ice cream, and watch in awe as the blender transformed our ingredients into a swirled, frosty delight.
The way the dark Oreos blended with the white ice cream created a river of contrasting colors that promised pure magic in every sip. Memories of those carefree afternoons linger as a reminder of how something as simple as a milkshake can evoke joy. This classic Oreo milkshake effortlessly mixes nostalgia with flavor, making it a go-to treat that brings people together. Each time I blend it up, it feels like I’m crafting a little piece of childhood happiness.
Now, creating this Oreo milkshake is easier than ever. Just a handful of ingredients will yield a delightful dessert that satisfies cravings and creates memories. Whether you enjoy it on a sunny day or as a late-night treat, this Oreo milkshake will always find a place in your heart and your glass.
Oreo Milkshake Essentials
Fundamentals
Crafting an Oreo milkshake requires just a few essential ingredients and the right equipment. This delightful treat typically features Oreos, vanilla ice cream, milk, and a dash of vanilla extract. Together, these elements create a milkshake that balances creaminess and texture perfectly.
The key to a successful Oreo milkshake lies in your blender. A high-quality blender takes the hassle out of mixing these ingredients, ensuring everything blends evenly into a smooth and delicious beverage. Besides, having the right proportions of each ingredient can make a significant difference in taste and texture.
Preparation/setup
Start by assembling your ingredients: 10 Oreos, three generous scoops of vanilla ice cream, a quarter cup of milk, and half a teaspoon of vanilla extract. This blend of Oreos and vanilla ice cream forms the base, while the milk adds the perfect liquid texture. The vanilla extract enhances the overall flavor, giving it a delightful finish.
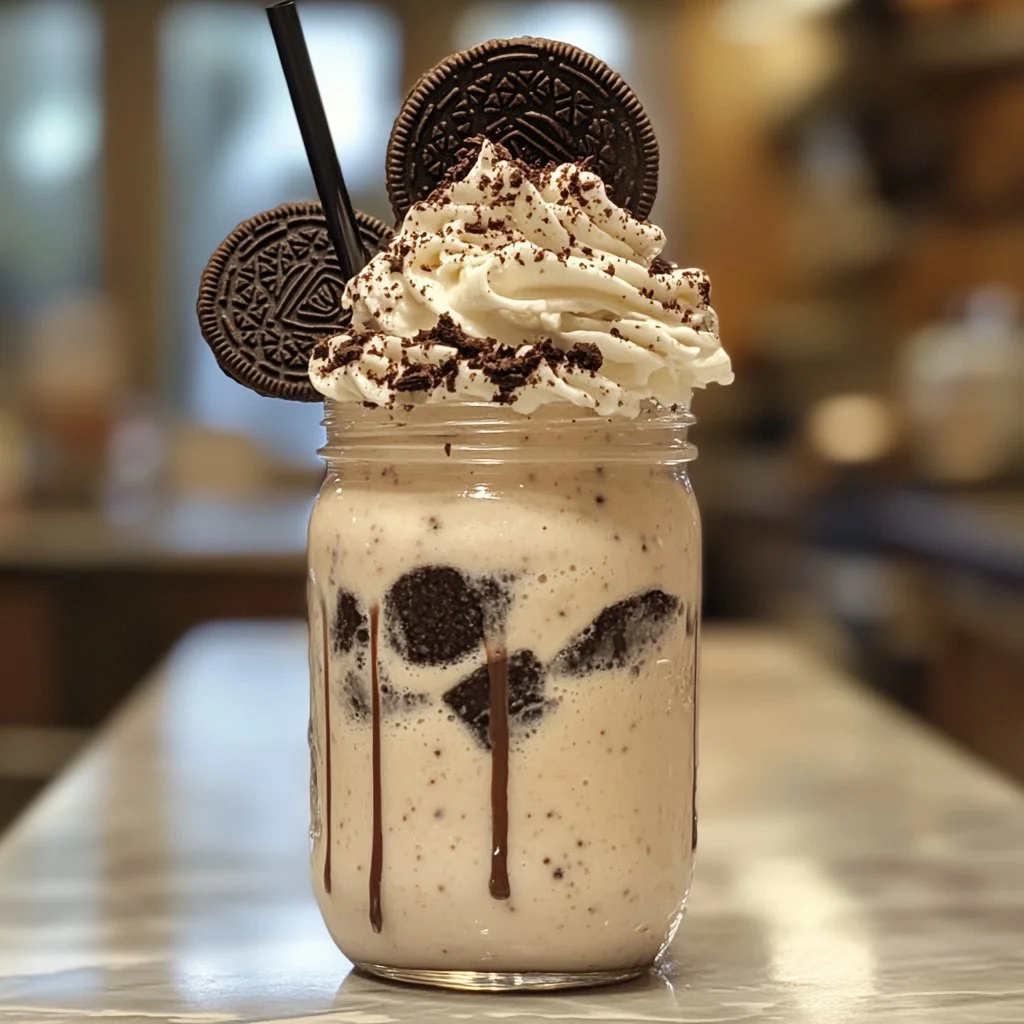
Make sure to have a tall glass ready for pouring your milkshake once it’s finished. A dollop of whipped cream and some extra crushed Oreos can serve as a delightful topping. The preparation for this treat is quick and can easily be done in under 10 minutes.
Ingredients
To whip up your Oreo milkshake, gather:
- 10 Oreos
- 3 scoops vanilla ice cream
- 1/4 cup milk
- 1/2 tsp. vanilla extract
- Whipped cream (for topping)
These ingredients create a rich and creamy blend that indulges your sweet tooth.
Directions
- In a blender, combine the Oreos, vanilla ice cream, milk, and vanilla extract. Blend until smooth.
- Pour the milkshake into a glass.
- Top with whipped cream and additional crushed Oreos if desired.
- Serve immediately and enjoy!

Mastering the Milkshake
Technique
Blending is all about understanding the right technique. Start by adding the softest ingredients to the blender first—this means placing the vanilla ice cream and milk at the bottom. Next, toss in the Oreos and vanilla extract on top. This layering helps prevent the Oreos from sticking to the bottom and ensures they blend evenly through the shake.
Blend on a low to medium speed until you achieve a smooth consistency. If you prefer a thicker shake, feel free to add another scoop of vanilla ice cream or reduce the amount of milk. For a more liquid milkshake, increase the milk slightly.
Tips/tricks
One great tip for getting the best Oreo milkshake is to chill your glass beforehand. Placing your glass in the freezer for a few minutes before pouring will keep your milkshake colder for longer.
Additionally, for those who love extra flavor, consider adding a tablespoon of chocolate syrup to the blender. This twist will enhance the classic flavor and give you an even richer dessert experience.
Perfecting Your Oreo Milkshake
Perfecting results
To perfect your Oreo milkshake, consider your desired thickness. For a milkshake that’s thick enough for a spoon, prioritize more ice cream over milk. Using frozen vanilla yogurt instead of ice cream can give your shake a slightly tangy flavor while keeping it creamy.
Also, keep in mind that blending the Oreos for a bit longer can help break them down into finer pieces, creating a smoother texture. Just be mindful not to overblend, as this can lead to a less creamy shake.
Troubleshooting/variations
If your milkshake ends up too thin, it’s easy to adjust. Add more ice cream or toss in a few extra Oreos for added thickness. For those who want to experiment, try adding different flavors of ice cream, like caramel or cookies and cream, to change the milkshake’s character.
Even adding a splash of chocolate milk instead of regular milk can give an extra layer of chocolatey goodness. This versatility lets you customize the shake to suit your taste perfectly.
Enjoying Your Oreo Milkshake
Serving/presentation
Once blended and poured into your chilled glass, the presentation plays a big role in enjoyment. A fluffy layer of whipped cream on top creates a beautiful visual, while sprinkles of crushed Oreos make for a delightful garnish. This presentation not only looks appealing but also invites everyone to dig in.
Consider using a tall straw or a spoon to make sipping easier. The combination of textures from the whipped cream and crushed cookies enhances the overall experience.
Pairings/storage
Oreo milkshakes pair well with fresh fruits, like sliced bananas or strawberries, if you want a bit of a fruity twist. For a chocolate lover’s delight, serve alongside chocolate chip cookies for a few extra bites of sweetness.
Storing your Oreo milkshake isn’t recommended, as they taste best fresh. However, if you need to save any leftovers, place your shake in an airtight container in the freezer. Just remember, the texture may change slightly upon freezing, but a quick blend can help restore its creamy goodness.
In conclusion, the Oreo milkshake represents the joyful blend of simplicity and indulgence. The combination of Oreos, ice cream, and milk results in a treat that stimulates memories of childhood and brings friends together. Perfecting the art of making this milkshake not only satisfies cravings but also elevates ordinary moments into delicious celebrations.
Print
Oreo Milkshake
- Prep Time: 10 minutes
- Cook Time: 0 minutes
- Total Time: 10 minutes
- Yield: 2 servings
- Category: Dessert
- Method: Blending
- Cuisine: American
- Diet: Vegetarian
Description
Indulge in the nostalgic delight of a classic Oreo milkshake, blending creamy vanilla ice cream with crunchy Oreos for a refreshing treat.
Ingredients
- 10 Oreos
- 3 scoops vanilla ice cream
- 1/4 cup milk
- 1/2 tsp vanilla extract
- Whipped cream (for topping)
Instructions
- In a blender, combine Oreos, vanilla ice cream, milk, and vanilla extract. Blend until smooth.
- Pour the milkshake into a glass.
- Top with whipped cream and additional crushed Oreos if desired.
- Serve immediately and enjoy!
Notes
Chill your glass in the freezer before serving for a colder milkshake. Consider adding chocolate syrup for extra flavor.
