

📑 Table of Contents ▶
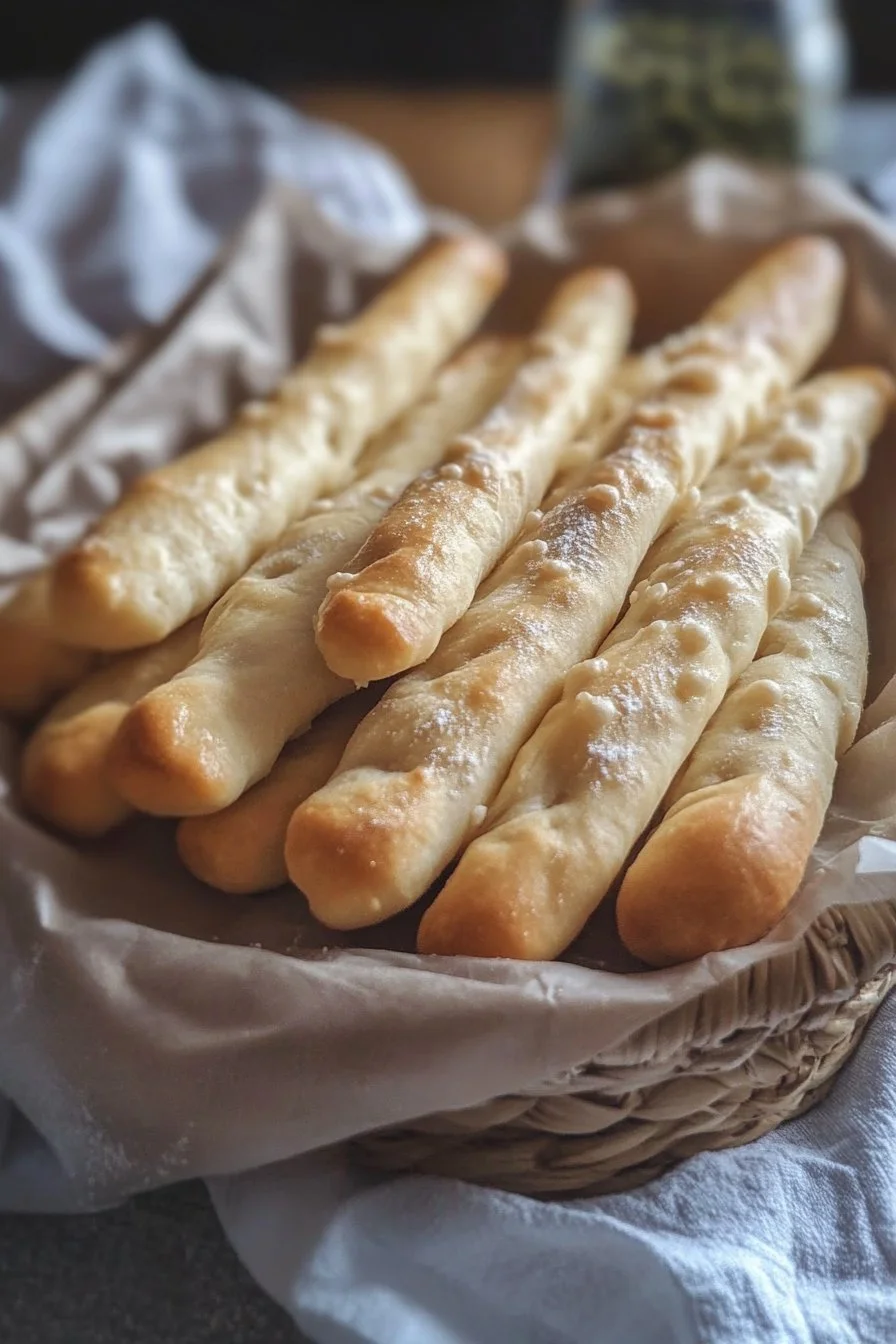
Sourdough Discard Breadsticks
Creating delicious snacks can transform any ordinary day into something extraordinary. One of my favorite creative outlets in the kitchen involves using sourdough discard. This tangy ingredient, often overlooked, becomes the star in various recipes. One memorable day, I decided to experiment with my sourdough discard and ended up crafting homemade breadsticks that blew everyone away.
The aroma of garlic and fresh herbs filled the kitchen, making it impossible to resist tasting these fragrant delights right out of the oven. Each crispy bite combined the delightful taste of sourdough with hints of garlic and herbs. Making these sourdough discard breadsticks not only cleared out my fridge but also brought a touch of homemade goodness to snack time.
Every time I whip up a batch, I find myself smiling, recalling that first batch that disappeared in minutes. Friends, family, and even hesitant eaters can’t say no to these simple yet flavorful treats. Let’s dive into how you can create your own batch of sourdough discard breadsticks at home.
Sourdough Discard Breadsticks: Fundamentals
Understanding the fundamentals of sourdough discard breadsticks sets the stage for a delightful cooking experience. The main ingredients come together to create a simple yet satisfying dough. The foundation comprises sourdough discard, all-purpose flour, salt, garlic powder, and olive oil. Each element contributes to the texture and flavor profile that makes these breadsticks irresistible.
Sourdough discard not only adds flavor but also provides some of the natural yeast, enhancing the breadsticks’ chewy texture. The all-purpose flour forms the structure, while the salt elevates the flavors. Garlic powder offers a savory kick, perfectly balancing the sour notes of the discard. Finally, olive oil enriches the dough, bringing a tender crumb that complements the breadsticks’ crunch.
Preparation begins with gathering the ingredients and ensuring your workspace is ready. A clean surface and mixing bowls help streamline the process. Prepping your oven to 400°F (200°C) upfront ensures a hot and consistent baking environment, giving the breadsticks that coveted golden-brown finish.
Preparation/setup
Before diving into the actual breadstick-making process, taking a moment to prepare your workspace makes everything easier. Have all ingredients measured and ready to go. This includes your cup of sourdough discard, cup of all-purpose flour, half teaspoon of salt, and a quarter teaspoon of garlic powder. Having your utensils in place—mixing bowls, a rolling pin, and baking sheets—will help maintain momentum as you work through the recipe.
Preheating the oven is crucial. Setting it to 400°F (200°C) ensures a perfect baking environment, leading to crispy, golden breadsticks that delight the senses. Line your baking sheet with parchment paper as an extra step for easy cleanup. Preparing your tools and workspace can transform the cooking experience into an enjoyable and mess-free task.
Ingredients
Gathering the right ingredients elevates your sourdough discard breadsticks. Here’s a quick overview of what you need to make these flavorful snacks:
- 1 cup sourdough discard: This tangy base provides flavor and texture.
- 1 cup all-purpose flour: This gives the breadsticks their structure and chewiness.
- 1/2 teaspoon salt: Enhances all flavors in the dough.
- 1/4 teaspoon garlic powder: Adds a savory note to each bite.
- 1/4 cup olive oil: Richens the dough while adding moisture.
You can also elevate your breadsticks with additional toppings. Herbs like rosemary or thyme can sprinkle on top, adding fragrance and visual appeal. Cheese lovers may opt for a sprinkle of their favorite grated cheese to enhance flavor even more. This flexible recipe allows for personalization, making each batch unique.
Directions
Creating sourdough discard breadsticks follows a straightforward process that anyone can master. Start by preheating your oven to 400°F (200°C). In a mixing bowl, combine the sourdough discard, all-purpose flour, salt, and garlic powder.
Once combined, add the olive oil, mixing until a dough forms. Knead the dough on a floured surface for a couple of minutes until it becomes smooth. Then, roll the dough into a rectangle, and cut it into strips.
Twist the strips, placing them on a baking sheet lined with parchment paper. Sprinkle herbs or cheese on top as desired before baking for 15-20 minutes or until golden brown and crispy. Allow the breadsticks to cool slightly before serving.
Sourdough Discard Breadsticks: Technique
Perfecting the technique while making sourdough discard breadsticks ensures that each bite produces delightful textures and flavors. The key lies in understanding how to handle the dough and enhance its natural qualities.
Kneading is a crucial step that brings the dough together, allowing for proper gluten development. Gluten is what gives bread its elasticity, creating the perfect chew. Ensure that you knead for a couple of minutes until you achieve a smooth consistency to get the best results.
Rolling the dough into a rectangle and cutting it into strips allows for uniformity. Consistent sizes lead to even baking, preventing some breadsticks from becoming overcooked while others remain underbaked.
Tips/tricks
Keep some extra flour nearby while rolling out the dough. It prevents sticking and makes it easier to handle. Don’t hesitate to experiment with different herb mixes and cheeses based on what you have on hand.
When twisting the dough strips, be gentle. Over-tightening can lead to uneven baking. Allow a little space between each breadstick on the baking sheet to help them crisp up nicely during baking. Check the breadsticks a minute or two before the baking time ends. This way, you can pull them out at the perfect moment for optimal crispness.
Sourdough Discard Breadsticks: Perfecting Results
Perfecting your sourdough discard breadsticks often comes down to paying attention to small details that elevate flavors and textures. Achieving the perfect crunch without compromising the soft interior takes practice but is entirely doable.
Letting the dough rest briefly after mixing can enhance the flavors. This rest period allows the flour to hydrate, leading to a more cohesive dough. As the dough sits, its texture improves, making it easier to work with once you’re ready to roll it out.
Experimenting with various herbs can transform the flavor profile. Fresh versus dried herbs may yield different experiences in taste and aroma, so don’t shy away from trying new combinations. A little rosemary can add a nice contrast to the garlic, while thyme offers its earthy undertones.
Troubleshooting/variations
If you find your dough too sticky to work with, a light dusting of flour while kneading can help manage the texture. Adjust the amount of flour accordingly to achieve the right consistency without overworking the dough.
Variations can change the overall taste and excitement of your breadsticks. Consider adding cheese directly into the dough mixture or different spices for an added kick. Options like crushed red pepper or even smoked paprika open up flavors beyond the basic recipe.
Don’t hesitate to explore. Each attempt can lead to new discoveries and delightful additions that make sourdough discard breadsticks all your own.
Sourdough Discard Breadsticks: Serving & Presentation
Serving your sourdough discard breadsticks can highlight their delightful texture and flavors. These breadsticks shine as a snack, appetizer, or accomplice to your favorite dips. Arrange them on a platter, garnished with a sprinkle of fresh herbs for a visually appealing presentation.
A simple dipping sauce can elevate the experience. Consider pairing them with olive oil infused with herbs for dipping or a zesty marinara sauce for added flavor.
Pairings/storage
Storage becomes essential if you manage to have leftovers. Allow the breadsticks to cool completely before placing them in an airtight container. Proper storage helps maintain their crispness. They can last a couple of days, but reheating them briefly in the oven can bring back that much-coveted crunch.
Breathable storage bags also work, but be mindful to avoid moisture, which can lead to sogginess. For longer storage, consider freezing the breadsticks. Store them in freezer-safe bags, and when you’re ready to enjoy, pop them into the oven directly from the freezer for a warm treat anytime.
Conclusion
Creating sourdough discard breadsticks opens up a world of flavors in your kitchen. Every crispy bite carries a story, from the lively mingling of garlic and herbs to the satisfying texture of the dough. The process becomes an enjoyable exploration of flavors while ensuring no sourdough discard goes to waste.
These breadsticks not only serve as a delicious snack option but also offer versatility for gatherings and meals. Enjoy the journey of making and sharing sourdough discard breadsticks, celebrating the joy of simple, homemade goodness that unites friends and family around the table.
Print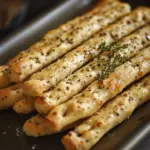
Sourdough Discard Breadsticks
- Prep Time: 10 minutes
- Cook Time: 20 minutes
- Total Time: 30 minutes
- Yield: 4 servings
- Category: Snack
- Method: Baking
- Cuisine: American
- Diet: Vegetarian
Description
Delicious and flavorful breadsticks made using sourdough discard, garlic, and herbs.
Ingredients
- 1 cup sourdough discard
- 1 cup all-purpose flour
- 1/2 teaspoon salt
- 1/4 teaspoon garlic powder
- 1/4 cup olive oil
Instructions
- Preheat your oven to 400°F (200°C).
- In a mixing bowl, combine the sourdough discard, all-purpose flour, salt, and garlic powder.
- Add the olive oil and mix until a dough forms.
- Knead the dough on a floured surface for a couple of minutes until smooth.
- Roll the dough into a rectangle and cut it into strips.
- Twist the strips and place them on a baking sheet lined with parchment paper.
- Sprinkle herbs or cheese on top as desired.
- Bake for 15-20 minutes or until golden brown and crispy.
- Allow to cool slightly before serving.
Notes
Try adding different herbs or cheeses to customize your breadsticks.
