
📑 Table of Contents ▶
Korean Fried Chicken
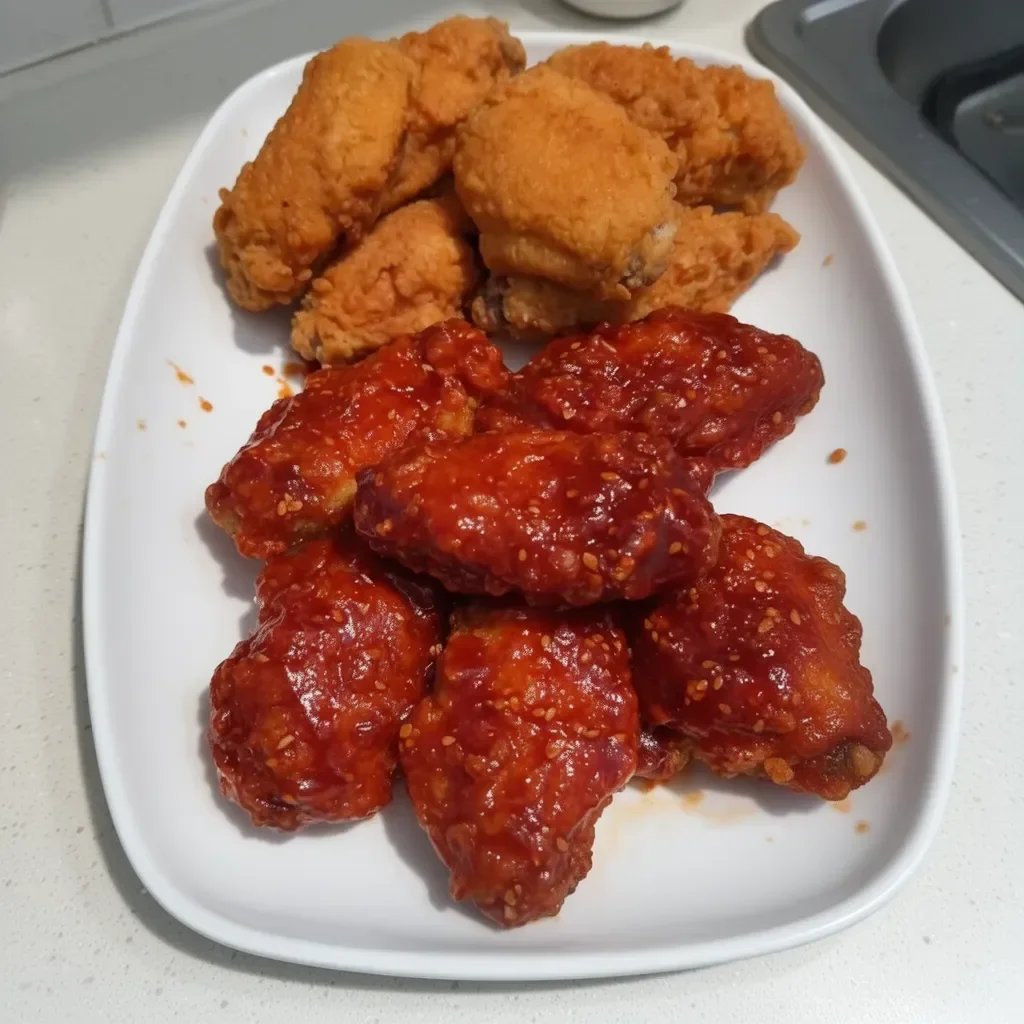
The first time I experienced Korean fried chicken, I was captivated by its irresistible crunch and rich flavor. A friend invited me over for dinner, and she served this incredible dish, dripping in a spicy-sweet sauce that perfectly coated each wingette. The combination of crispy fried exterior and tender meat had me hooked immediately.
Korean fried chicken stands out for its unique double-frying technique, which results in a light and crispy texture that’s simply unbeatable. The flavors are bold and lively, using ingredients like gochujang and sesame that elevate this dish to new heights. I’ve enjoyed making this at home since that fateful night, and it quickly became a staple at gatherings with friends and family.
Cooking Korean fried chicken not only allows for delightful flavors but also brings the joy of sharing a delicious meal with loved ones. The process might seem intricate, but once you get the hang of it, every bite becomes a delicious celebration. Embrace the crunch and flavor of this dish that has made it a beloved classic.
Korean Fried Chicken Essentials
Fundamentals
Korean fried chicken is not your average fried chicken. Its signature is the double fry, which achieves a unique texture and taste. The first fry cooks the meat and begins the crisping process. The second fry elevates the crunch to a satisfying level, creating a flavor-packed crust that stands up to sauces beautifully.
The key ingredients are straightforward yet essential. These include Korean fried chicken mix, gochujang, and a blend of seasonings. Each component plays a pivotal role, enhancing the overall taste and texture of the chicken. Preparing this dish involves some steps, but anyone can master the art of Korean fried chicken with a little patience and practice.
Preparation/Setup
To prepare the chicken, start with a brine that includes salt, Korean chili powder, and garlic powder mixed with cold water. This step ensures the meat remains juicy and flavorful. After brining for at least eight hours, it’s time to coat the chicken wingettes.
Make a batter using Korean fried chicken mix and cold water. This mixture binds to the chicken, creating a crispy coating once fried. You then dust the battered wingettes with additional chicken mix to achieve that incredible crunch. The entire process highlights how traditional Korean culinary techniques can enhance the flavor and texture of this dish.
Ingredients
- 16 chicken wingettes (or drumettes)
- 500 g cold water (about 2 cups)
- 15 g salt (about 2½ tsp)
- 1 tsp Korean chili powder
- ½ tsp garlic powder (or 1 tsp freshly chopped garlic)
- 240 g Korean fried chicken mix (for the batter)
- 240 g cold water (1 cup)
- 240 g Korean fried chicken mix (in the bag)
- Vegetable oil for frying (fill the medium pot half full)
- 3 tbsp gochujang
- ½ tbsp Korean chili powder
- 1 tbsp soy sauce
- 2 tbsp ketchup
- 4 tbsp honey (or light corn syrup)
- 1 tbsp apple cider vinegar
- 1 tbsp lemon juice
- 2 tsp minced garlic
- 1 tsp minced ginger
- 1 tsp sesame seeds
Directions
- In a large bowl, mix the salt, Korean chili powder, and garlic powder (or freshly chopped garlic) with cold water until completely dissolved.
- Add the chicken wingettes to the salt water solution, making sure they are completely submerged. Cover the bowl with plastic wrap and refrigerate overnight or for at least 8 hours.
- The next day, remove the chicken wingettes from the salt water solution and set them on a plate.
- In a bowl, mix 240 g Korean fried chicken mix and 240 g cold water together until fully combined.
- Pour the batter onto the chicken wingettes, flipping them to ensure they are evenly coated.
- Add Korean fried chicken mix into a gallon Ziploc bag. Place 6 battered chicken wingettes into the bag and seal it tightly, leaving some air inside.
- Shake the bag vigorously until the chicken wingettes are evenly coated with the flour mixture.
- Remove the chicken wingettes from the Ziploc bag and gently shake off excess flour. Arrange them on a large plate. Repeat for the remaining chicken wingettes.
- Heat oil in a heavy-bottomed pot to 320°F. Gently add the chicken wingettes to the hot oil and fry for approximately 3 minutes or until they turn golden brown and crispy, adjusting the heat to maintain the oil temperature.
- Place the fried chicken wingettes on a wire rack to drain excess oil. Repeat frying in batches as needed.
- After cooling, raise the oil temperature to 355°F. Add the chicken wingettes back into the hot oil, frying for another minute or until they turn crispy and golden brown.
- Remove the chicken wingettes from the oil and place them on a wire rack to further drain.
- In a nonstick frying pan, add all the sauce ingredients. Stir and thicken the sauce over low heat until bubbling. Toss the fried chicken wingettes in the sauce until coated.
- Serve hot.
Mastering Korean Fried Chicken Techniques
Technique
Understanding the frying technique is vital for perfecting Korean fried chicken. Achieving the perfect oil temperature is essential; too low and your chicken could absorb excess oil, becoming greasy, while too high could cause the coating to burn before the chicken cooks through.
It’s also crucial to allow the chicken to rest after the initial fry. This prevents sogginess by allowing steam to escape. The second fry rapidly raises the temperature, sealing in moisture and creating a satisfyingly crunchy exterior.
Tips and Tricks
For the crispiest chicken, a double-dipping method proves effective. Dip the wingettes in batter, coat them with flour, and then repeat the process. This layering builds a thicker, crunchier crust that holds up well to the sauce.
Don’t skimp on the brining time either. The longer the chicken sits in the saltwater solution, the more infused with flavor it becomes. Additionally, feel free to experiment with the spice mix or sauces to match your taste preferences.
Perfecting the Results
Perfecting Results
For a truly extraordinary experience, ensure that each batch of Korean fried chicken hits that golden mark. Test the temperature of the oil with a small piece of batter. If it bubbles and rises to the surface, you’re ready to fry.
Giving the fried chicken a brief rest on a wire rack after frying helps maintain its crispy texture. Coat the chicken with the sauce immediately before serving for optimal crunch. This method keeps your fried chicken as crispy as possible while delivering that wonderfully sticky sauce.
Troubleshooting and Variations
If you find your chicken feels soggy, you might need to adjust your frying technique. Confirm the oil reaches the proper temperature before adding your wingettes. Additionally, using too much batter may lead to a heavier coating.
If you’re looking to alter flavors, feel free to swap spices according to your preferences. Adding more gochujang increases the intensity of heat in the sauce, while adding more honey can sweeten things up. Don’t hesitate to play around with these elements to find your custom combination.
Serving Korean Fried Chicken
Serving and Presentation
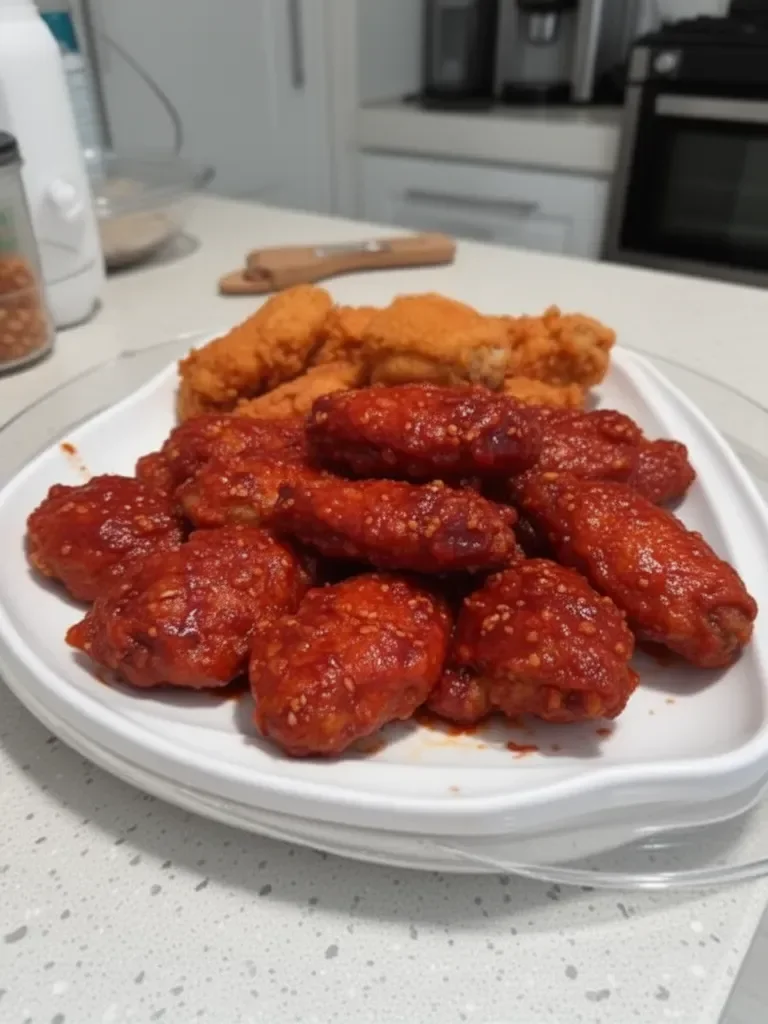
Korean fried chicken deserves a beautiful presentation. Serve the crispy wingettes on a platter and drizzle with extra sauce. Adding a sprinkle of sesame seeds on top enhances visual appeal and adds a touch of nutty flavor.
Pair this dish with sliced scallions or pickled vegetables for a pop of color and texture. Creating a vibrant table setting not only celebrates the meal but also brings excitement to your dining experience.
Pairings and Storage
For side dishes, consider serving Korean fried chicken with shredded cabbage or a refreshing cucumber salad. These bright flavors contrast beautifully with the richness of the chicken.
Store any leftovers in an airtight container in the refrigerator. For the best texture, reheat in the oven to regain crispness rather than using a microwave. Korean fried chicken is best enjoyed fresh, but can conveniently be stored and reheated for quick snacks or meals later.
Conclusion
Korean fried chicken impresses with its crispy texture and bold flavors, making it a welcome addition to any meal. Mastering its preparation takes time but is well worth the effort. From brining the chicken to the double frying technique, each step contributes to an unforgettable dish. Korean fried chicken not only plays a central role at gatherings but also invites friends and family to enjoy delicious moments together. This dish brings a taste of Korea’s culinary culture right to your kitchen and makes every occasion feel special.
Print
Korean Fried Chicken
- Prep Time: 480 minutes
- Cook Time: 10 minutes
- Total Time: 490 minutes
- Yield: 4 servings
- Category: Main Course
- Method: Frying
- Cuisine: Korean
- Diet: None
Description
Crispy and flavorful Korean fried chicken with a spicy-sweet sauce, perfect for gatherings.
Ingredients
- 16 chicken wingettes (or drumettes)
- 500 g cold water (about 2 cups)
- 15 g salt (about 2½ tsp)
- 1 tsp Korean chili powder
- ½ tsp garlic powder (or 1 tsp freshly chopped garlic)
- 240 g Korean fried chicken mix (for the batter)
- 240 g cold water (1 cup)
- 240 g Korean fried chicken mix (in the bag)
- Vegetable oil for frying (fill the medium pot half full)
- 3 tbsp gochujang
- ½ tbsp Korean chili powder
- 1 tbsp soy sauce
- 2 tbsp ketchup
- 4 tbsp honey (or light corn syrup)
- 1 tbsp apple cider vinegar
- 1 tbsp lemon juice
- 2 tsp minced garlic
- 1 tsp minced ginger
- 1 tsp sesame seeds
Instructions
- In a large bowl, mix the salt, Korean chili powder, and garlic powder (or freshly chopped garlic) with cold water until completely dissolved.
- Add the chicken wingettes to the salt water solution, making sure they are completely submerged. Cover the bowl with plastic wrap and refrigerate overnight or for at least 8 hours.
- The next day, remove the chicken wingettes from the salt water solution and set them on a plate.
- In a bowl, mix 240 g Korean fried chicken mix and 240 g cold water together until fully combined.
- Pour the batter onto the chicken wingettes, flipping them to ensure they are evenly coated.
- Add Korean fried chicken mix into a gallon Ziploc bag. Place 6 battered chicken wingettes into the bag and seal it tightly, leaving some air inside.
- Shake the bag vigorously until the chicken wingettes are evenly coated with the flour mixture.
- Remove the chicken wingettes from the Ziploc bag and gently shake off excess flour. Arrange them on a large plate. Repeat for the remaining chicken wingettes.
- Heat oil in a heavy-bottomed pot to 320°F. Gently add the chicken wingettes to the hot oil and fry for approximately 3 minutes or until they turn golden brown and crispy, adjusting the heat to maintain the oil temperature.
- Place the fried chicken wingettes on a wire rack to drain excess oil. Repeat frying in batches as needed.
- After cooling, raise the oil temperature to 355°F. Add the chicken wingettes back into the hot oil, frying for another minute or until they turn crispy and golden brown.
- Remove the chicken wingettes from the oil and place them on a wire rack to further drain.
- In a nonstick frying pan, add all the sauce ingredients. Stir and thicken the sauce over low heat until bubbling. Toss the fried chicken wingettes in the sauce until coated.
- Serve hot.
Notes
For the crispiest chicken, use a double-dipping method. Let the chicken rest after frying for optimal crunch.