

📑 Table of Contents ▶
- Cheesy Bbq Brisket Bacon Mac and Cheese Bombs
- Crafting Cheesy BBQ Brisket Bacon Mac and Cheese Bombs
- Fundamentals
- Preparation/Setup
- Mastering the Technique
- Technique
- Tips/Tricks
- Achieving Perfection
- Perfecting Results
- Troubleshooting/Variations
- Serving, Pairings, and Storage
- Serving/Presentation
- Pairings/Storage
- Conclusion
- FAQs – Cheesy Bbq Brisket Bacon Mac and Cheese Bombs
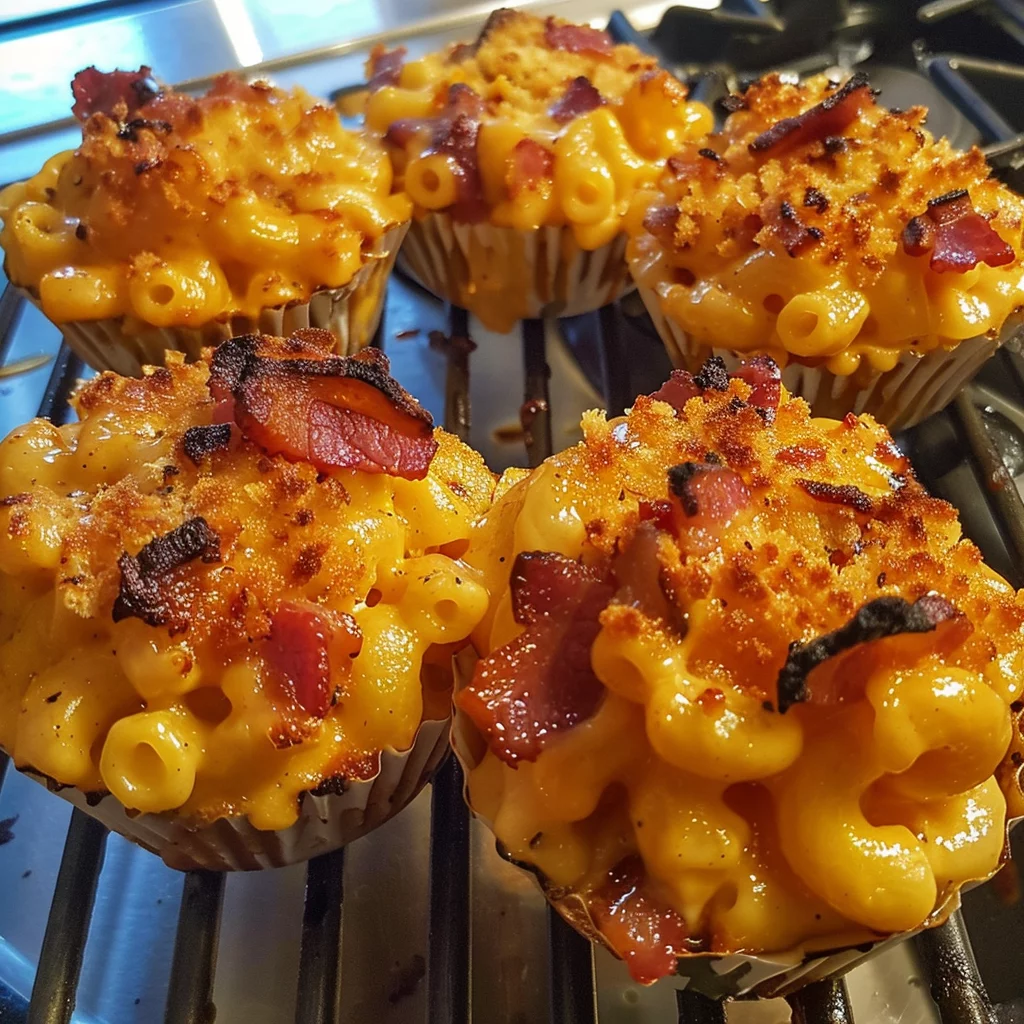
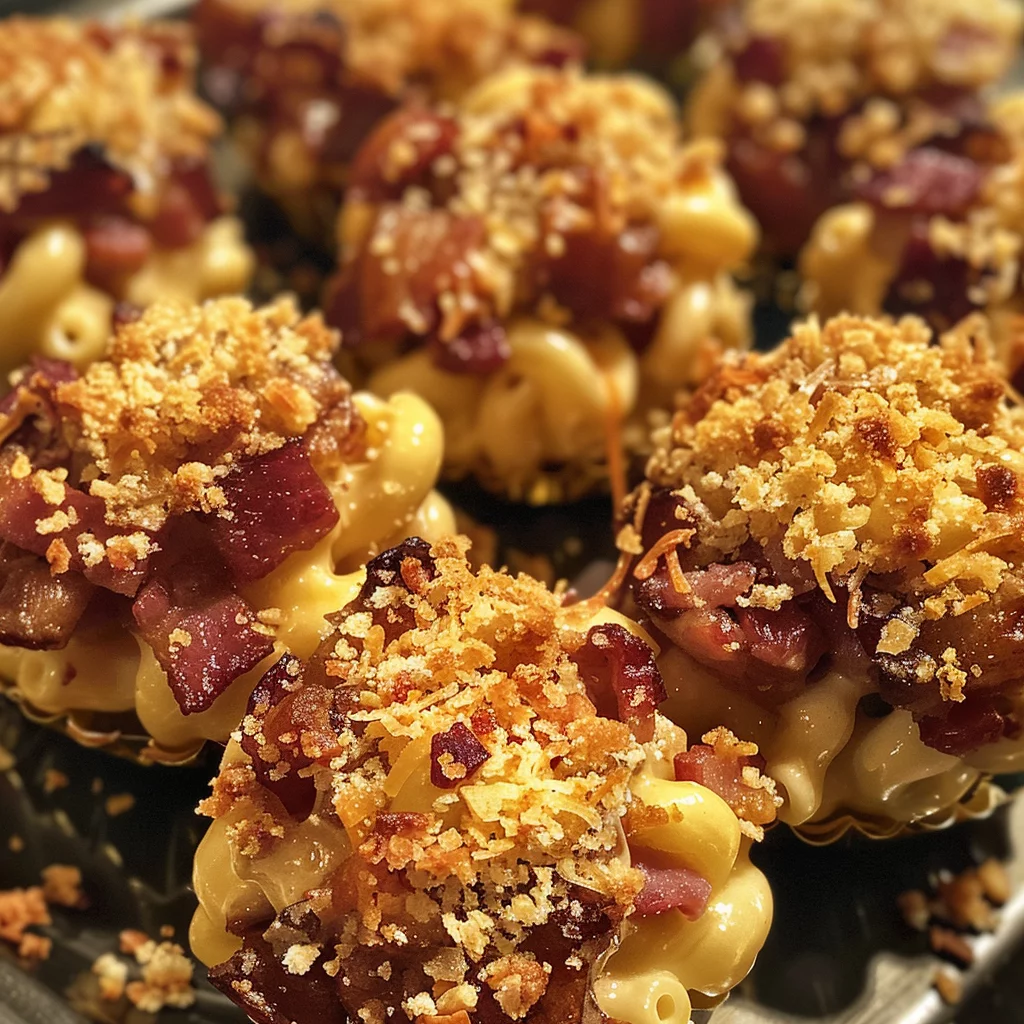
If you’ve ever had the pleasure of tasting Cheesy BBQ Brisket Bacon Mac and Cheese Bombs, you know why they’re a crowd favorite. These delightful bites are a staple for any gathering, combining the comfort of mac and cheese with the robust flavor of barbecue brisket. I remember the first time I made them; the kitchen was filled with laughter and the irresistible aroma of cheddar and BBQ sauce. It was a recipe born out of love for good food and good company.
Each bite is a perfect balance of cheesy goodness and savory brisket, wrapped in a crispy panko breadcrumb coating. These bombs not only satisfy the soul but also bring back memories of fun-filled moments spent with family and friends. The beauty of these delights lies in their simplicity, yet they never fail to impress, elevating any occasion to a new level of deliciousness.
Creating these Cheesy BBQ Brisket Bacon Mac and Cheese Bombs is a journey of flavors and textures. The combination of tender shredded beef, creamy cheeses, and zesty BBQ sauce is a match made in culinary heaven. This recipe has become a signature dish in my family, a testament to its universal appeal and ability to bring people together. Whether you’re a seasoned cook or a kitchen newbie, these bombs promise a gratifying experience.

Cheesy Bbq Brisket Bacon Mac and Cheese Bombs
- Prep Time: 20 minutes
- Cook Time: 15 minutes
- Total Time: 35 minutes
- Yield: 4 servings
- Category: Appetizer
- Method: Frying
- Cuisine: American
Description
Indulge in the ultimate comfort food with our Cheesy BBQ Brisket Bacon Mac and Cheese Bombs recipe. Learn how to create these savory bites today!
Ingredients
- 2 cups cooked beef, shredded (about 300 g)
- 1 cup BBQ sauce (240 ml)
- 8 ounces macaroni (225 g)
- 2 cups shredded cheddar cheese (200 g)
- 1 cup shredded mozzarella cheese (100 g)
- 1 cup panko breadcrumbs (100 g)
- 1 tablespoon butter (14 g)
- 1 teaspoon garlic powder (5 g)
- 1 teaspoon onion powder (5 g)
- 1 teaspoon smoked paprika (5 g)
- Salt to taste
- Pepper to taste
- 2 large eggs
- 2 tablespoons milk (30 ml)
- Vegetable oil for frying
Instructions
- Cook the elbow macaroni according to package instructions until al dente; drain and set aside.
- In a large pan, combine the shredded brisket and barbecue sauce; heat on medium until warm.
- Add the cooked macaroni to the brisket mixture and stir well to combine.
- Mix in the shredded cheddar and mozzarella cheeses until melted and fully integrated.
- Season the mixture with garlic powder, onion powder, smoked paprika, salt, and pepper.
- Let the mac and cheese mixture cool slightly, then shape into golf-ball-sized balls.
- In a small bowl, whisk together the eggs and milk; set aside.
- Place the panko breadcrumbs in another shallow bowl.
- Roll each mac and cheese ball in the egg mixture, then coat thoroughly with panko breadcrumbs.
- Heat vegetable oil in a deep fryer or large pot to 350°F (175°C).
- Fry the coated mac and cheese balls in batches until golden brown and crispy, about 3-4 minutes.
- Remove from oil and drain on paper towels.
- Serve hot and enjoy your Cheesy BBQ Brisket Bacon Mac and Cheese Bombs.
Notes
- Consider enhancing the flavor by using a smoky BBQ sauce or adding chipotle peppers to the brisket mixture.
- Experiment with alternative cheeses like pepper jack or gouda for a unique twist.
- For a vegetarian option, substitute beef with pulled jackfruit or mushrooms for a delicious alternative.
Crafting Cheesy BBQ Brisket Bacon Mac and Cheese Bombs
Fundamentals
At the heart of Cheesy BBQ Brisket Bacon Mac and Cheese Bombs lies a simple yet flavorful combination of ingredients. The key to success is starting with quality components: tender cooked beef, rich BBQ sauce, and a harmonious blend of cheddar and mozzarella cheeses. These elements create the robust base that defines the dish, ensuring each bite is packed with flavor.
Understanding the role of each ingredient is crucial. The shredded beef provides a hearty texture, while the BBQ sauce infuses a smoky, sweet note. The cheeses bind everything together, offering a creamy, gooey center that’s utterly satisfying. Meanwhile, the panko breadcrumbs add a necessary crunch, creating a perfect contrast to the soft interior.
Preparation/Setup
Begin by preparing the macaroni according to the package instructions, ensuring it’s cooked to al dente perfection. This step is vital as overcooked pasta can become mushy, affecting the overall texture of the bombs. While the pasta cooks, shred the beef and warm it with the BBQ sauce in a large pan, creating a savory, aromatic base.
Once the macaroni is ready, combine it with the brisket mixture, stirring in the cheddar and mozzarella cheeses until they melt seamlessly. This mixture should be seasoned with garlic powder, onion powder, smoked paprika, salt, and pepper, enhancing the depth of flavor. Allow the mixture to cool slightly before shaping it into golf-ball-sized portions, preparing them for their crunchy coating.
Mastering the Technique
Technique
The technique for these bombs is straightforward but requires attention to detail. Once the mac and cheese mixture is cooled and shaped, the next step is coating them for frying. This involves a two-step process: first, dipping each ball in a mixture of whisked eggs and milk, then rolling them in panko breadcrumbs.
This double coating ensures a crispy, golden exterior that contrasts beautifully with the creamy interior. It’s crucial to coat the balls thoroughly, pressing the breadcrumbs gently to adhere them well. This step is essential for achieving that desirable crunch that makes these bombs irresistible.
Cheesy Bbq Brisket Bacon Mac and Cheese Bombs
Tips/Tricks
For best results, make sure the oil is heated to the right temperature of 350°F (175°C) before frying. This ensures that the bombs cook evenly, achieving a perfect, golden-brown crust. Fry in small batches to prevent the oil temperature from dropping, which could lead to soggy results.
Maintain consistency in size when shaping the bombs; this ensures even cooking. If you love creative comfort food, you’ll definitely want to try these BBQ Brisket Bacon Loaded Cheese Fry Bombs—a fun twist on classic flavors. For a variation, consider adding a touch of spice with a dash of cayenne pepper to the cheese mixture, or experiment with different cheeses for a unique flavor profile.
Achieving Perfection
Perfecting Results
Perfecting Cheesy BBQ Brisket Bacon Mac and Cheese Bombs involves practice and patience. The goal is a crisp exterior with a warm, gooey center. It’s a delicate balance achieved by monitoring frying time closely—typically around 3-4 minutes per batch. The visual cue of a golden hue is a reliable indicator that they’re ready.
Rest the cooked bombs on paper towels immediately after frying to absorb any excess oil, preserving their crunch. This small step is crucial for maintaining the integrity of the dish. If you’re inspired by these flavors, consider trying BBQ Brisket Bacon Loaded Cheese Waffle Bombs for another delightful culinary adventure.
Troubleshooting/Variations
If your bombs aren’t holding their shape, ensure the mixture isn’t too warm when forming the balls. A chilled mixture is easier to handle and less likely to fall apart. If the coating isn’t adhering well, ensure the egg mixture is evenly applied before rolling in breadcrumbs.
For those interested in exploring more comfort food variations, these Buffalo Bacon Mac and Cheese Stuffed Pretzel Bombs offer a spicy twist. Experiment with different seasonings or cheeses to customize the flavor to your liking.
Serving, Pairings, and Storage
Serving/Presentation
When it comes to serving Cheesy BBQ Brisket Bacon Mac and Cheese Bombs, presentation is key. Arrange them on a platter with a side of extra BBQ sauce for dipping, garnished with fresh herbs for a pop of color. These bombs are a hit at parties, offering both visual appeal and irresistible flavor.
Consider serving them alongside a fresh salad or crunchy slaw to balance the richness. These bombs are a versatile addition to any menu, perfect as appetizers or main course accompaniments. For an additional flair, try pairing them with BBQ Bacon Tater Tot Cheeseburger Casserole, a dish that complements their savory profile.
Cheesy Bbq Brisket Bacon Mac and Cheese Bombs
Pairings/Storage
Store any leftover bombs in an airtight container in the refrigerator for up to three days. To reheat, use an oven to maintain their crispiness, avoiding microwaving which can make them soggy. For those who enjoy a creative take on familiar flavors, these Mushroom BBQ Bacon Cheeseburger Stuffed Peppers offer a unique pairing option.
If you find yourself with extra mac and cheese mixture, consider freezing it before frying. This allows you to prepare the bombs ahead of time, frying them fresh when needed. It’s a convenient way to enjoy this dish without compromising on taste or texture.
Conclusion
Cheesy BBQ Brisket Bacon Mac and Cheese Bombs are a delightful fusion of flavors and textures, offering comfort and excitement in every bite. Their beauty lies in their simplicity and the joy they bring to any gathering. By mastering the technique and understanding the ingredients, you can create a dish that’s sure to impress.
These bombs are not just about taste; they’re about creating memories and sharing moments with loved ones. Whether you’re making them for a special occasion or a casual get-together, they promise to be a hit. Embrace the creativity and fun that comes with preparing this dish, and you’ll find it becomes a cherished part of your culinary repertoire.
