

📑 Table of Contents ▶
Baked Coconut Rice
The first time I tasted baked coconut rice, I couldn’t believe the combination of flavors. It evoked memories of tropical vacations, sunshine, and simple beachside meals. Each bite delivered a sweet, creamy sensation, instantly transporting me back to lazy summer days. The rich coconut milk melded beautifully with the white rice, creating a dish that comforted both body and soul.
Baked coconut rice holds a special place in my heart because it’s an effortless way to impress family and friends during gatherings. Its simplicity makes it incredibly accessible, while its flavors make it feel indulgent. In just a few steps, you can create a dish that feels fancy yet rustic, a perfect addition to any meal.
As the aroma fills your kitchen, anticipation builds, and your guests will flock to the table. Each spoonful carries the spirit of tropical islands, making your dining experience feel like a mini getaway. With that in mind, let’s dive into making this easy, delicious baked coconut rice that will keep everyone coming back for more.
Baked Coconut Rice Essentials
Fundamentals
Baked coconut rice epitomizes the ease of cooking with minimal ingredients while delivering a luscious flavor profile. At its core, this dish requires just a handful of items: white rice, coconut milk, sugar, and salt. Each ingredient plays a vital role in creating a harmonious balance.
White rice serves as the canvas for this tropical delight. It absorbs the coconut milk and sweetness, resulting in a creamy texture that’s simply irresistible. Coconut milk brings richness and depth, infusing the dish with notes of the tropics. Sugar enhances the overall sweetness while the salt ensures a balanced flavor.
Preparation/Setup
Preparation for baked coconut rice couldn’t be simpler. Start by preheating the oven to 375°F (190°C). This ensures that your dish will bake evenly, yielding perfectly tender rice. Then, gather your baking dish and combine the rice, coconut milk, water, sugar, and salt. Stir well to ensure everything blends seamlessly, enhancing every grain of rice with coconut goodness.
Cover the dish tightly with aluminum foil. This helps trap steam, allowing the rice to cook properly without drying out. As you slide it into the preheated oven, envision the delightful dish that awaits you in just 25-30 minutes.
Ingredients
To craft the perfect baked coconut rice, you’ll need the following ingredients:
- 1 cup white rice
- 1 cup coconut milk
- 1 cup water
- 1 tablespoon sugar
- 1/2 teaspoon salt
- 1/4 cup shredded coconut (optional)
These components meld together beautifully, but feel free to adjust the shredded coconut based on your preference.
Directions
- Preheat your oven to 375°F (190°C).
- In a baking dish, combine the rice, coconut milk, water, sugar, and salt. Stir well to mix.
- Cover the dish tightly with aluminum foil.
- Bake in the preheated oven for 25-30 minutes, or until all the liquid is absorbed and the rice is tender.
- If using, sprinkle shredded coconut on top and bake uncovered for an additional 5-10 minutes.
- Remove from the oven and fluff with a fork before serving.
Crafting Coconut Rice Excellence
Technique
Baking is a wonderful cooking technique that requires minimal supervision, making it ideal for busy cooks. The key lies in accurately measuring your ingredients. Ensure you have precisely one cup of rice and one cup of coconut milk for the best results. The ratio is crucial; too much or too little will affect the final texture.
After mixing the ingredients, use aluminum foil to cover the dish tightly. This step traps steam and helps cook the rice evenly. Avoid opening the foil too early; patience is your ally here.
Tips & Tricks
Perfecting baked coconut rice involves a few insider tips. To enhance the coconut flavor, consider using full-fat coconut milk. This will yield a richer, creamier dish. Additionally, rinsing the rice before cooking helps remove excess starch, resulting in fluffier grains.
When adding the optional shredded coconut, toast it lightly before sprinkling on top. To do this, place it in a dry skillet over medium heat. Stir occasionally, watching carefully to prevent burning. This toastiness adds depth and a beautiful golden hue to your finished dish.
Perfecting Baked Coconut Rice
Perfecting Results
After baking, ensure you take the time to fluff the rice. Use a fork to gently separate the grains, allowing the steam to escape. This step ensures the rice remains light and airy, avoiding any clumping.
Adjust the mixture’s sweetness by tasting the rice before baking. If you prefer it sweeter, add another teaspoon of sugar. Respecting your palate leads to a more satisfying dish.
Troubleshooting/Variations
Should your baked coconut rice turn out too sticky, consider a couple of adjustments next time. Rinse the rice before cooking to remove excess starch. If you want to try a different texture, use jasmine or basmati rice instead of standard white rice. Both varieties complement the dish’s flavor, lending a subtle fragrance.
You can mix in extras such as chopped fresh fruit or nuts for added flavor and texture. Diced mango, for instance, pairs wonderfully with coconut, creating a delightful contrast.
Serving Baked Coconut Rice
Serving & Presentation
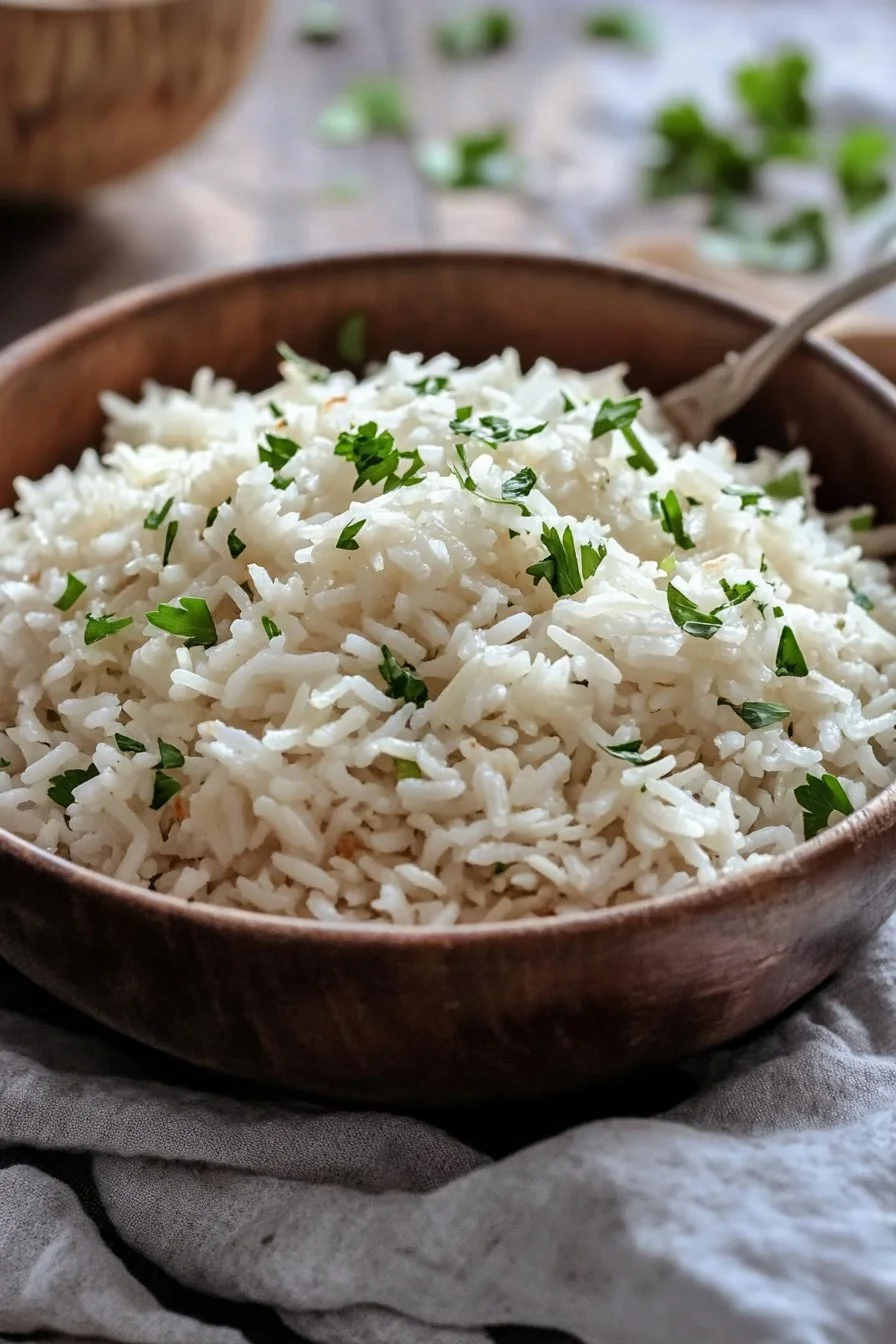
When presenting baked coconut rice, consider a simple, elegant approach. Scoop the rice into a serving bowl and garnish with additional toasted shredded coconut. This adds visual appeal while enhancing the dish’s flavor. For an added touch, sprinkle some fresh mint leaves on top; their vibrant green color creates a striking contrast against the creamy rice.
Baked coconut rice complements many meals. Serve it alongside grilled meats or vegetarian options for a complete dining experience. This dish can act as both a side and a main, adapting to your table’s needs.
Pairings & Storage
Baked coconut rice pairs beautifully with tropical flavors. Enjoy it alongside grilled chicken or a fresh mango salsa for a vibrant meal. For vegetarian options, consider serving it with a stir-fry featuring colorful vegetables.
To store leftovers, place the rice in an airtight container, refrigerating for up to four days. Reheat in the oven or microwave, ensuring it warms evenly. If the rice dries out, splash a little coconut milk or water before reheating to restore moisture.
Baked coconut rice creates a delightful experience for both cooking and dining. The balance of flavors invites creativity, and its deliciousness makes it a memorable dish for any gathering. Enjoy cooking this simple yet stunning recipe, embracing the tropical vibes it brings to your kitchen.
Print
Baked Coconut Rice
- Prep Time: 10 minutes
- Cook Time: 30 minutes
- Total Time: 40 minutes
- Yield: 4 servings
- Category: Side Dish
- Method: Baking
- Cuisine: Tropical
- Diet: Vegetarian
Description
A delicious and easy baked coconut rice recipe that transports you to tropical islands with each creamy bite.
Ingredients
- 1 cup white rice
- 1 cup coconut milk
- 1 cup water
- 1 tablespoon sugar
- 1/2 teaspoon salt
- 1/4 cup shredded coconut (optional)
Instructions
- Preheat your oven to 375°F (190°C).
- In a baking dish, combine the rice, coconut milk, water, sugar, and salt. Stir well to mix.
- Cover the dish tightly with aluminum foil.
- Bake in the preheated oven for 25-30 minutes, or until all the liquid is absorbed and the rice is tender.
- If using, sprinkle shredded coconut on top and bake uncovered for an additional 5-10 minutes.
- Remove from the oven and fluff with a fork before serving.
Notes
For a richer flavor, use full-fat coconut milk. Rinsing the rice before cooking helps achieve fluffier grains. Consider adding toasted shredded coconut for enhanced flavor.
