
📑 Table of Contents ▶
Apple Bars
The kitchen fills with enticing autumn aromas as apples bake into gooey perfection. Apple bars remind many of cherished moments spent in cozy kitchens, where family recipes come to life. This classic treat combines the comforting flavors of cinnamon and brown sugar with the crispness of freshly chopped apples, creating a dessert that feels like a warm hug.
Watching apple bars transform in the oven is pure magic. The scent wafts through the air, and curiosity builds as the golden crust browns beautifully. Lifting a warm square from the pan and noticing how the crust crumbles slightly proves irresistibly satisfying. These bars make any gathering brighter, inviting heartwarming conversations and laughter.
Baking apple bars is more than just preparing a dessert; it connects us to traditions and family memories. Each bite transports you to a moment of sweetness, making it essential for fall festivities, potlucks, or simply enjoying a cozy afternoon. With a few simple ingredients, you can create these delightful apple bars that win hearts and taste buds alike.
Apple Bars Essentials
Fundamentals
Apple bars are the perfect blend of buttery crust and spiced apple filling. Many appreciate these bars not just for their flavor, but also for their simplicity. The main components include a crumbly oat-based crust, a cinnamon-spiced apple filling, and a sweet glaze that ties it all together. Use quality ingredients to elevate the flavors, making each bite memorable.
The blend of old-fashioned oats into the crust adds unique texture. It enhances the bars and makes each piece satisfyingly chewy. The apples provide a juicy contrast while bringing a natural sweetness balanced by the spices. Together, these ingredients create a delicious fall treat that’s wholesome and tasty.
Preparation/Setup
Start by preheating your oven to 350°F and lining a 9×13-inch pan with parchment paper. This makes for easier removal after baking and ensures the bars don’t stick. Preparing your workspace is essential; have your ingredient lineup ready to streamline the process. Measure out the flour, oats, sugars, and spices so they’re easily accessible.
Gathering ingredients like cold, cubed butter and peeled, chopped apples is also necessary. As you prep, consider using freshly harvested apples for the best flavor. Select a mix of sweet and tart varieties to create a well-rounded filling. The right combination will bring a stunning depth of flavor to your apple bars.
Ingredients
To create these delightful apple bars, you will need:
- 2 cups all-purpose flour
- 1 1/2 cups old-fashioned oats
- 1/2 cup granulated sugar
- 3/4 cup brown sugar
- 1 cup unsalted butter, cold and cubed
- 1/2 teaspoon salt
- 1 1/2 teaspoons ground cinnamon
- 1/4 teaspoon nutmeg (optional)
- 3 cups apples, peeled and chopped
- 1 tablespoon lemon juice
- 1 tablespoon cornstarch
- 1 teaspoon vanilla extract
- 1/2 cup powdered sugar
- 1–2 tablespoons milk (for glaze)
Directions
Begin by mixing the flour, oats, both sugars, salt, and cinnamon in a large bowl. Cut in the cold, cubed butter until the mixture appears crumbly, resembling coarse sand. It’s essential to keep the butter cold for a flaky texture. Reserve 1 ½ cups of this mixture for topping later.
Press the remaining mixture into the lined baking pan. Bake this base for 10–12 minutes until it sets but does not brown. While the crust bakes, prepare the apple filling. In another bowl, combine the chopped apples with lemon juice, cornstarch, vanilla extract, additional cinnamon, and nutmeg if desired. Tossing the apples ensures even coating.
Once the crust is ready, spread the apple mixture evenly over it. Sprinkle the reserved topping over the apples, ensuring even coverage. Return the entire pan to the oven, baking for another 30–35 minutes. Watch for a golden brown top and bubbling filling.
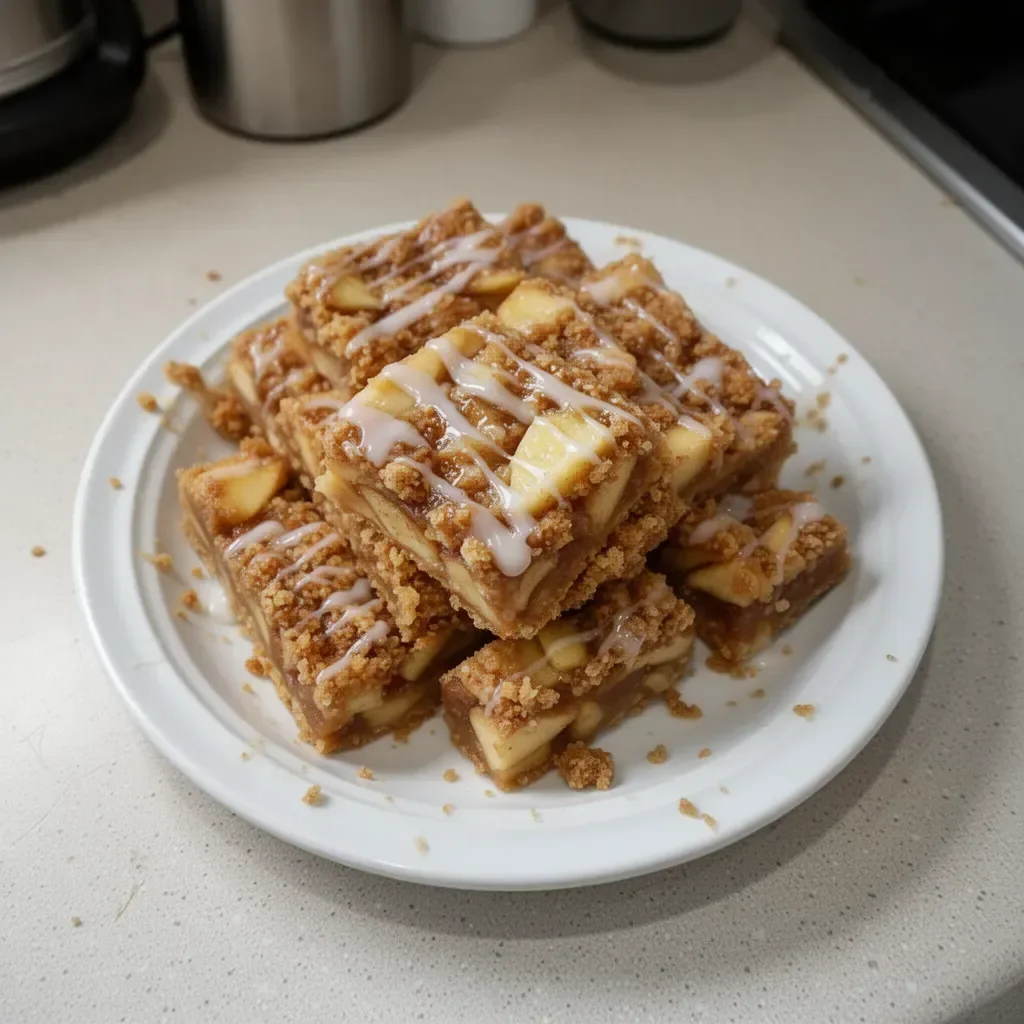
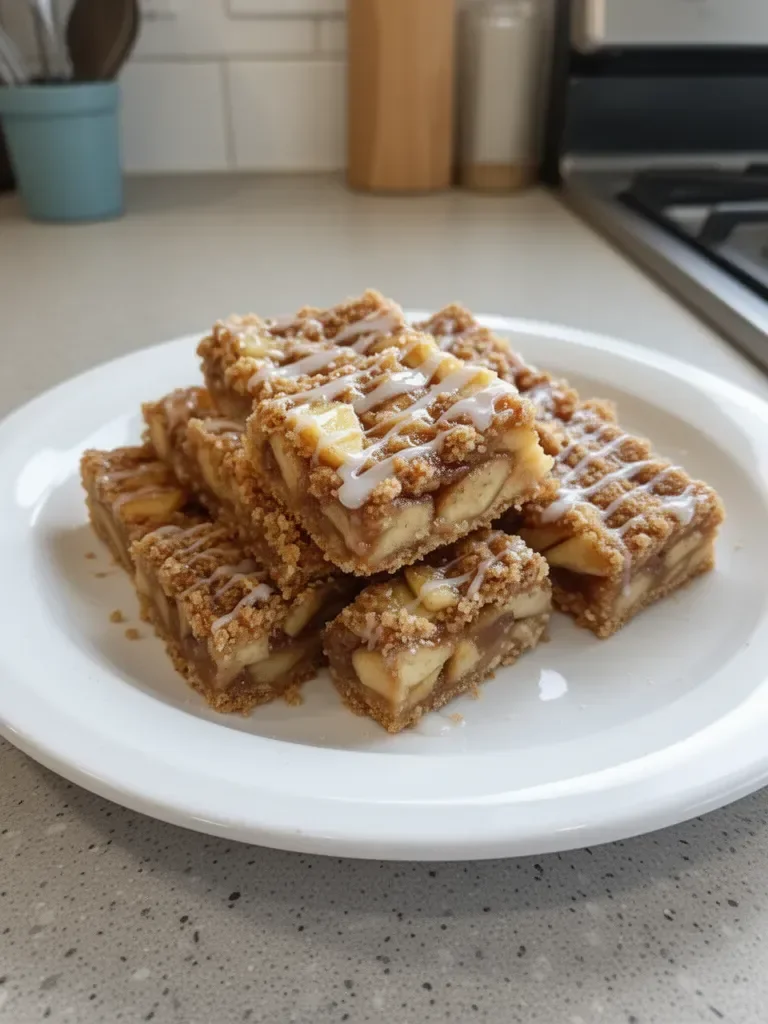
After baking, cool the pan completely before slicing into bars. Prepare the glaze while waiting. Whisk together powdered sugar and milk until smooth. Drizzle this glaze over the cooled bars for that perfect finishing touch.
Crafting Apple Bars
Technique
Mastering the technique of making apple bars ensures consistent and delicious outcomes. First, pay attention to the temperature of your ingredients. Cold butter creates a flakier crust, so keep it in the fridge until ready. Use a pastry cutter or your fingers for cutting butter into flour to achieve that crumbly texture.
While baking, check for doneness by looking for a golden color and bubbling edges. If unsure, insert a toothpick into the center. It should come out clean, indicating the bars have cooked through perfectly. Allowing plenty of cooling time is essential before slicing, as it helps set the filling, preventing a messy serving.
Tips/Tricks
Using a mix of apple varieties enhances flavor complexity. Combine tart apples like Granny Smith with sweeter ones like Fuji or Honeycrisp for a delightful blend. Don’t skip the lemon juice, as it brightens the apple flavor and prevents browning.
Baking in a parchment-lined pan makes removing the bars easier. When cooling, run a knife along the edges before lifting with the parchment paper. For added texture, consider adding nuts or raisins to the apple mixture for crunch and chewiness.
Perfecting Apple Bars
Perfecting Results
To achieve perfection in your apple bars, always ensure precise measurements. Baking is a science, and accurate quantities impact the final result. If you prefer a sweeter bar, slightly increase the granulated sugar while keeping the apple filling balanced for optimal taste.
Experimenting with spices can yield distinct flavors; using ginger or allspice can add depth. Adjusting the baking time based on your oven is also key. Ovens can vary, so keep an eye on your bars to avoid overbaking, resulting in a dry crust.
Troubleshooting/Variations
If your bars become too dry, consider reducing bake time slightly. Using slightly softened butter rather than cold may also result in a denser texture. If the crust is too crumbly, add a teaspoon of water to the mixture to help bind if needed.
Feel free to customize the apple bars by adding caramel pieces to the filling or swapping spices based on your preference. Maple syrup can be used instead of granulated sugar for a different flavor profile.
Serving Apple Bars
Serving/Presentation
Serving apple bars can be as simple or as elegant as you desire. Slice them into squares and place them on a beautiful platter for a casual gathering. For a more refined presentation, serve each bar alongside a dollop of whipped cream or a scoop of vanilla ice cream.
Dusting the bars with an extra sprinkle of powdered sugar adds a charming touch. Pair the bars with a warm beverage like apple cider or freshly brewed coffee for an inviting dessert experience.
Pairings/Storage
Apple bars pair beautifully with a variety of sides like fresh whipped cream or ice cream. Alternatively, serve them warm with a scoop of yogurt for a more wholesome treat.
For storage, keep the bars in an airtight container to maintain freshness. Properly stored, they can last for up to a week. Alternatively, they also freeze well for up to three months, allowing you to enjoy apple bars anytime the craving strikes.
Apple bars capture the essence of wholesome baking, perfect for sharing with loved ones or relishing during a cozy evening at home. The rich flavors and textures will surely leave everyone asking for seconds.
Enjoy every slice, savoring the memory of each warm, cinnamon-spiced bite.
Print
Apple Bars
- Prep Time: 15 minutes
- Cook Time: 45 minutes
- Total Time: 60 minutes
- Yield: 12 servings
- Category: Dessert
- Method: Baking
- Cuisine: American
- Diet: Vegetarian
Description
Delicious apple bars with a buttery oat crust and spiced apple filling, perfect for fall gatherings.
Ingredients
- 2 cups all-purpose flour
- 1 1/2 cups old-fashioned oats
- 1/2 cup granulated sugar
- 3/4 cup brown sugar
- 1 cup unsalted butter, cold and cubed
- 1/2 teaspoon salt
- 1 1/2 teaspoons ground cinnamon
- 1/4 teaspoon nutmeg (optional)
- 3 cups apples, peeled and chopped
- 1 tablespoon lemon juice
- 1 tablespoon cornstarch
- 1 teaspoon vanilla extract
- 1/2 cup powdered sugar
- 1–2 tablespoons milk (for glaze)
Instructions
- Preheat your oven to 350°F and line a 9×13-inch pan with parchment paper.
- Mix the flour, oats, both sugars, salt, and cinnamon in a large bowl.
- Cut in the cold, cubed butter until the mixture resembles coarse sand.
- Reserve 1 ½ cups of this mixture for topping later.
- Press the remaining mixture into the lined baking pan and bake for 10–12 minutes until it sets.
- Combine the chopped apples with lemon juice, cornstarch, vanilla extract, and remaining spices in another bowl.
- Spread the apple mixture evenly over the crust.
- Sprinkle the reserved topping over the apples.
- Bake for another 30–35 minutes until golden brown.
- Cool the pan completely before slicing into bars.
- Whisk together powdered sugar and milk until smooth for the glaze.
- Drizzle the glaze over the cooled bars.
Notes
Using a mix of apple varieties enhances flavor complexity. Serve with whipped cream or ice cream for an added treat.
