
📑 Table of Contents ▶
- Part 1 — Baking Strawberry Kiss Cookies
- Fundamentals
- Preparation/setup
- Directions
- Part 2 — Making Strawberry Kiss Cookies Perfectly
- Technique
- Tips/tricks
- Part 3 — Perfecting Results
- Perfecting results
- Troubleshooting/variations
- Part 4 — Serving Strawberry Kiss Cookies
- Serving/presentation
- Pairings/storage
- Conclusion
Strawberry Kiss Cookies
The first time I made Strawberry Kiss Cookies, I was taken back to childhood summers spent in my grandmother’s kitchen. She had this magical ability to whip up simple ingredients into delightful treats that felt like pure joy. On several occasions, we would mix in strawberry gelatin for that vibrant color and sweet flavor. Days spent baking brought us closer together, and the promise of fresh cookies always filled the air with excitement.
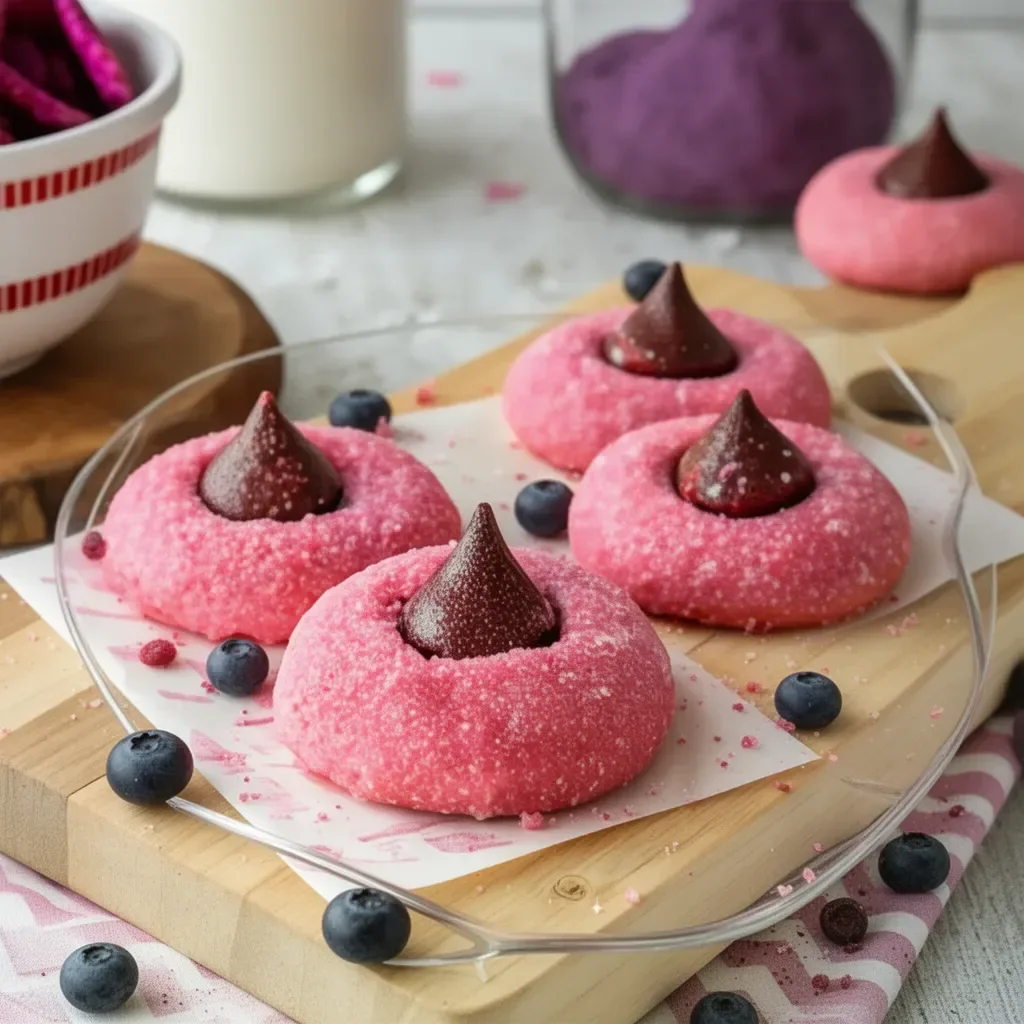
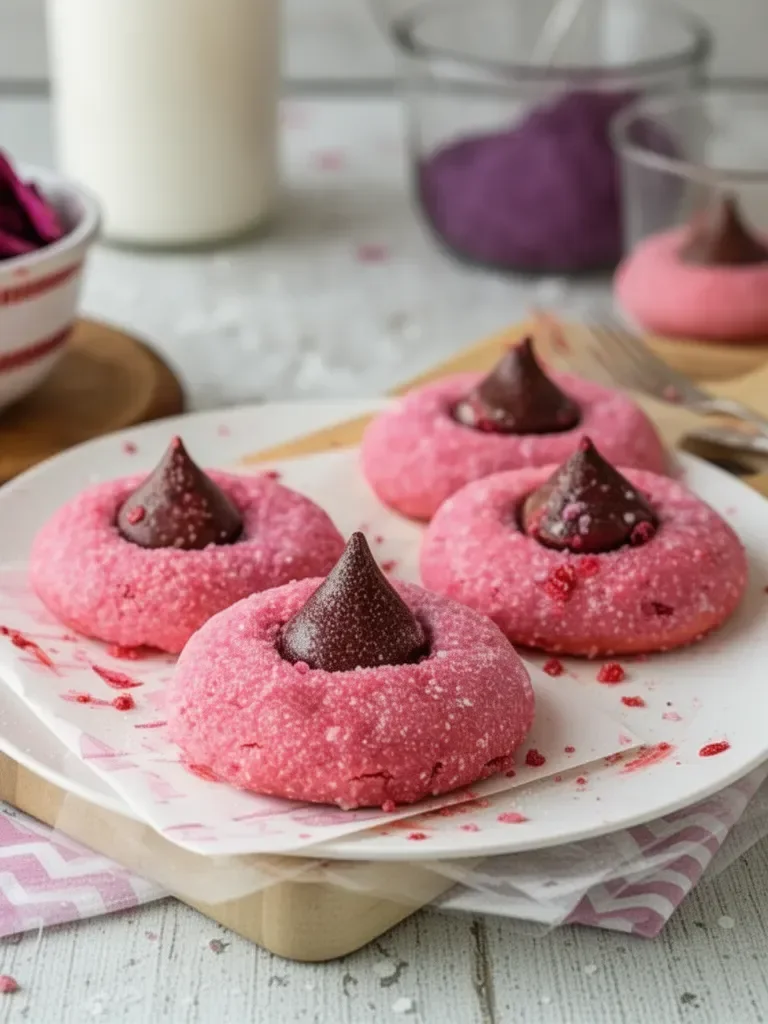
These Strawberry Kiss Cookies are a playful take on traditional butter cookies. Their soft, pink texture and delightful strawberry essence make them irresistible, especially with a melty chocolate kiss nestled in the center. Nothing compares to the memory of breaking one open, watching the chocolate slightly ooze, and savoring that first bite. The confectionery sweetness balances perfectly with the berry undertones, creating a cookie that feels both nostalgic and fresh.
Baking Strawberry Kiss Cookies brings that comforting childhood memory into your kitchen. They make for an excellent treat at parties or family gatherings, sparking joy with their color and sweetness. With just a few simple steps, you can create these delightful cookies that will undoubtedly become a new favorite for friends and family alike.
Part 1 — Baking Strawberry Kiss Cookies
Fundamentals
Baking Strawberry Kiss Cookies requires a few essential components. The combination of unsalted butter and granulated sugar creates a rich base, while the addition of strawberry-flavored gelatin adds a unique twist. This ingredient provides not only flavor but also the signature pink hue that’s fun and inviting. The eggs and vanilla extract contribute moisture and enhance sweetness, making the cookies both tender and flavorful.
In creating this cookie, the precise balance of wet and dry ingredients plays a critical role. All-purpose flour forms the backbone of the dough, giving structure, and the baking powder ensures these cookies rise beautifully in the oven. When combined, these ingredients create a soft and moldable dough, perfect for shaping.
Preparation/setup
Keep the preparation simple and efficient to make great Strawberry Kiss Cookies. Start by gathering the required ingredients: unsalted butter, sugar, egg, vanilla extract, almond extract (if you’re feeling adventurous), all-purpose flour, baking powder, salt, and strawberry-flavored gelatin mix.
Prepping everything in advance sets you up for success. Ensure that the butter is softened to room temperature for easy mixing. This step helps achieve the right consistency and texture. Additionally, pre-chill your mixing bowls and baking trays. A little chill can prevent the dough from spreading excessively during baking, resulting in prettily shaped cookies.
Ingredients
- 1 cup (226g) unsalted butter, softened
- 1 cup (200g) granulated sugar
- 1 large egg, at room temperature
- 1 tsp vanilla extract
- 1/2 tsp almond extract (optional)
- 2 cups + 2 tbsp (280g) all-purpose flour
- 1 tsp baking powder
- 1/4 tsp salt
- 1 package (3 oz) strawberry-flavored gelatin mix
- 1/4 cup powdered sugar, for dusting
- 24-30 chocolate kiss candies, unwrapped
Directions
- In a large mixing bowl, beat the softened butter and granulated sugar until light and fluffy, about 2-3 minutes.
- Incorporate the egg, vanilla extract, and almond extract (if desired), mixing until everything is well combined.
- Gradually mix in the strawberry-flavored gelatin powder until fully incorporated.
- In a separate bowl, whisk together the flour, baking powder, and salt.
- Gradually add the dry mixture to the wet ingredients, mixing on low speed until a soft, pink dough forms. If the dough seems sticky, add 1-2 extra tablespoons of flour as needed.
- Scoop about 1 tablespoon of the dough and roll it into a smooth ball in your hands. Place the balls on a lined baking sheet.
- Chill the dough balls in the refrigerator for at least 1 hour or overnight for optimal results.
- Preheat the oven to 350°F (175°C) and arrange the chilled dough balls on a parchment-lined baking sheet with about 2 inches of space between them.
- Bake for 11-13 minutes, until the edges appear set.
- Let the cookies sit on the baking sheet for 2 minutes before pressing a chocolate kiss into the center.
- Allow cookies to cool completely on a wire rack before serving.
- Dust the cooled cookies with powdered sugar just prior to serving for a sweet finishing touch.
Part 2 — Making Strawberry Kiss Cookies Perfectly
Technique
Perfecting Strawberry Kiss Cookies requires mastering the dough and baking techniques. Start by mixing the butter and sugar well, as this aerates the mixture and provides a light texture. Gradually incorporate the egg and extracts to prevent curdling, which helps maintain the silky consistency of the dough.
When mixing in the dry ingredients, keep the speed low to avoid overworking the dough. A soft dough is crucial for preventing tough cookies. The rolling process should be gentle as you form the dough into balls, which helps maintain that perfect round shape.
Tips/tricks
For the best results with Strawberry Kiss Cookies, consider chilling the dough more extensively, if possible. This step allows the flavors to meld and enhances the cookies’ overall texture. Utilize parchment paper both for lining baking sheets and for easy cookie removal once baked.
Don’t press an indentation into the dough before baking. This can lead to excess spreading. Instead, allow the cookies to bake undisturbed before adding the chocolate kisses. Press the kisses into the cookies while still warm. This technique ensures that the chocolate adheres without melting completely.
Part 3 — Perfecting Results
Perfecting results
Achieving perfection with Strawberry Kiss Cookies is all about timing and temperature. Ensuring the butter is perfectly softened creates a delicate crumb, while baking them just until the edges are set yields a soft center.
For an added dimension, consider playing with the almond extract. While optional, it harmonizes beautifully with the strawberry flavor, elevating your cookies. Adjust the quantity to suit your taste preference, but even a dash can enhance the overall profile of the cookie.
Troubleshooting/variations
If your cookies spread too much, reconsider both the chilling time of the dough and the oven temperature. About 1-2 hours in the fridge will significantly help with maintaining shape during the baking process.
Variation possibilities abound for Strawberry Kiss Cookies. Try swapping the strawberry gelatin for a different flavor, such as raspberry or cherry, for a new twist on the classic. Additionally, you might experiment with different types of chocolates or even peanut butter-filled candies in place of the traditional chocolate kisses for an interesting spin.
Part 4 — Serving Strawberry Kiss Cookies
Serving/presentation
Presenting Strawberry Kiss Cookies is as fun as making them. Arrange them neatly on a colorful plate or in a candy jar for a festive display. Their bright colors and shiny chocolate centers attract attention, making them perfect for gatherings.
For parties, offering these cookies alongside other treats provides variety while honoring their unique flavor. Their eye-catching pink hue lends a playful atmosphere to any dessert table. Consider garnishing with fresh strawberries or mint leaves to enhance visual appeal and resonate with the cookie’s refreshing flavor.
Pairings/storage
These cookies pair wonderfully with a variety of refreshments. Serve them alongside ice-cold milk to complement the sweetness or offer a selection of coffee, tea, or lemonade for a delightful afternoon treat.
For storage, keep Strawberry Kiss Cookies in an airtight container at room temperature. They retain their delightful flavor and texture for about a week. If you plan to store them longer, consider freezing the dough balls before baking. This approach allows you to enjoy freshly baked cookies whenever the craving strikes without the prep time.
Conclusion
The delightful aspect of Strawberry Kiss Cookies lies in their ability to evoke cherished memories while crafting new experiences. Each cookie captures the essence of nostalgic sweetness paired with the rich chocolate center that brings joy in every bite. Creating these cookies requires simple ingredients, playful techniques, and a sprinkle of love. They shine brightly at any gathering, beckoning you to take just one more. With each bite, you’ll be transported back to that magical kitchen filled with warmth, laughter, and the unforgettable aroma of freshly baked cookies.
Print
Strawberry Kiss Cookies
- Prep Time: 60 minutes
- Cook Time: 13 minutes
- Total Time: 73 minutes
- Yield: 24 cookies
- Category: Dessert
- Method: Baking
- Cuisine: American
- Diet: Vegetarian
Description
Delightful strawberry cookies with a chocolate kiss in the center, evoking childhood memories of baking in grandma’s kitchen.
Ingredients
- 1 cup (226g) unsalted butter, softened
- 1 cup (200g) granulated sugar
- 1 large egg, at room temperature
- 1 tsp vanilla extract
- 1/2 tsp almond extract (optional)
- 2 cups + 2 tbsp (280g) all-purpose flour
- 1 tsp baking powder
- 1/4 tsp salt
- 1 package (3 oz) strawberry-flavored gelatin mix
- 1/4 cup powdered sugar, for dusting
- 24-30 chocolate kiss candies, unwrapped
Instructions
- Beat the softened butter and granulated sugar until light and fluffy, about 2-3 minutes.
- Incorporate the egg, vanilla extract, and almond extract (if desired), mixing until well combined.
- Gradually mix in the strawberry-flavored gelatin powder until fully incorporated.
- Whisk together the flour, baking powder, and salt in a separate bowl.
- Add the dry mixture to the wet ingredients, mixing on low speed until a soft, pink dough forms. If sticky, add 1-2 extra tablespoons of flour as needed.
- Scoop about 1 tablespoon of the dough and roll it into a smooth ball in your hands. Place the balls on a lined baking sheet.
- Chill the dough balls in the refrigerator for at least 1 hour or overnight for optimal results.
- Preheat the oven to 350°F (175°C) and arrange the chilled dough balls on a parchment-lined baking sheet.
- Bake for 11-13 minutes, until the edges appear set.
- Let cookies sit on the baking sheet for 2 minutes before pressing a chocolate kiss into the center.
- Allow cookies to cool completely on a wire rack before serving.
- Dust cooled cookies with powdered sugar just prior to serving.
Notes
Chill the dough thoroughly for better shaping and flavor melding.
