
📑 Table of Contents ▶
Sourdough Bread
The first time I made sourdough bread, the anticipation was electrifying. I carefully combined flour and warm water, stirred, and waited. The magic of fermentation began with my vibrant sourdough starter. Inside that bowl, a transformation unfolded; a simple mix of ingredients turned into something extraordinary.
A few hours later, the dough had puffed up, covered with bubbles, revealing its hidden potential. I felt a wave of excitement as I pictured the warm, crusty bread emerging from the oven. Sourdough bread isn’t just a recipe; it’s a rite of passage for home bakers, an experience that connects us to traditions and the joy of baking from scratch.
Baking sourdough bread requires patience and attention, but the results are undeniably rewarding. With each step, from mixing the dough to witnessing its final rise, the process becomes a pleasurable journey. Anyone can master the art of sourdough with the right approach and a bit of practice.
The Art of Sourdough Bread
Fundamentals
Understanding the core components of sourdough bread is essential. Bread flour or all-purpose flour forms the backbone of your dough. This flour supplies the necessary structure, allowing your loaf to rise beautifully. Sourdough relies on a unique blend of ingredients, particularly the active sourdough starter.
The sourdough starter is a live culture of flour and water inhabited by wild yeast and bacteria. This starter ferments the dough, creating the characteristic flavor and texture associated with sourdough. The warm water is crucial, too, as it activates the yeast, kickstarting the fermentation process.
Preparation/Setup
Preparation begins with gathering all ingredients. You need four cups of flour, one and two-thirds cups of warm water, one cup of your active sourdough starter, and two teaspoons of salt. Each ingredient plays a vital role in creating a loaf that boasts flavor and depth.
Begin by finding a spacious mixing bowl where you can work comfortably. Combining the flour and warm water first creates a shaggy dough. This initial mix doesn’t require much finesse; simply stir until everything comes together. After this, allow the dough to rest for 30 minutes. This rest period is known as autolyse, and it helps to develop the gluten structure essential for a good rise.
Ingredients
- 4 cups (500g) bread flour or all-purpose flour
- 1⅔ cups (375g) warm water
- 1 cup (200g) active sourdough starter
- 2 teaspoons (10g) salt
Directions
- In a large mixing bowl, combine the flour and warm water.
- Stir until a shaggy dough forms, then let it rest for 30 minutes.
- After resting, incorporate the active sourdough starter and salt.
- Mix well until fully combined.
- Cover the bowl with a clean towel or plastic wrap.
- Allow the dough to sit at room temperature.
- Every 30 minutes for 2 hours, perform a set of stretch and folds by pulling one side of the dough upward and folding it over itself.
- After each stretch and fold, turn the bowl a quarter turn and repeat for all four sides.
- After the final fold, cover the bowl again and let it rise for 6 to 8 hours until it doubles in size and looks bubbly.
- Gently transfer the dough to a lightly floured surface and shape it into a round or oval loaf.
- Place the dough seam-side up in a floured proofing basket or a towel-lined bowl.
- Cover and refrigerate for 8 to 12 hours.
- The next day, preheat your oven to 450°F (232°C), placing a Dutch oven inside.
- Remove the dough from the fridge and turn it out onto parchment paper.
- Score the dough’s top with a sharp knife or razor blade.
- Lower it carefully into the hot Dutch oven using the parchment paper.
- Cover and bake for 20 minutes.
- Remove the lid and bake uncovered for an additional 25 minutes.
- Lastly, take the bread out of the Dutch oven and allow it to cool completely on a wire rack before slicing.
Mastering Sourdough Bread Techniques
Technique
Using effective techniques will elevate your sourdough bread experience. The stretch and fold method works wonders. This technique reinforces the gluten structure and improves the dough’s strength. Performing this every half hour during the first two hours of rising encourages the dough to develop that desirable chewy texture.
When shaping the dough, focus on creating surface tension. Gently folding and tucking the edges underneath helps create a round or oval loaf. This technique will also support a better rise during baking.
Tips/Tricks
Sourdough baking thrives on practice and patience. Pay attention to your starter; it’s the heart of the bread. If it’s active and bubbly, your bread will reflect that vitality. Always use warm water to maintain the fermentation process efficiently. Adjust the hydration level if you find your dough too sticky or dry; minor tweaks can make a significant difference.
Keep an eye on your dough while it’s rising. The exact timing can vary based on temperature and humidity. Look for a doubled size and a bubbly appearance, which indicates optimal fermentation.
Perfect Results with Sourdough Bread
Perfecting Results
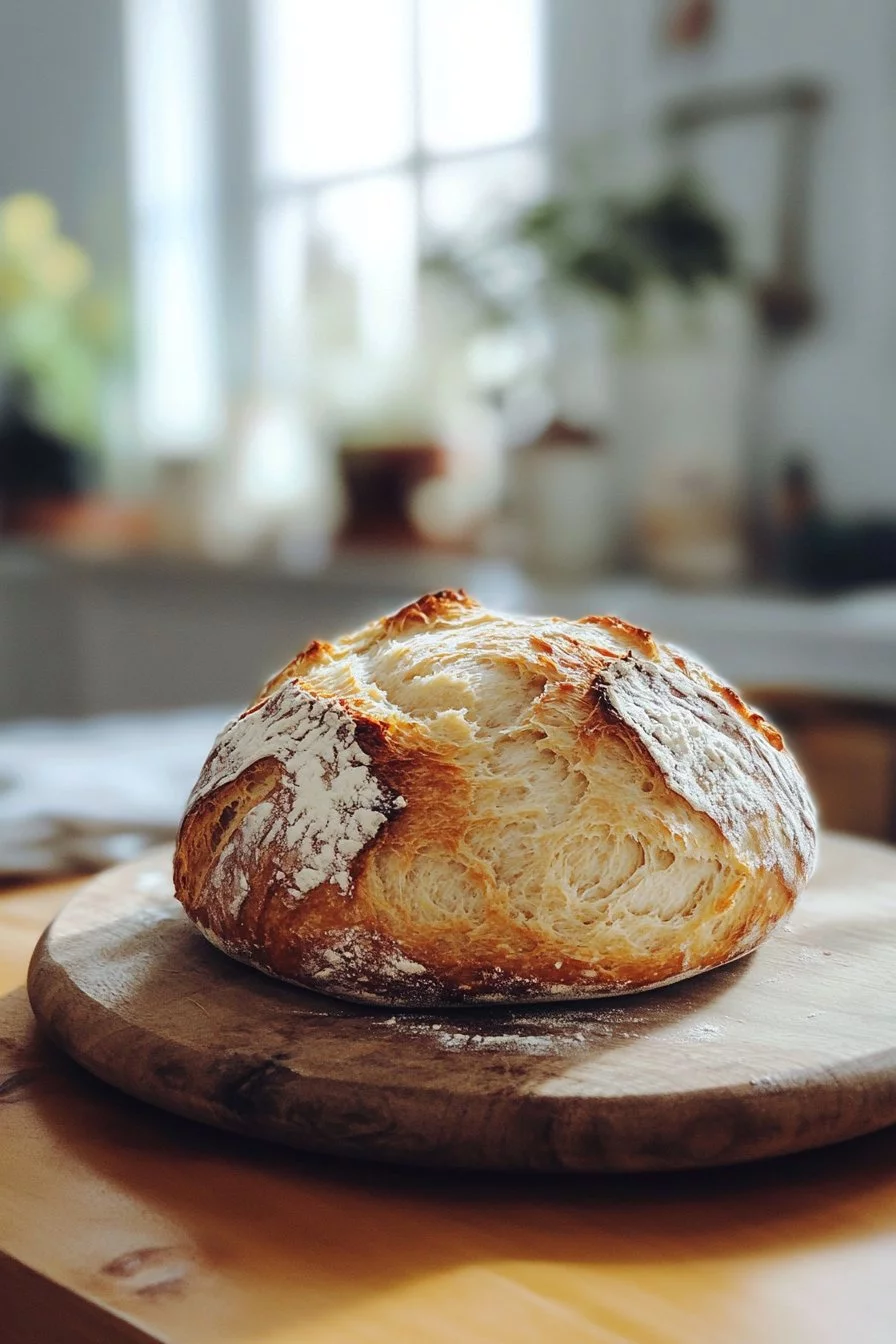
The quest for perfect sourdough bread often involves trial and error. Allow yourself room for mistakes. Over time, you’ll develop an instinct for when the dough is perfectly risen and ready for baking. A gently scored loaf allows for expansion during baking, preventing any unwanted burst.
Oven spring happens when your loaf rises dramatically in the oven. Proper preheating of your Dutch oven is essential for achieving that beautiful crust. Remember, a good bread-crust forms due to the high initial heat that traps steam.
Troubleshooting/Variations
If your bread doesn’t rise as expected, consider a few factors. First, check the activity of your sourdough starter. It must be bubbly and robust at baking time. Insufficient fermentation time may also lead to dense bread; patience is key.
Variations can include adding seeds, herbs, or other flavor enhancers. Experimenting with whole grains can create different textures and tastes. Keep notes on what works and what doesn’t, as this will help you refine your sourdough skills.
Serving Sourdough Bread
Serving/Presentation
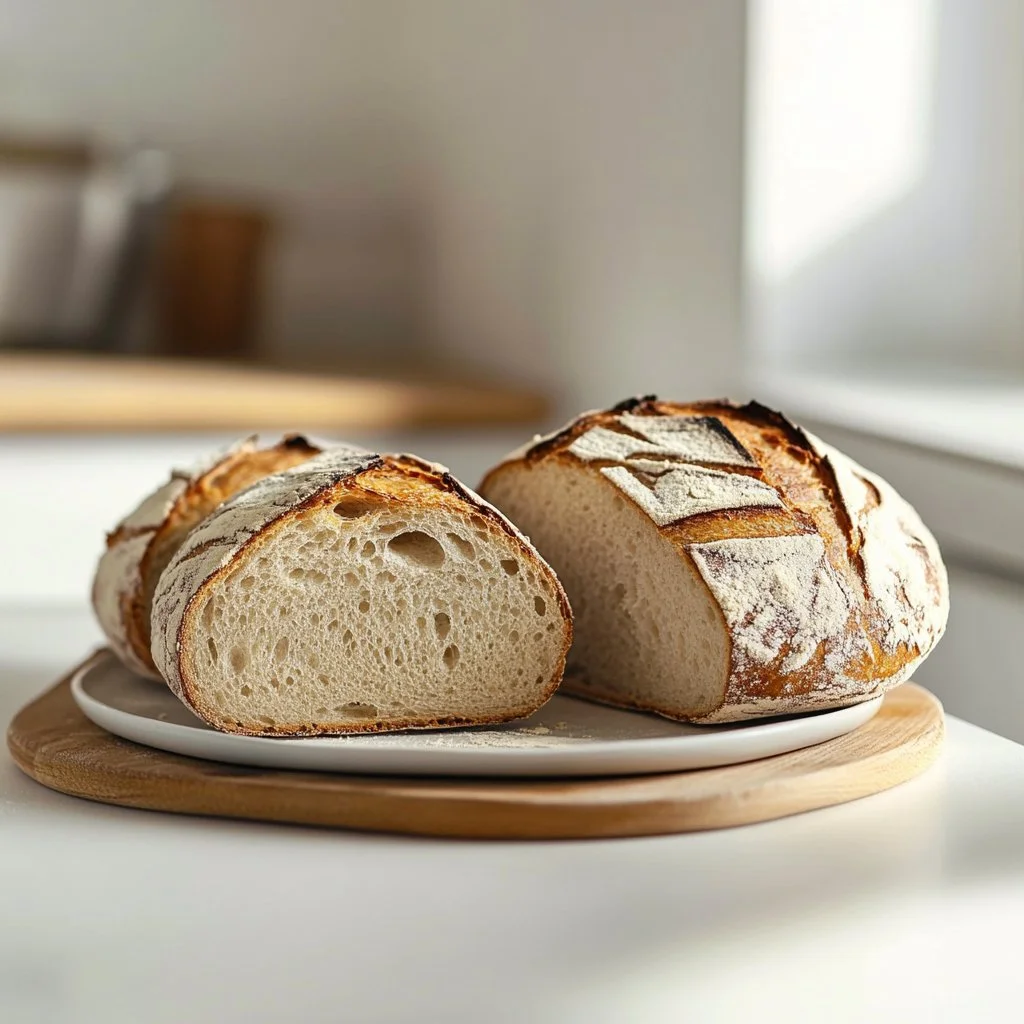
Once cooled, sourdough bread offers a crusty exterior and a soft, airy inside. Slice it to reveal its beautifully open crumb structure. This bread shines at any meal, from breakfast to dinner.
Toast slices for breakfast topped with butter or avocado. Sourdough’s tangy flavor pairs beautifully with all sorts of toppings, making it perfect for bruschetta or sandwiches.
Pairings/Storage
Sourdough bread pairs nicely with hearty soups and salads. It’s a fantastic companion for butter or spreads. To store, keep your loaf in a paper bag at room temperature for a few days. For longer storage, wrap it tightly in plastic and freeze it.
When ready to enjoy again, simply thaw it at room temperature or gently reheat it in the oven. This method revives the crust’s crispness, bringing your sourdough bread back to life.
Sourdough bread is an art that welcomes creativity and personal touch. Embrace the process and enjoy the fruits of your labor.
Print
Sourdough Bread
- Prep Time: 30 minutes
- Cook Time: 45 minutes
- Total Time: 12 hours
- Yield: 1 loaf
- Category: Baking
- Method: Baking
- Cuisine: American
- Diet: Vegetarian
Description
A classic recipe for homemade sourdough bread, featuring a crispy crust and soft interior.
Ingredients
- 4 cups (500g) bread flour or all-purpose flour
- 1⅔ cups (375g) warm water
- 1 cup (200g) active sourdough starter
- 2 teaspoons (10g) salt
Instructions
- In a large mixing bowl, combine the flour and warm water.
- Stir until a shaggy dough forms, then let it rest for 30 minutes.
- After resting, incorporate the active sourdough starter and salt.
- Mix well until fully combined.
- Cover the bowl with a clean towel or plastic wrap.
- Allow the dough to sit at room temperature.
- Every 30 minutes for 2 hours, perform a set of stretch and folds by pulling one side of the dough upward and folding it over itself.
- After each stretch and fold, turn the bowl a quarter turn and repeat for all four sides.
- After the final fold, cover the bowl again and let it rise for 6 to 8 hours until it doubles in size and looks bubbly.
- Gently transfer the dough to a lightly floured surface and shape it into a round or oval loaf.
- Place the dough seam-side up in a floured proofing basket or a towel-lined bowl.
- Cover and refrigerate for 8 to 12 hours.
- The next day, preheat your oven to 450°F (232°C), placing a Dutch oven inside.
- Remove the dough from the fridge and turn it out onto parchment paper.
- Score the dough’s top with a sharp knife or razor blade.
- Lower it carefully into the hot Dutch oven using the parchment paper.
- Cover and bake for 20 minutes.
- Remove the lid and bake uncovered for an additional 25 minutes.
- Lastly, take the bread out of the Dutch oven and allow it to cool completely on a wire rack before slicing.
Notes
Experiment with adding seeds or herbs to customize your bread flavor.
