
📑 Table of Contents ▶
- Pumpkin Scones
- Pumpkin Scones: A Seasonal Delight
- Fundamentals
- Preparation/setup
- Crafting the Perfect Pumpkin Scone
- Technique
- Tips/tricks
- Mastering the Art of Pumpkin Scones
- Perfecting results
- Troubleshooting/variations
- Presenting and Enjoying Pumpkin Scones
- Serving/presentation
- Pairings/storage
- Conclusion
- FAQs – Pumpkin Scones
I remember the first time I made pumpkin scones. The kitchen was filled with the aroma of spices, and there was something magical about watching the dough come together. As I kneaded the mixture, I realized how therapeutic baking could be. The blend of cinnamon, ginger, nutmeg, and cloves was like a warm hug on a chilly day.
In our home, pumpkin scones have become a beloved treat, especially during the fall. There’s a joy in combining simple ingredients to create something so comforting and delicious. Each batch tells a story, reminding me of cozy mornings spent with family, sipping on tea and sharing laughter over these delightful pastries.
These pumpkin scones hold a special place in my heart, not just for their taste but for the memories they evoke. From that first bite, with its perfect blend of sweetness and spice, to the soft, tender crumb, they are a testament to the joy of baking. Whether enjoyed fresh out of the oven or shared with friends, they always bring a smile.
As we dive into this recipe, I can’t wait to share the process and tips that make these pumpkin scones a favorite in my kitchen. Let’s explore how to make them together, ensuring each step is as enjoyable as the final product.
Print
Pumpkin Scones
- Prep Time: 20 minutes
- Cook Time: 12-15 minutes
- Total Time: 32-35 minutes
- Yield: 16 scones
- Category: Dessert
- Method: Baking
- Cuisine: American
Description
Learn how to make delicious pumpkin scones with this easy recipe. Perfect for fall baking, these scones are a must-try for any pumpkin lover!
Ingredients
- – 2 1/4 cups (540 ml) (286 grams) all-purpose flour
- – 2 1/2 teaspoons (13 ml) baking powder
- – 1 teaspoon (5 ml) fine sea salt
- – 1/2 teaspoon (3 ml) baking soda
- – 1 teaspoon (5 ml) ground cinnamon
- – 3/4 teaspoon (4 ml) ground ginger
- – 1/2 teaspoon (3 ml) ground nutmeg
- – 1/2 teaspoon (3 ml) ground cloves
- – 1/3 cup (80 ml) (66 grams) light brown sugar
- – 1 stick (113 grams) unsalted butter, cold and cubed
- – 1/2 cup (120 ml) (122 grams) canned pure pumpkin puree
- – 1/4 cup (60 ml) buttermilk or heavy cream
- – 2 large eggs, divided
- – 1 cup (240 ml) (125 grams) powdered sugar
- – 1 tablespoon (15 ml) (15 grams) canned pure pumpkin puree
- – 1 tablespoon (15 ml) milk
- – 1/4 teaspoon (1 ml) cinnamon
Instructions
- In a large mixing bowl, combine the flour, leavening agents, salt, spices, and sugar until thoroughly mixed, ensuring there are no brown sugar lumps.
- Use a pastry cutter to incorporate the butter into the dry ingredients until the pieces are about the size of peas.
- In a measuring cup, blend the pumpkin puree, cream, and one egg together.
- Create a well in the center of the dry mixture and pour in the wet mixture. Stir until it’s partially mixed but still rough in texture.
- Move the dough onto a floured surface and shape it into a rough rectangle. Fold it over three times as if folding a letter. It doesn’t have to be perfect. Flatten it again in the opposite direction and fold it three more times.
- Divide the dough in half. Shape each half into a 3/4-inch thick circle with a 6-inch diameter. Cut each circle into 8 triangular pieces and arrange them on prepared baking sheets, leaving about 2 inches between each piece. Place the unbaked scones in the freezer while preheating the oven.
- For future use, the unbaked scones can be kept in the fridge overnight or sealed and frozen for up to a month. If baking from frozen, extend the baking time by about 2 minutes.
- Position the oven rack in the center and preheat the oven to 400°F. Cover two baking sheets with parchment paper.
- In a small dish, mix the remaining egg with a teaspoon of water. Brush this mixture over the cold scones.
- Bake the scones for 12 to 15 minutes until they turn golden brown. Transfer the baking sheet to a cooling rack and allow the scones to cool while you prepare the glaze.
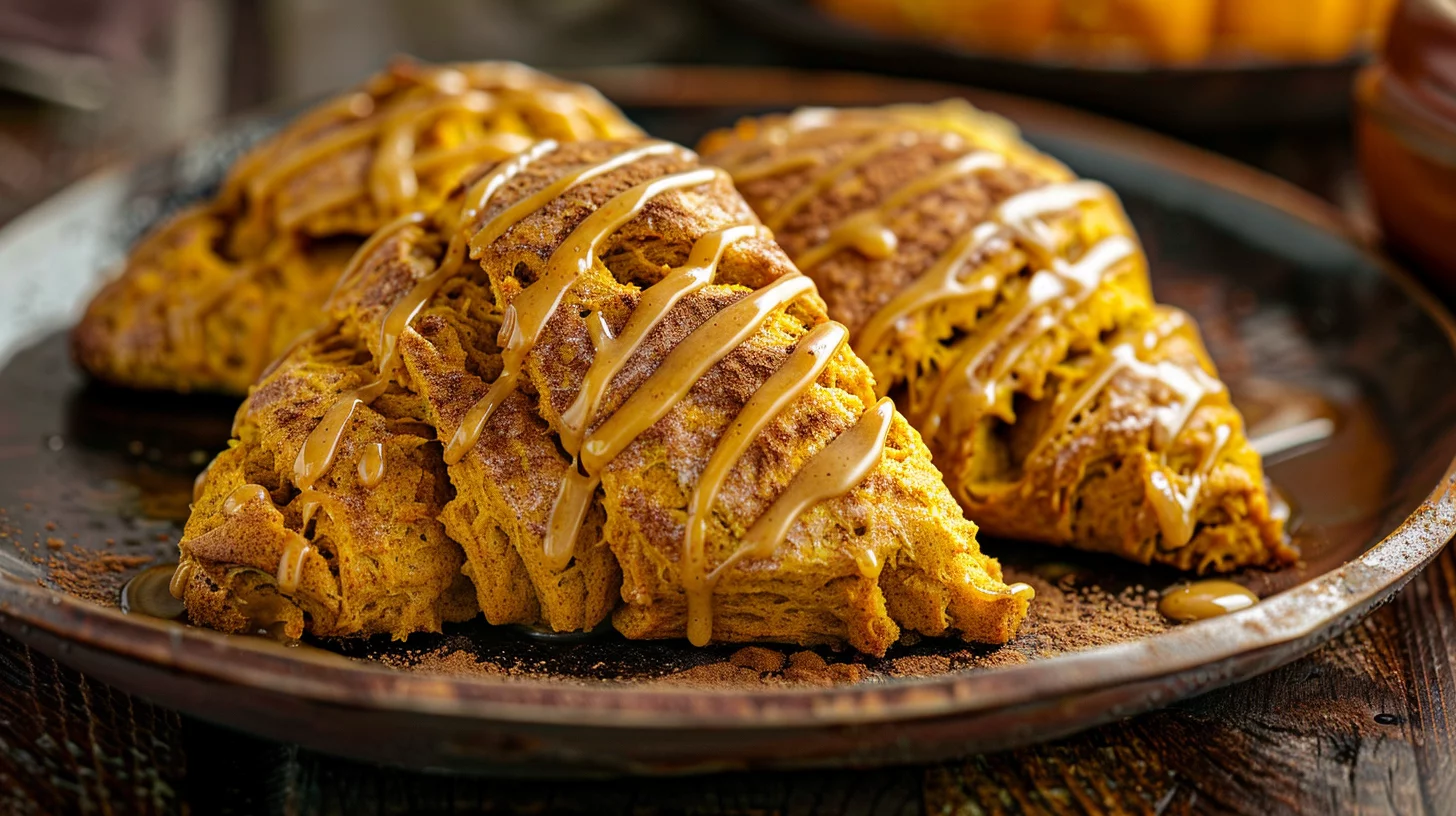
- In a small bowl, stir together all the glaze ingredients with a fork until it becomes smooth and thick. Drizzle the glaze over each scone. If you prefer dipping, add a little extra milk to make the glaze thinner. Let the glaze set before serving, if you wish.
- For the best taste, enjoy the scones on the day they are baked.
Notes
- Ensure the butter is cold and cubed for optimal scone texture.
- For a richer taste, substitute heavy cream for buttermilk in the wet mixture.
- Brush scones with egg wash before baking for a beautiful golden finish.
Pumpkin Scones: A Seasonal Delight
Fundamentals
The key to perfect pumpkin scones lies in the balance of ingredients. Start with 2 1/4 cups of all-purpose flour, which provides the structure. The leavening agents—2 1/2 teaspoons of baking powder and 1/2 teaspoon of baking soda—ensure a light, fluffy texture. A teaspoon of fine sea salt enhances the flavors, while the spices—cinnamon, ginger, nutmeg, and cloves—add warmth and depth.
Sugar plays a crucial role in both taste and texture. Here, 1/3 cup of light brown sugar adds sweetness and a hint of molasses flavor. The butter, cold and cubed, contributes richness and flakiness, essential for that perfect scone texture. Finally, the canned pure pumpkin puree, along with buttermilk or heavy cream, provides moisture and a subtle pumpkin flavor.
Preparation/setup
Begin by combining the dry ingredients in a large mixing bowl. Ensure everything is thoroughly mixed, with no lumps of brown sugar remaining. Use a pastry cutter to incorporate the butter into the dry mix until the pieces resemble peas. This step is crucial for achieving the right texture in your scones.
In a separate measuring cup, blend the pumpkin puree, cream, and one egg. This wet mixture will be added to the dry ingredients, but it’s essential to create a well in the center first. Pour the wet mixture into the well and stir until partially mixed. The dough should be rough in texture, not fully combined, as overmixing can lead to tough scones.
Crafting the Perfect Pumpkin Scone
Technique
Moving the dough onto a floured surface, shape it into a rough rectangle. Fold it over three times, as if folding a letter. This folding technique helps create layers in the scones. Flatten the dough again, fold in the opposite direction, and repeat the process. Dividing the dough in half, shape each half into a 3/4-inch thick circle with a 6-inch diameter.
Cut each circle into eight triangular pieces and arrange them on prepared baking sheets, leaving space between each piece. This step ensures even baking. Place the unbaked scones in the freezer while preheating the oven. This chilling process helps the scones hold their shape during baking.
Pumpkin Scones
Tips/tricks
For the best results, use cold ingredients, especially the butter. Cold butter helps create the flaky texture that scones are known for. If you’re planning ahead, the unbaked scones can be kept in the fridge overnight or sealed and frozen for up to a month. When baking from frozen, simply extend the baking time by about two minutes to ensure they are cooked through.
Before baking, brush the scones with a mixture of the remaining egg and a teaspoon of water. This egg wash gives the scones a beautiful golden color and a glossy finish. Bake them for 12 to 15 minutes until golden brown, then transfer to a cooling rack to set the structure before glazing.
Mastering the Art of Pumpkin Scones
Perfecting results
To perfect your pumpkin scones, attention to detail is key. Ensure your oven is preheated to the correct temperature of 400°F. This precise heat setting is crucial for achieving the right rise and texture. Positioning the oven rack in the center allows for even heat distribution, ensuring the scones bake uniformly.
Once baked, let the scones cool slightly. This brief cooling period allows the internal structure to set, preventing them from crumbling when glazed. The glaze itself is a simple mixture of powdered sugar, canned pure pumpkin puree, milk, and a hint of cinnamon. This combination complements the scones perfectly, adding sweetness and a touch of spice.
Troubleshooting/variations
If your scones spread too much during baking, it could be due to the butter being too warm or overmixing the dough. Remember, cold ingredients and minimal mixing are essential for maintaining the right consistency. For a variation, consider adding a handful of chopped nuts or dried cranberries to the dough for an added texture and flavor.
Should you encounter a glaze that’s too thick, simply add a bit more milk to reach your desired consistency. The glaze should be thick enough to cling to the scones but not too runny. If you prefer a more robust spice profile, feel free to adjust the cinnamon and ginger quantities to taste.
Presenting and Enjoying Pumpkin Scones
Serving/presentation
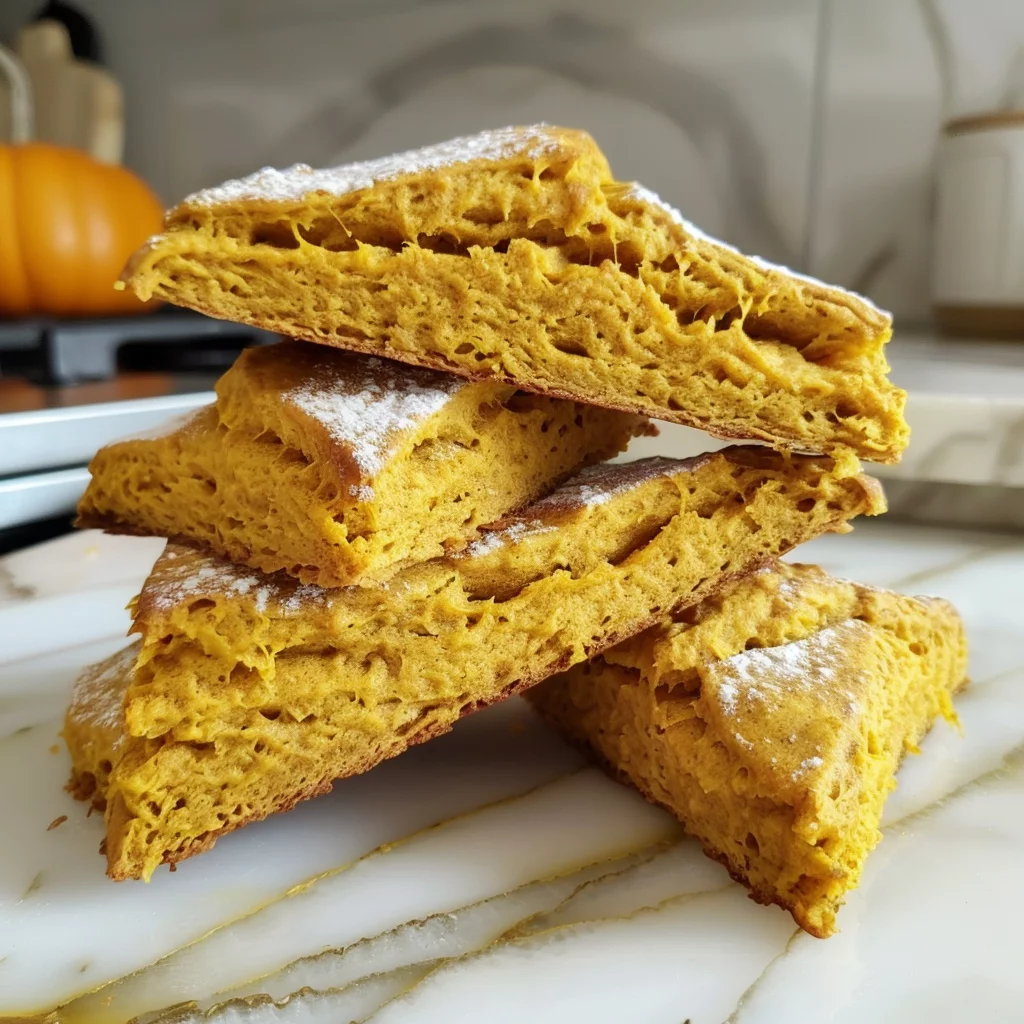
Once glazed, allow the scones to set for a few minutes. The glaze will harden slightly, providing a delightful contrast to the soft, tender crumb of the scone. Arrange them on a serving platter for an inviting presentation. These scones pair beautifully with a hot cup of tea or coffee, making them perfect for breakfast or an afternoon treat.
For a touch of elegance, consider sprinkling a bit of cinnamon over the glaze before it sets. This small detail can elevate the appearance and add a hint of extra flavor. Whether you’re hosting brunch or enjoying a quiet morning, these pumpkin scones are sure to impress.
Pairings/storage
While these scones are delicious on their own, they also pair well with a variety of spreads. Consider serving them with clotted cream, butter, or a dollop of whipped cream for added richness. If you have leftovers, store them in an airtight container at room temperature for up to two days, or freeze for longer storage.
To reheat, simply pop them in a warm oven for a few minutes to regain their fresh-from-the-oven taste and texture. The versatility and ease of storage make these pumpkin scones a convenient treat for any occasion.

Pumpkin Scones
Conclusion
Creating pumpkin scones is a rewarding experience that combines simple ingredients into a delightful treat. The key to their deliciousness lies in the balance of flavors and the careful handling of the dough. These scones are versatile, perfect for breakfast, a cozy afternoon snack, or any time you crave a touch of autumnal warmth.
The process of making them is as enjoyable as the end result, offering both a creative outlet and a comforting ritual. With the right techniques and a bit of patience, you can master the art of baking these scones to perfection. Whether you enjoy them plain or with a variety of accompaniments, pumpkin scones are a delightful addition to any table.
Explore more pumpkin-inspired recipes such as vegetarian pumpkin chili or roasted pumpkin soup with sizzled sage for a cozy fall menu. These dishes, along with your freshly baked pumpkin scones, can create a harmonious meal experience that celebrates the flavors of the season.
For more baking inspiration, consider trying peach scones or delight in golden pumpkin balls for a sweet treat. Each recipe offers its own unique twist, ensuring there’s always something new and exciting to bake.
