
📑 Table of Contents ▶
- Pumpkin Patch Delights
- Fundamentals
- Preparation/Setup
- Directions
- Creative Techniques for Perfect Pumpkin Patch Deviled Eggs
- Technique
- Tips/Tricks
- Achieving Perfectly Festive Pumpkin Patch Eggs
- Perfecting Results
- Troubleshooting/Variations
- Serving and Storage Tips for Deviled Egg Delights
- Serving/Presentation
- Pairings/Storage
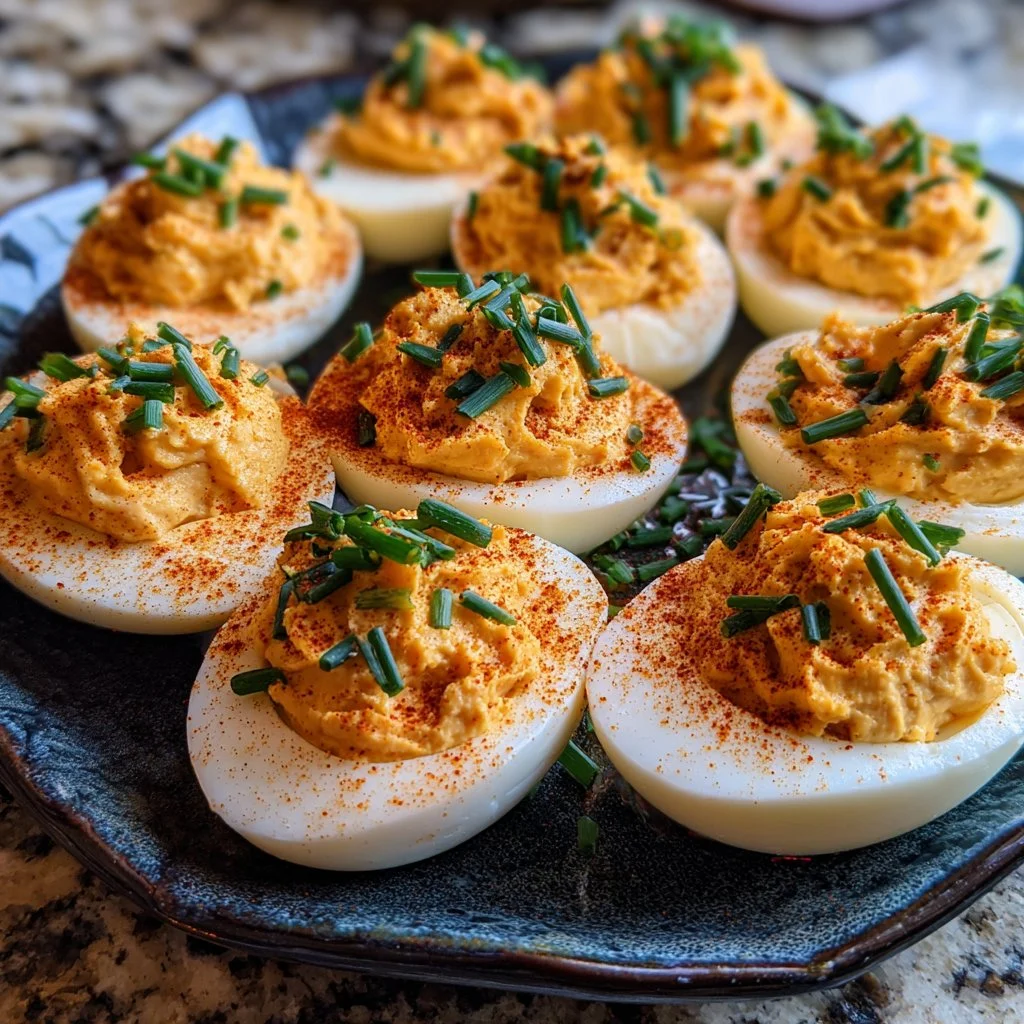
Pumpkin Patch Deviled Eggs
Joyful gatherings with family and friends always featured one dish that captured everyone’s attention: deviled eggs. There’s something magical about their creamy filling and the delightful way they’re presented. As a child, I remember excitedly helping in the kitchen every autumn to make these festive treats, especially when we crafted our special pumpkin-shaped version. It became a cherished tradition to overstuff the whites, creating the perfect pumpkin-shaped presentation.
The vibrant colors and playful shapes make deviled eggs a star feature at potlucks and family dinners. Pumpkin Patch Deviled Eggs are not just about flavors; they also embody fun and nostalgia. Each bite brings a wave of warmth, especially when topped with finely chopped chives to mimic pumpkin stems. Entering the season of falling leaves and cooler weather, these festive treats are a delightful reminder of the joy that gatherings bring.
Once you master the foolproof technique for peeling eggs and preparing the filling, you’ll find yourself whipping them up for any occasion. Let’s dive into the art of making these delightful Pumpkin Patch Deviled Eggs!
Pumpkin Patch Delights
Fundamentals
Creating the perfect Pumpkin Patch Deviled Eggs starts with understanding the basics of cooking eggs. The journey begins with selecting fresh, large eggs, which tend to peel better than smaller varieties. These eggs serve as the canvas for our delicious filling.
The cooking technique plays a crucial role in achieving the desired tenderness without overcooking. Understanding the cooking time and method prevents that unpleasant greenish-gray ring from forming around the yolks and ensures a beautifully presented dish.
These fluffy, creamy delights divine into every season, but they truly shine during fall festivities. The vibrant colors and shapes evoke the spirit of the season, bringing holiday cheer to every gathering.
Preparation/Setup
Start by gathering all necessary equipment and ingredients to ensure a smooth cooking process. Place the eggs in a single layer in a heavy-bottomed pan. This method prevents cracking and ensures even cooking. Prepare the ice bath beforehand to quickly cool the eggs after cooking.
It is also helpful to have a piping bag ready for filling and decorating the egg halves. This will not only make the task efficient but will also elevate the presentation, turning your deviled eggs into small works of art.
Ingredients
To create your Pumpkin Patch Deviled Eggs, assemble the following ingredients:
- 6 large eggs
- 1/4 cup mayonnaise
- 1 teaspoon yellow mustard
- 1/4 teaspoon salt
- 1/8 teaspoon black pepper
- 1/2 teaspoon paprika, plus more for dusting
- A tiny dash of orange food coloring (optional)
- 2 tablespoons fresh chives, finely chopped (for stems and garnish)
Each ingredient plays a unique role in flavor, texture, and presentation. The creamy mayonnaise combines with mustard for tanginess, while salt and pepper enhance the overall flavor. Paprika adds an earthy note as well as aesthetic appeal.
Directions
Begin with the foolproof easy peel method. Place the eggs in a single layer in a saucepan and cover them with cold water. Bring the water to a rolling boil over high heat. Once boiling, remove the pan from the heat and cover it with a lid, letting the eggs sit for exactly 10 minutes.
Prepare the ice bath during this time by filling a large bowl with ice and water. After 10 minutes, transfer the hot eggs using a slotted spoon to the ice bath, allowing them to cool completely for at least 5 minutes. The rapid cool-down helps the egg contract, making shell removal effortless.
Once cooled, gently tap each egg on a hard surface to crack the shell. Then, roll the egg between your hands to loosen the shell further, and peel under cool running water to make the shell slide off easily.
Carefully slice each peeled egg in half lengthwise and scoop out the yolks into a small bowl while keeping the whites intact.
In the bowl with the yolks, combine mayonnaise, mustard, salt, pepper, and paprika. If you’re looking to create the pumpkin’s vibrant color, add a touch of orange food coloring. Mash everything together thoroughly with a fork until smooth and creamy.
For a professional finish, you can press the mixture through a fine-mesh sieve for extra smoothness. Fill a piping bag fitted with a star tip and piped the yolk mixture into each egg white half, creating a plump, round pumpkin shape.
To enhance the pumpkin appearance, use a toothpick or the dull side of a knife to create indentations that resemble pumpkin ridges. For the “stems,” insert small bundles of chive pieces into the center of each piped pumpkin. Finally, lightly dust the piped pumpkins with paprika to add a finishing touch.
Creative Techniques for Perfect Pumpkin Patch Deviled Eggs
Technique
When crafting Pumpkin Patch Deviled Eggs, technique truly matters. The method used for cooking and peeling the eggs can make or break the end result. Following the step-by-step process ensures that egg whites remain intact, providing a sturdy vessel for your creamy filling.
The piping technique elevates the appearance of your deviled eggs. When you pipe the filling, allow the mixture to mound on top, which adds height and creates a playful pumpkin-like shape.
Using a toothpick or knife to create ridges not only enhances the aesthetic but also adds an interactive element for your guests. This attention to detail makes the deviled eggs more inviting.
Tips/Tricks
For best results, use older eggs for boiling, as they tend to peel easier than fresh ones. Additionally, employing the ice bath immediately after cooking is crucial. This step reduces the chances of overcooking and offers better peeling.
When mashing the yolk mixture, be patient and ensure it reaches a perfectly smooth texture. This guarantees a creamy filling that will make each bite irresistible.
Experimenting with flavors can add a personal twist to the classic recipe. Adding ingredients like pickle relish or hot sauce can create a unique filling that reflects your taste.
Achieving Perfectly Festive Pumpkin Patch Eggs
Perfecting Results
Perfecting pumpkin-shaped deviled eggs requires practice and knowledge. Timing is everything when cooking the eggs. Remember the 10-minute rule to achieve desired doneness without gray rings around the yolks.
Also, temperature plays a crucial role. Filling the eggs when too warm may cause the mixture to melt and lose its shape, while filling them too cold can lead to refusing adhesion between the egg white and yolk mixture.
Troubleshooting/Variations
In case the shells stick to the eggs during peeling, light cracking all over before placing them in the ice bath can help. Don’t despair; peeling can take practice.
If you want a twist in accessories, consider adding toppings like bacon bits or olives for whimsical designs. Each variation can lead to unique flavors that add joy to the pumpkin patch theme.
Serving and Storage Tips for Deviled Egg Delights
Serving/Presentation
When it comes to serving Pumpkin Patch Deviled Eggs, presentation is key. Arrange the eggs on a colorful platter to make them eye-catching. Surround the eggs with decorative greens, or even place miniature pumpkins for a playful fall theme.
Using fresh chives for garnish not only enhances the visual appeal but also adds a fresh flavor that complements the eggs. Smaller chive bundles as stems can lead to an organized and aesthetic presentation.
Pairings/Storage
Pumpkin Patch Deviled Eggs pair excellently with a variety of dishes. Consider serving them alongside crisp salads, charcuterie boards, or autumn-themed entrees. Their creamy texture and rich flavor blend beautifully with lighter, crisp options.
For storage, keep any leftover deviled eggs in an airtight container in the refrigerator. Enjoy within a couple of days for the best flavor and texture. Always ensure they remain chilled to keep them fresh and safe to eat.
Pumpkin Patch Deviled Eggs not only provide a festive touch to fall gatherings, but they also allow for creativity and fun in the kitchen. Embrace the joy of cooking and share these delightful bites with loved ones throughout the season.
Print
Pumpkin Patch Deviled Eggs
- Prep Time: 15 minutes
- Cook Time: 10 minutes
- Total Time: 25 minutes
- Yield: 12 servings
- Category: Appetizer
- Method: Boiling
- Cuisine: American
- Diet: Vegetarian
Description
Delightful and festive deviled eggs shaped like pumpkins, perfect for fall gatherings.
Ingredients
- 6 large eggs
- 1/4 cup mayonnaise
- 1 teaspoon yellow mustard
- 1/4 teaspoon salt
- 1/8 teaspoon black pepper
- 1/2 teaspoon paprika, plus more for dusting
- A tiny dash of orange food coloring (optional)
- 2 tablespoons fresh chives, finely chopped (for stems and garnish)
Instructions
- Place the eggs in a single layer in a saucepan and cover with cold water. Bring to a boil over high heat.
- Remove from heat, cover, and let sit for exactly 10 minutes.
- Prepare an ice bath in a large bowl with ice and water.
- Transfer the eggs to the ice bath and cool for at least 5 minutes.
- Once cooled, gently crack and peel the eggs under cool running water.
- Slice each peeled egg in half lengthwise and scoop out the yolks into a bowl.
- In the bowl, combine yolks with mayonnaise, mustard, salt, pepper, and paprika. Add orange food coloring if desired.
- Mix until smooth and creamy. Optionally, press through a fine-mesh sieve for extra smoothness.
- Fill a piping bag fitted with a star tip with the yolk mixture and pipe into each egg white half.
- Create indentations for ridges using a toothpick or knife, then insert chive pieces for stems.
- Lightly dust with paprika and serve on a platter garnished with greens or mini pumpkins.
Notes
Use older eggs for easier peeling and ensure proper cooling with the ice bath.
