
📑 Table of Contents ▶
Oreo No-Bake Cheesecake Cups
The first time I encountered Oreo No-Bake Cheesecake Cups, I felt an instant rush of nostalgia. It was a warm summer afternoon, and I was invited to a friend’s gathering. Upon arrival, I spotted a table overflowing with delicious treats. Among them, the Oreo cheesecake cups caught my eye and intrigued my taste buds. Each bite was a harmonious blend of creamy filling and crunchy Oreo goodness, instantly bringing back memories of childhood dessert parties.
This delightful dessert has since become a staple at my gatherings. Friends and family love how easy it is to whip up, yet it packs an impressive taste. Whenever I serve these Oreo No-Bake Cheesecake Cups, the compliments flow, making it a favorite among guests. Perfect for any occasion, the layers of cream cheese and Cool Whip create a texture that keeps dessert light and smooth, while the Oreos provide a satisfying crunch that elevates the entire experience.
If you want to impress your friends or simply treat yourself, these tasty cups are the answer. With minimal effort and a handful of ingredients, you can create an irresistible dessert that everyone adores. Join me as we explore the steps to craft beautiful Oreo No-Bake Cheesecake Cups that echo the sweetness of those initial tastings.
Oreo No-Bake Cheesecake Cups
Fundamentals
Understanding the basics of making Oreo No-Bake Cheesecake Cups simplifies the entire process. The essence of these cups lies in achieving the right balance between the creamy cheesecake filling and the crunchy Oreo crust. While traditional cheesecakes often require baking, this no-bake version eliminates that step, making it accessible even for novice bakers.
The key players include cream cheese, whipped topping, powdered sugar, vanilla, and, of course, Oreos. Each ingredient brings its unique flavor and texture, combining to form a delightful dessert. When selecting the ingredients, go for high-quality cream cheese for the best results. You’ll notice the difference in the taste and texture of your final product.
Preparation starts with a few simple steps. Gather your materials and set the stage for an impressive dessert. Once you crack the code on these foundational elements, you’ll feel empowered to create your very own Oreo No-Bake Cheesecake Cups.
Preparation/setup
Setting up for this recipe requires minimal effort, making the process enjoyable. Begin by gathering all your ingredients and tools. You’ll need an 8 oz block of softened cream cheese, 8 oz of Cool Whip or whipped topping, 2/3 cup of powdered sugar, 1 teaspoon of vanilla extract, and around 24-26 Oreo cookies. Ensure you have small dessert dishes that hold at least 3/4 cup to 1 cup of contents.
Start by preparing your work area. Lay out the ingredients on a clean countertop, making sure everything is easily accessible. Then, grab a sturdy plastic bag and place your Oreos inside. Seal the bag tightly. Using a rolling pin or a wooden spoon, crush the Oreos until they turn into fine crumbs. This will create an excellent base for your cheesecake cups.
Now, spoon 1 1/2 – 2 tablespoons of the crushed Oreos into the bottom of each dessert dish. This will serve as a delicious crust. Set these aside while you prepare the cheesecake filling.
Ingredients
- 1 8 oz block of cream cheese, softened
- 1 8 oz Cool Whip or whipped topping
- 2/3 cup powdered sugar
- 1 tsp vanilla
- 24-26 Oreo cookies (more as desired)
These simple ingredients work together to create a luxurious dessert that screams indulgence. Softening the cream cheese is essential, as it melds beautifully with the other ingredients. The vanilla adds aromatic depth, while the powdered sugar balances the creaminess with just the right amount of sweetness.
Directions
- Crush the Oreos in a sealed plastic bag using a rolling pin or sturdy wooden spoon until you achieve fine crumbs.
- Spoon 1 1/2 – 2 tablespoons of the crushed Oreos into the bottom of 6 small dessert dishes. Ensure the dishes are at least 3/4 cup to 1 cup in size. Set aside.
- In a mixing bowl, use a hand or standing mixer to whip the softened cream cheese and powdered sugar together until creamy and smooth.
- Add the vanilla extract and blend until fully combined.
- Gently fold in the Cool Whip, taking care not to deflate the mixture.
- Fold in the remaining crushed Oreos to incorporate into the filling evenly.
- Divide the cheesecake filling evenly across the dessert cups and gently press onto the crushed Oreo crust.
- Chill in the refrigerator for about 1 hour or until you’re ready to serve.
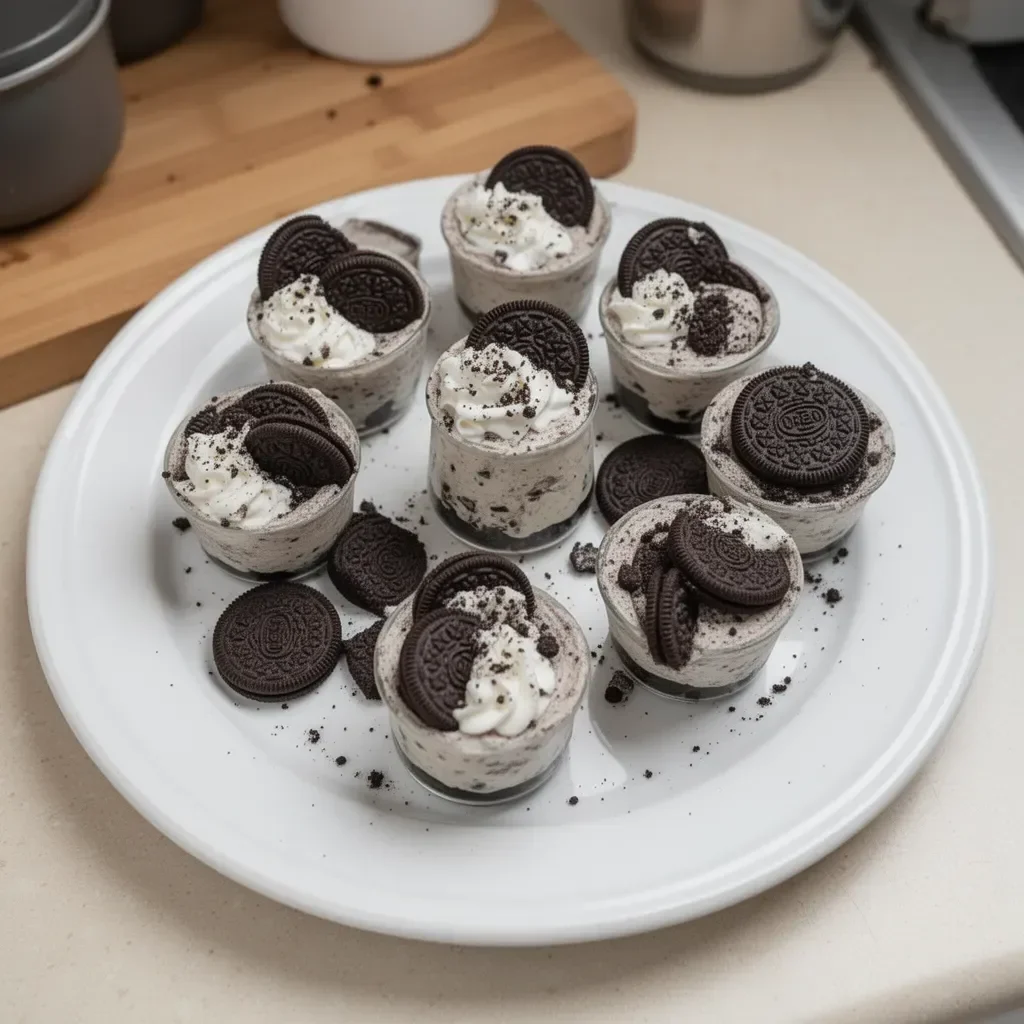
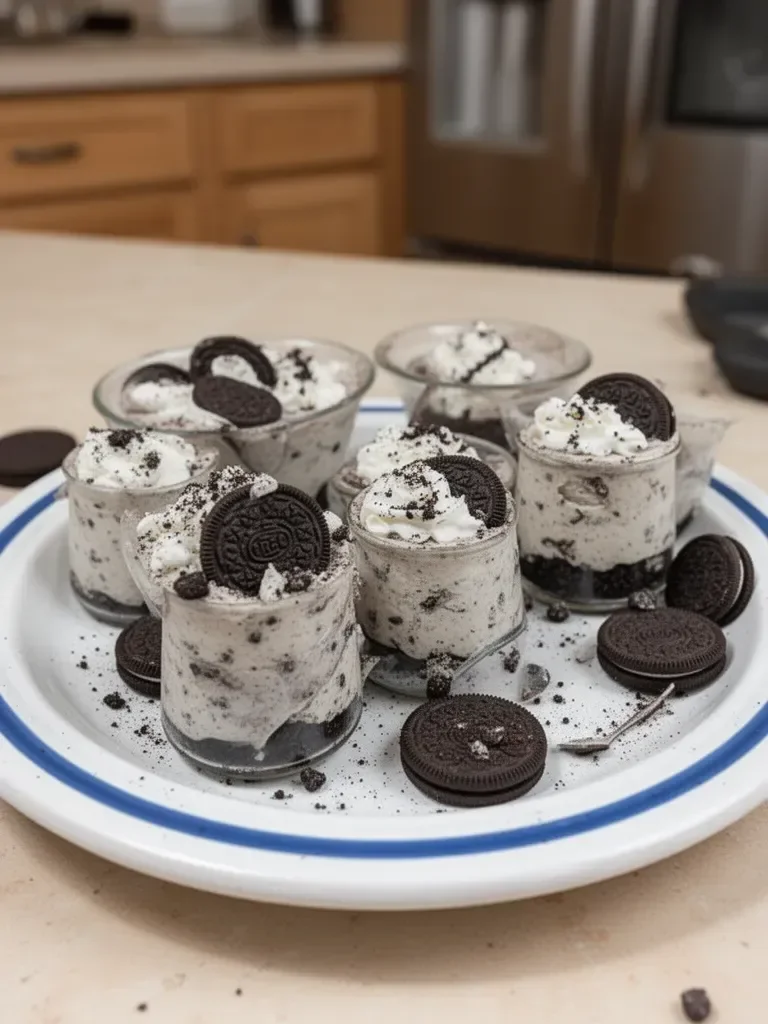
- Just before serving, top with whipped cream and a sprinkling of crushed Oreos for presentation.
Perfecting Your Oreo No-Bake Cheesecake Cups
Technique
Perfecting your Oreo No-Bake Cheesecake Cups is about mastering the techniques that bring this dessert to life. The key is in the mixing and folding process. When folding in the whipped topping, use a gentle motion to maintain the airiness of the mixture. This is vital for creating a light, fluffy filling.
Incorporating the crushed Oreos at the end ensures that you don’t lose the distinct cookie flavor throughout the filling. Using crushed Oreos in the crust and the filling brings a wonderful depth to the dessert.
Tips/tricks
A few simple tips can enhance your Oreo No-Bake Cheesecake Cups. Consider freezing the dessert cups for a short while after chilling. This creates a firmer texture, great for warmer climates. Alternatively, if you’re aiming for a more decadent experience, blend in additional layers of crushed Oreos within the filling.
For an added flourish, garnish with fresh fruit or drizzle some chocolate sauce atop the whipped cream. This not only enhances the visual appeal but also introduces new flavors that complement the Oreo base.
Further Tweaks and Variations
Perfecting results
Perfecting your results with Oreo No-Bake Cheesecake Cups takes practice. Elements such as the temperature of your ingredients can significantly impact the texture. Make sure your cream cheese is sufficiently softened to avoid lumps in your filling. A smoother mixture leads to a more enjoyable eating experience.
Taste-testing the filling before folding in the Oreos is also a wise move. Adjust the sweetness by adding more powdered sugar or vanilla as needed. This way, you cater to your preference, ensuring a satisfying dessert every time.
Troubleshooting/variations
If your cheesecake cups feel too soft or runny, ensure the cream cheese is thoroughly blended. Additionally, chilling the cups for longer can firm up the filling. If you’re feeling adventurous, consider swapping out Oreos for other cookie varieties, such as chocolate chip or graham crackers, to create unique flavors.
Don’t hesitate to add a splash of lemon or lime juice for a zesty twist. This citrus note can elevate the flavor profile, adding complexity to your cheesecake filling.
Serving and Storing Your Dessert
Serving/presentation
Serving your Oreo No-Bake Cheesecake Cups can be as creative as you wish. Presenting them in charming dessert dishes or jars elevates the aesthetic appeal. Layering extra crushed Oreos and whipped cream on top gives an inviting touch and makes them instantly picture-worthy.
For added flair, consider drizzling some chocolate syrup or a sprinkle of cocoa powder on top before serving. Such touches can entice your guests before they even take their first bite.
Pairings/storage
These Oreo No-Bake Cheesecake Cups pair delightfully with fresh berries or a scoop of vanilla ice cream. As for storage, cover your dessert cups tightly and keep them in the refrigerator. They can last up to 3 days, making them an excellent make-ahead option for parties or gatherings.
If you need to store them for a longer duration, you can freeze them. Just ensure you wrap them well to prevent freezer burn. When you’re ready to serve, let them thaw in the refrigerator for a few hours for the perfect consistency.
You create a show-stopping dessert that’s both simple and sophisticated by mastering the art of Oreo No-Bake Cheesecake Cups. With every layer, you embark on a delightful journey of flavors and textures that keeps everyone coming back for more.
Print
Oreo No-Bake Cheesecake Cups
- Prep Time: 15 minutes
- Cook Time: 0 minutes
- Total Time: 60 minutes
- Yield: 6 servings
- Category: Dessert
- Method: No-Baking
- Cuisine: American
- Diet: Vegetarian
Description
Delightful no-bake cheesecake cups made with creamy filling and crunchy Oreo crust, perfect for any occasion.
Ingredients
- 1 8 oz block of cream cheese, softened
- 1 8 oz Cool Whip or whipped topping
- 2/3 cup powdered sugar
- 1 tsp vanilla extract
- 24-26 Oreo cookies (more as desired)
Instructions
- Crush the Oreos in a sealed plastic bag using a rolling pin or sturdy wooden spoon until you achieve fine crumbs.
- Spoon 1 1/2 – 2 tablespoons of the crushed Oreos into the bottom of 6 small dessert dishes. Set aside.
- In a mixing bowl, use a hand or standing mixer to whip the softened cream cheese and powdered sugar together until creamy and smooth.
- Add the vanilla extract and blend until fully combined.
- Gently fold in the Cool Whip, taking care not to deflate the mixture.
- Fold in the remaining crushed Oreos to incorporate into the filling evenly.
- Divide the cheesecake filling evenly across the dessert cups and gently press onto the crushed Oreo crust.
- Chill in the refrigerator for about 60 minutes or until you’re ready to serve.
- Top with whipped cream and a sprinkling of crushed Oreos just before serving.
Notes
For a firmer texture, consider freezing the dessert cups for a short while after chilling. For added flavor, garnish with fresh fruit or a drizzle of chocolate sauce.
