
📑 Table of Contents ▶
Oreo Balls Recipe
There’s something magical about the combination of chocolate and cookies. Growing up, Oreo cookies brought an instant thrill, especially when shared with friends and family. The crunchiness of the cookie paired with the creamy filling created an irresistible experience. One day, while brainstorming dessert ideas for a family gathering, I decided to take my love for Oreos to the next level. This led me to the delightful creation of Oreo balls.
Dipping Oreo balls in chocolate results in a treat that captures everyone’s attention. Even those who claim they aren’t dessert lovers usually find themselves drawn to these sweet, bite-sized delights. They combine simplicity and deliciousness, making them the perfect party treat or a sweet pick-me-up at home.
Whether it’s for a birthday celebration, a holiday gathering, or simply a cozy movie night, these Oreo balls shine as the star of the dessert table. The blend of creamy and crunchy textures delivers a nostalgic taste that you simply can’t resist. The next time you have a craving for something sweet, reach for this Oreo balls recipe, and enjoy the smiles it brings.
The Basics of Oreo Balls
Fundamentals
Creating Oreo balls involves straightforward techniques, making it accessible even for novice bakers. The basic idea centers around crushed Oreo cookies, which come together with melted butter and a touch of milk for optimal consistency. After achieving the right texture, you give them a delightful coating of chocolate, taking them to another level of indulgence.
The use of various types of chocolate—dark, semi-sweet, or white—allows for exciting variations in flavor. Each type contributes its own richness that complements the savory Oreo filling. This flexibility means you can tailor your Oreo balls to suit your taste preferences, making it an adaptable recipe perfect for any occasion.
Preparation/Setup
To prepare for making Oreo balls, start by gathering your ingredients and necessary equipment. It helps to have a large food processor ready for efficiently crushing your cookies. Additionally, a baking sheet lined with parchment paper will make it easier to cool and serve your finished balls.
The process is largely hands-on, requiring some muscle for rolling the cookie mixture into balls. Chilling the balls in the freezer before dipping is essential to ensure they hold their shape when coated in chocolate. Take a moment to assess your workspace, as a clean area allows for smooth preparation.
Ingredients
You will need the following ingredients to make Oreo balls:
- 30 (340g) regular or gluten-free Oreo cookies
- 3 tablespoons (45g) unsalted butter, melted and cooled
- 2-5 tablespoons whole milk
- 8 ounces (225g) dark, semi-sweet, or white chocolate, chopped
- 1 teaspoon vegetable oil (optional)
Gathering these ingredients creates a foundation for a fun and tasty dessert. Keeping everything measured out and ready ahead of time streamlines the cooking process.
Directions
- Line a medium-sized baking sheet or cutting board with parchment paper and set aside.
- In the bowl of a large food processor, add in the Oreos (with the filling). Grind until the Oreos become very fine and crumbly.
- Add your melted butter and 2 tablespoons of milk to the Oreo crumbs. Pulse the mixture until it’s well moistened and sticks together without crumbling. Add more milk, 1 tablespoon at a time, if needed, until the mixture comes together.
- Scoop out 1 tablespoon-sized portions and roll them between your hands into smooth balls. Arrange on your parchment-lined baking sheet.
- If your mixture feels too crumbly to roll, blend in a bit more milk. If it becomes too sticky, scoop out portions and drop them onto the baking sheet. Chill in the freezer for 5-10 minutes until firm enough to roll smoothly.
- Place the Oreo balls in the freezer for at least 15 minutes or until solid before dipping in chocolate.
- Melt the chocolate in your microwave or on the stove over a double boiler.
- For the microwave, place the chopped chocolate in a microwave-safe bowl. Heat in 10-second bursts, stirring after each interval until melted and smooth.
- For the stovetop, fill a pot with 1 inch of water. Bring to a simmer, then reduce the heat. Place a heat-safe bowl with the chocolate over the pot, stirring frequently until melted.
- If using, mix in the oil to the melted chocolate and let it cool slightly for 5 minutes.
- Drop one Oreo ball into the melted chocolate, quickly toss to coat, then lift with a fork or chocolate dipping utensil. Gently shake to allow excess chocolate to drip off.
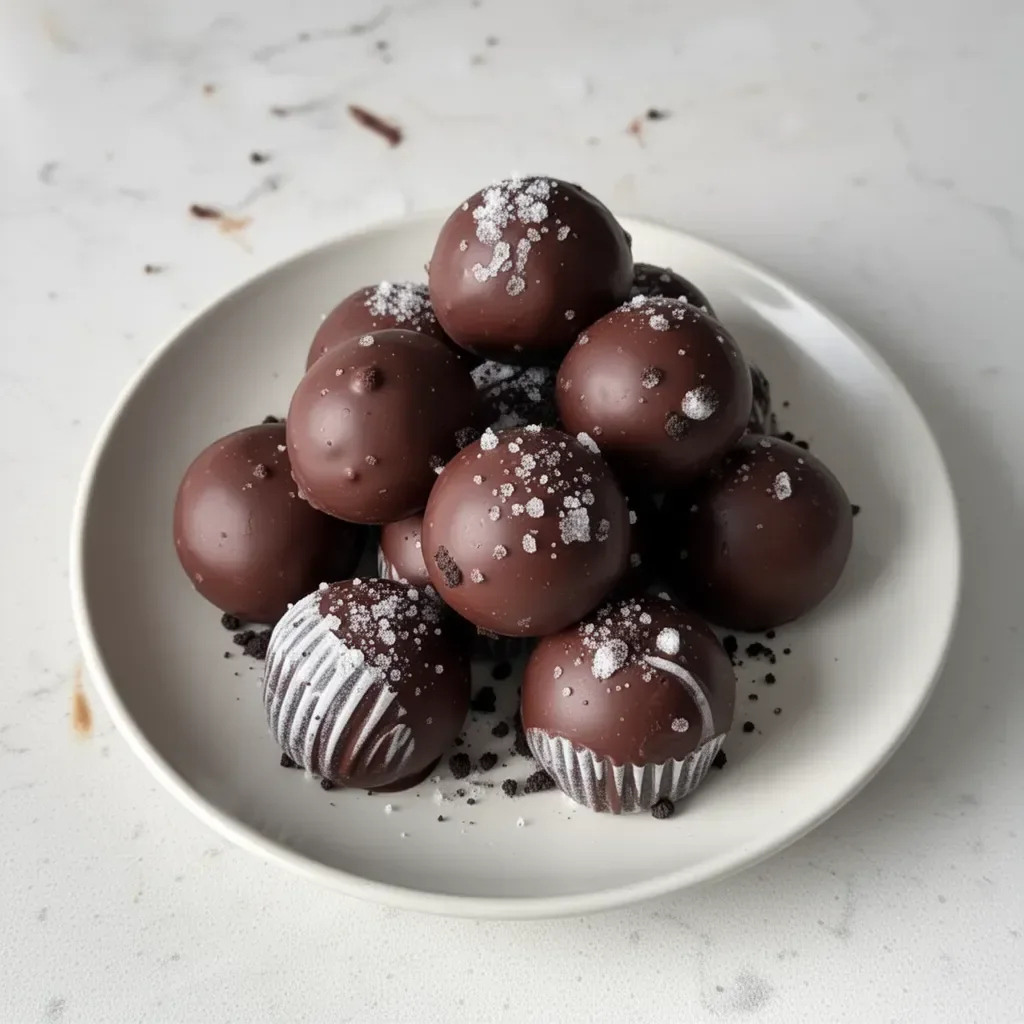
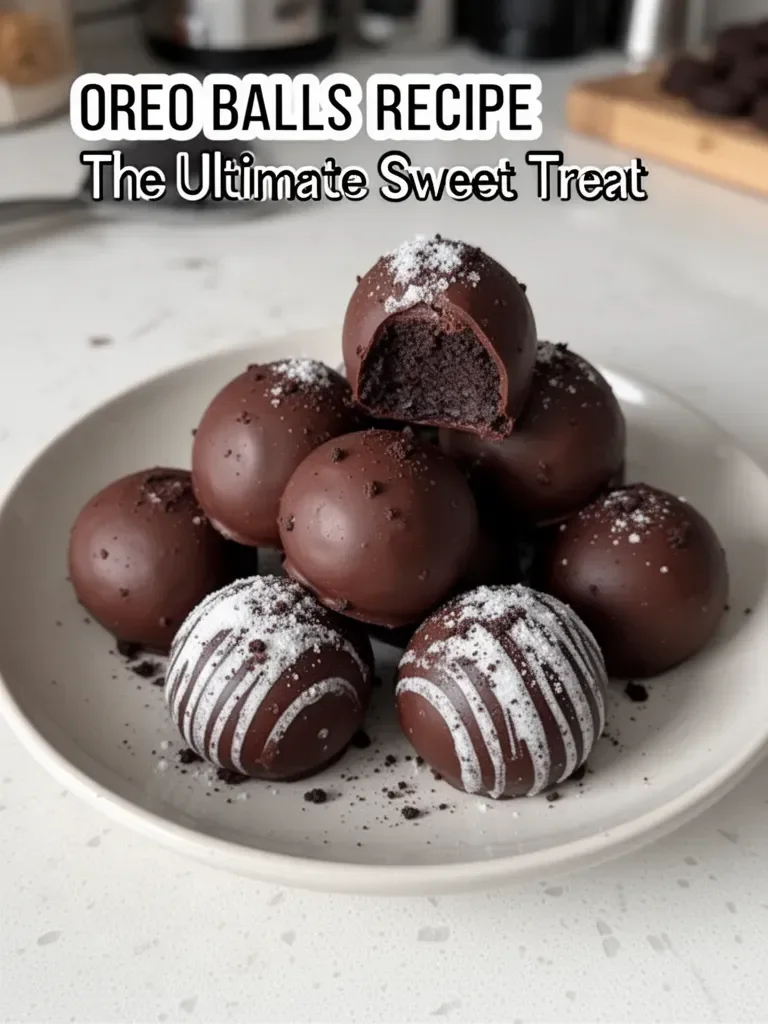
- Place the chocolate-dipped Oreo ball back onto the parchment-lined sheet. You can leave them plain or top with flaky sea salt or crushed Oreo crumbs while the chocolate is still wet.
- Repeat with remaining truffles. Chill the Oreo balls in the fridge or freezer until the chocolate layer is set. Store in the fridge until ready to serve.
Mastering the Process of Oreo Balls
Technique
Once you’ve got the basics down, enhancing your technique will refine your Oreo balls. Focus on achieving a smooth consistency when rolling the balls. Make sure the hands are slightly damp—this prevents the mixture from sticking while shaping. Forming the balls with uniform size not only ensures even appearances but also guarantees consistent texture and flavor in every bite.
Dipping the Oreo balls can be tricky without the right tools. A fork or a chocolate dipping tool is ideal. A fork allows for easy removal and gives the ball a nice coating. It can be helpful to tap the fork against the bowl’s edge to shed any excess chocolate before placing it back on the parchment.
Tips and Tricks
- Chilling Time: Don’t rush the chilling process. Allow the balls to freeze properly before coating. This helps them hold their shape and prevents them from melting during dipping.
- Experiment with Toppings: Before the chocolate coating sets, feel free to experiment with toppings. Crushed Oreos, sprinkles, or flaky sea salt can add a fun touch.
- Mixing it Up: Consider mixing in other ingredients like peanut butter or cream cheese to the crushed Oreos for added flavor. Each variation adds a delightful twist to a classic treat.
Perfecting Your Oreo Balls
Perfecting Results
Achieving Oreo balls with the perfect texture requires careful attention to moisture levels. The mixture should be moist enough to hold together, but not too wet that it loses shape. Adjust milk quantities according to the brand of Oreos—some may be drier than others, affecting the texture of your mixture.
For an elevated flavor experience, try using chocolate of various cocoa percentages. Dark chocolate provides a rich taste, while white chocolate offers a sweet contrast. Don’t hesitate to experiment to find your favorite combination.
Troubleshooting and Variations
- Too Crumbly: If the mixture is too crumbly, simply add additional milk, one tablespoon at a time. It should bind together without a struggle.
- Too Sticky: If the mixture becomes sticky, just put the balls in the freezer for a short time. This will help firm them up and make them easier to roll.
- Flavor Variations: For a seasonal twist, incorporate crushed peppermint candies or sprinkles for festive occasions.
Serving and Storing Oreo Balls
Serving and Presentation
Presenting Oreo balls creatively enhances their appeal. Arrange them on a decorative platter, perhaps garnished with a sprinkle of cocoa powder or extra crushed Oreos on the side. For added flair, you can drizzle different types of chocolate over the tops after the initial coating has set.
Whenever you serve these delightful treats, expect a crowd of eager dessert lovers. Their bite-sized nature makes them perfect for gatherings, allowing guests to indulge without the guilt of large portions.
Pairings and Storage
Oreo balls pair perfectly with coffee or milk, enhancing the chocolatey flavor. Serve them alongside fresh fruit for a balanced dessert table.
Store any unconsumed Oreo balls in a sealed container in the refrigerator. They can last up to a week, but they rarely last that long! The flavors tend to deepen and become richer over time, making them even more enjoyable later.
Creating Oreos balls transforms the beloved cookie into an unforgettable treat. With their adaptable flavors, irresistible chocolate coating, and charming bite-sized form, these Oreo balls are a must-try for any dessert lover. The simple ingredients come together to create a delightful experience, whether for casual enjoyment or festive celebrations.
Print
Oreo Balls
- Prep Time: 15 minutes
- Cook Time: 30 minutes
- Total Time: 45 minutes
- Yield: 20 servings
- Category: Dessert
- Method: Chilling
- Cuisine: American
- Diet: Vegetarian
Description
Delicious bite-sized treats made with crushed Oreos, butter, and chocolate.
Ingredients
- 30 (340g) regular or gluten-free Oreo cookies
- 3 tablespoons (45g) unsalted butter, melted and cooled
- 2-5 tablespoons whole milk
- 8 ounces (225g) dark, semi-sweet, or white chocolate, chopped
- 1 teaspoon vegetable oil (optional)
Instructions
- Line a medium-sized baking sheet or cutting board with parchment paper and set aside.
- Add the Oreos (with the filling) to a large food processor and grind until they become fine and crumbly.
- Add melted butter and 2 tablespoons of milk to the Oreo crumbs and pulse until well moistened. Add more milk if needed.
- Scoop out tablespoon-sized portions and roll into smooth balls, arranging them on the parchment-lined baking sheet.
- Chill the balls in the freezer for 5-10 minutes until firm enough to roll smoothly.
- Place the Oreo balls in the freezer for at least 15 minutes before dipping in chocolate.
- Melt the chocolate in a microwave-safe bowl or over a double boiler.
- Drop an Oreo ball into the melted chocolate, toss to coat, and lift with a fork to allow excess chocolate to drip off.
- Place the chocolate-dipped Oreo ball back onto the parchment sheet and add optional toppings if desired.
- Chill the Oreo balls in the fridge or freezer until the chocolate sets before serving.
Notes
Experiment with different types of chocolate and toppings for variety.
