

📑 Table of Contents ▶
No Knead Dutch Oven Bread
The first time I tried my hand at baking bread, I felt both excitement and trepidation. I had read countless recipes, but most seemed daunting. Then, I stumbled upon the magical world of no knead Dutch oven bread. The simplicity of mixing ingredients and letting time work its magic fascinated me. This technique transformed my idea of bread-making from a strenuous task into a delightful experience.
Imagine waking up to the aroma of freshly baked bread wafting through the house. No knead Dutch oven bread offers that warm, comforting feeling with minimal effort. The combination of warm water, flour, salt, and yeast creates a dough that rises beautifully, waiting for its moment in the oven. It’s a hands-off approach that brings joy to any home cook.
This method instantly became a staple in my kitchen. Whether I paired it with a simple soup or served it as a snack with butter, every loaf was a hit. As the crust turned golden and crispy, the insides remained soft and fluffy, making no knead Dutch oven bread a versatile addition to any meal. The best part? It requires no fancy skills or gadgets—just a bit of patience and enthusiasm for good food.
The Basics of No Knead Dutch Oven Bread
Fundamentals
No knead Dutch oven bread revolves around four core ingredients: all-purpose flour, salt, instant yeast, and warm water. Each component plays a crucial role in developing flavor and texture. All-purpose flour provides the structure necessary for a great loaf. Salt enhances the taste, while instant yeast brings the dough to life. Warm water activates the yeast and helps create a cohesive mixture that rises beautifully.
The beauty of this bread lies in its simplicity. With just these four elements, you can create a crunchy crust and a soft interior. This method emphasizes the power of time to develop flavors through a long fermentation process, making it incredibly beginner-friendly. No kneading means less work, yet the result is impressive.
Preparation/Setup
To start, find a large mixing bowl. Combine the 3 cups of all-purpose flour, 1 ½ teaspoons of salt, and ½ teaspoon of instant yeast. Stir them together to ensure even distribution. Gradually add the 1 ½ cups of warm water. As you mix, it’s normal to see a shaggy dough forming. Don’t be alarmed if it looks rough; that’s part of the allure.
Once combined, cover the bowl with plastic wrap, allowing it to rest at room temperature for 12 to 18 hours. This long wait allows the yeast to work its magic, developing flavor and texture. After the resting period, preheat your oven to 450°F (230°C). During this time, place a Dutch oven inside to heat up. This step is vital as it helps create an environment similar to a professional bakery.
Ingredients
- 3 cups all-purpose flour
- 1 ½ teaspoons salt
- ½ teaspoon instant yeast
- 1 ½ cups warm water
Directions
- In a large mixing bowl, combine flour, salt, and instant yeast.
- Stir in warm water until shaggy dough forms.
- Cover the bowl with plastic wrap and let it sit at room temperature for 12 to 18 hours.
- Preheat your oven to 450°F (230°C).
- Place a Dutch oven inside the oven while it heats up.
- Once heated, carefully remove the Dutch oven.
- Lightly flour a clean surface and shape the dough into a ball.
- Place the dough in the Dutch oven, cover it with the lid, and bake for 30 minutes.
- After 30 minutes, remove the lid and bake for an additional 15 to 20 minutes until the bread is browned and has a crispy crust.
- Let it cool before slicing.

Mastering the No Knead Technique
Technique
The no knead technique simplifies bread-making without sacrificing flavor. First, mixing the ingredients properly is crucial. Make sure that the water is evenly distributed throughout the dry ingredients. This step ensures proper hydration, which is essential for good gluten development even without the kneading process.
When it comes to shaping the dough, handle it gently. The goal is to maintain the air bubbles that formed during fermentation. That airy texture significantly contributes to the final loaf’s softness. After shaping, allow the dough to rest for a short time before placing it in the Dutch oven. This resting time lets the gluten relax, making it easier to achieve that beautiful round shape.
Tips/Tricks
Use a kitchen scale to measure ingredients accurately. While cups work, weighing flour often yields better results. Warm water should be between 100°F to 110°F for optimal yeast activation. If you’re in a cooler environment, consider using a microwave to warm your water.
Experiment with different flours for unique flavors. Whole wheat flour or bread flour can add depth to your no knead Dutch oven bread. Adjust the amount of water accordingly if you switch flours, as they may absorb moisture differently.
Don’t forget to monitor the baking time. Every oven is different, so keep a close eye on your bread as it bakes. The crust should be golden brown, and the bread should sound hollow when tapped on the bottom.
Perfecting Your No Knead Bread
Perfecting Results
Achieving the perfect loaf comes down to practice and a few key techniques. The fermentation period is essential. Longer fermentation results in better flavor development and a lighter texture. If you find that your bread is too dense, consider extending the resting time before baking.
Pay attention to the shaping method as well. A tighter shape will help the dough maintain its structure during baking, leading to a beautiful rise. Using parchment paper can also help to prevent sticking, especially if you’re baking in a Dutch oven without non-stick coating.
Troubleshooting/Variations
If your bread doesn’t rise well or turns out too dense, examine the temperature of your ingredients and environment. Cold dough can hinder yeast activity. Conversely, if it rises too quickly, it may indicate that the warm water was too hot or that it’s in a warmer spot.
You can also try adding herbs, cheeses, or seeds to elevate the flavor of your bread. Mixing in ingredients like rosemary, garlic, or cheese offers a delicious twist. Just be mindful not to overdo it, as too many additions might change the texture.
Elevating Your No Knead Dutch Oven Bread
Serving/Presentation
Presenting your freshly baked no knead Dutch oven bread can enhance the dining experience. Slice it while still warm, revealing the lovely airy texture inside. Serving it on a wooden board or in a woven basket creates a rustic presentation. After slicing, you can spread your choice of butter or dips, making it more inviting.
Consider pairing your bread with hearty soups and stews or serving it alongside salads. Toasting slices provides an excellent option for breakfast, while crusty pieces make an excellent foundation for bruschetta or toasted sandwiches.
Pairings/Storage
Storing your no knead Dutch oven bread requires some care to maintain freshness. Wrap it in a clean kitchen towel and place it in a breadbox or a paper bag for short-term storage. For longer freshness, consider freezing slices in an airtight container. This allows you to enjoy homemade bread anytime.
When it comes to pairings, think outside the box. This bread complements various spreads and toppings, from creamy cheeses to savory dips. Its versatility means you can use it as a side at any meal, enhancing dishes with its delightful textures.
With no knead Dutch oven bread, baking becomes an art of patience, allowing anyone to enjoy the fruits of their labor with minimal fuss.
Conclusion
The allure of no knead Dutch oven bread transcends the baking routine. It invites creativity, exploration, and, most importantly, satisfaction from homemade goodness. The recipe transforms simple ingredients into a comforting staple perfect for any table, showcasing that good bread is truly achievable for everyone. This approach to baking adds a wonderful touch to both everyday meals and special occasions. Enjoy the simplicity and richness of no knead Dutch oven bread, knowing that every loaf carries with it the warmth and comfort of homemade goodness.
Print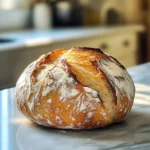
No Knead Dutch Oven Bread
- Prep Time: 720 minutes
- Cook Time: 45 minutes
- Total Time: 765 minutes
- Yield: 1 loaf
- Category: Bread
- Method: Baking
- Cuisine: Generic
- Diet: Vegetarian
Description
A simple and rewarding no knead bread recipe that yields a crispy crust and soft interior, perfect for pairing with soups or snacks.
Ingredients
- 3 cups all-purpose flour
- 1 ½ teaspoons salt
- ½ teaspoon instant yeast
- 1 ½ cups warm water
Instructions
- In a large mixing bowl, combine flour, salt, and instant yeast.
- Stir in warm water until a shaggy dough forms.
- Cover the bowl with plastic wrap and let it sit at room temperature for 12 to 18 hours.
- Preheat your oven to 450°F (230°C) and place a Dutch oven inside to heat up.
- Once heated, carefully remove the Dutch oven.
- Lightly flour a clean surface and shape the dough into a ball.
- Place the dough in the Dutch oven, cover with the lid, and bake for 30 minutes.
- After 30 minutes, remove the lid and bake for an additional 15 to 20 minutes until the bread is browned and has a crispy crust.
- Let it cool before slicing.
Notes
Perfect for pairing with soups or as a standalone snack. Experiment with different flours for unique flavors.
