
📑 Table of Contents ▶
- Understanding Sourdough Sandwich Bread
- Fundamentals
- Preparation/setup
- Directions
- Mastering Sourdough Sandwich Bread
- Technique
- Tips/tricks
- Perfecting Your Sourdough Sandwich Bread
- Perfecting results
- Troubleshooting/variations
- Serving and Storing Your Sourdough Sandwich Bread
- Serving/presentation
- Pairings/storage
- Easy Sourdough Sandwich Bread (Super Soft)
Easy Sourdough Sandwich Bread (Super Soft)
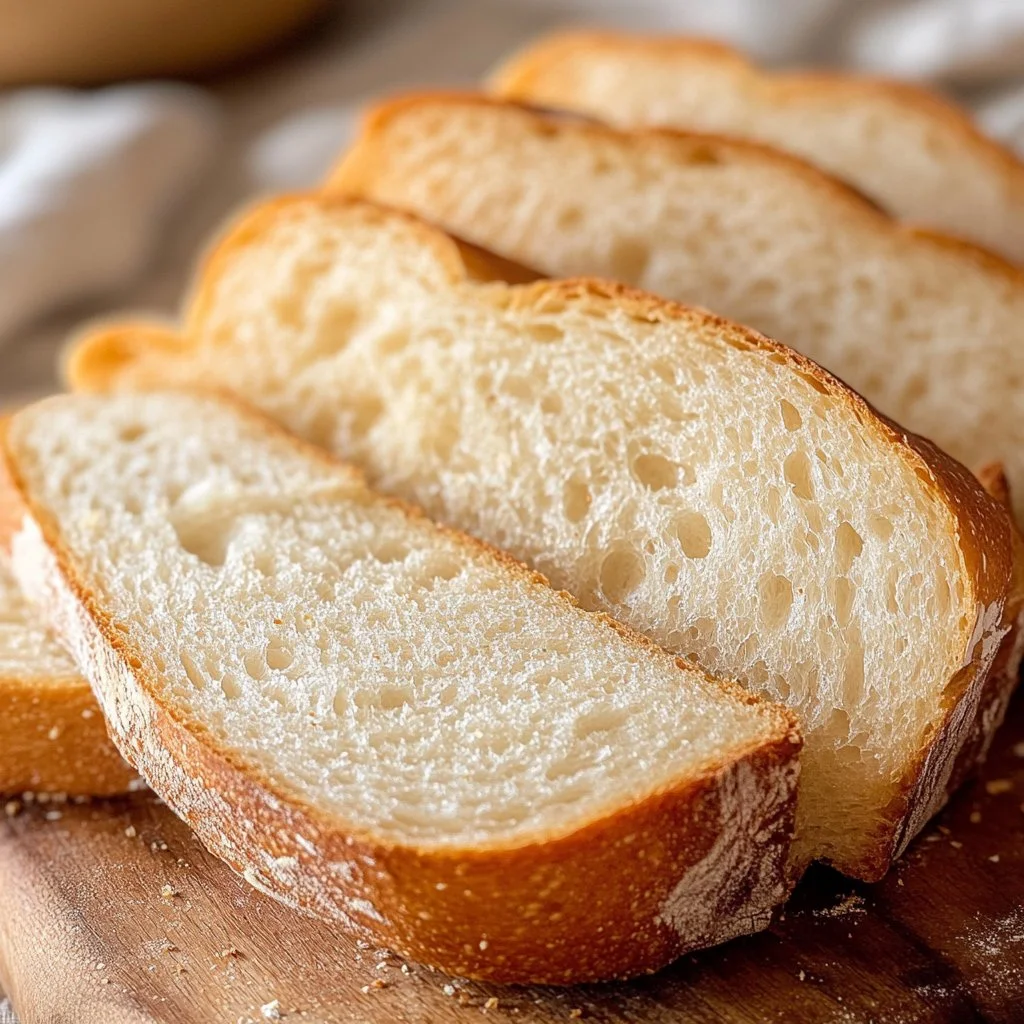
Making sourdough sandwich bread transforms a simple loaf into a delightful experience. The anticipation of its warm aroma wafting through the kitchen is something special. Each slice brings the perfect balance of crust and softness. It’s a thrill to cut into a freshly baked loaf, revealing its airy, fluffy insides, ready to be filled with your favorite ingredients.
The journey of making this sourdough sandwich bread starts with that beloved active starter. Feeding it gives life to your dough, creating a bread texture that is light and soft, perfect for sandwiches. Those moments spent gently kneading and shaping the dough truly highlight how rewarding the process can be.
This sourdough sandwich bread isn’t just a recipe; it’s a way to connect with the age-old tradition of bread-making. The ingredients blend harmoniously, crafting a loaf that elevates any meal. Setting aside a little time for this process is worthwhile, especially when you pull that golden loaf from the oven and savor the first warm slice.
Incorporating this sourdough sandwich bread into your home routine makes it a staple worth mastering. The satisfaction of creating something timeless feels incredible, and it’s a great way to nourish yourself and those you love.
Understanding Sourdough Sandwich Bread
Fundamentals
Sourdough sandwich bread stands apart from regular bread. Its unique texture and flavor come from naturally fermented dough, which gives it a character that yeast alone cannot match. The slow fermentation process not only produces delightful bubbles and a chewy texture but also allows for a deeper flavor profile. This results in a bread that won’t just hold your sandwich together; it enhances each bite.
This recipe emphasizes using an active sourdough starter. Start by feeding your starter. A well-fed starter ensures that the natural yeasts have reached their peak activity. This means a better rise and a lighter loaf at the end.
Understanding temperature and hydration levels also contributes significantly to the final product. Lukewarm water activates the yeast effectively, while the right flour combination—bread flour and all-purpose—provides structure and tenderness.
Preparation/setup
Preparation for sourdough sandwich bread combines both patience and excitement. Begin feeding your starter 4-8 hours prior to mixing your dough, ensuring that it becomes bubbly and active during that time. This crucial first step sets the foundation for a successful loaf.
After feeding, gather all your ingredients to minimize interruptions. The blend of 400 grams of bread flour and 100 grams of all-purpose flour provides the ideal balance for structure and softness.
Measuring accurately is essential, especially with careful ingredients like salt and sugar. The 12 grams of salt controls fermentation and enhances flavor, while 14 grams of sugar promotes browning and adds a hint of sweetness. Adding 15 grams of oil—either avocado or olive—improves moisture and helps create that soft crumb we all love.
Ingredients
- 65 grams active sourdough starter (active + bubbly)
- 300 grams lukewarm water
- 12 grams salt (2 teaspoons)
- 14 grams sugar
- 15 grams oil (avocado or olive) (1 tablespoon, plus more for coating the pan)
- 400 grams bread flour
- 100 grams all-purpose flour
Directions
- Start by mixing the active sourdough starter with lukewarm water in a large bowl.
- Gradually add the bread flour and all-purpose flour, mixing until no dry bits remain.
- Add salt, sugar, and oil. Mix until fully incorporated and a sticky dough forms.
- Knead the dough for about 10 minutes on a floured surface until smooth and elastic.
- Place the dough into a lightly oiled bowl, cover it, and let it rise until doubled in size, about 2-3 hours.
- Once the dough has risen, gently punch it down to release excess gas, then shape it into a loaf.
- Place the shaped dough into a greased loaf pan, cover, and allow it to rise again for about 1-2 hours.
- Preheat your oven to 425°F (220°C).
- Bake for 30-35 minutes or until golden brown and the bread sounds hollow when tapped.
- Remove from the oven, let it cool in the pan for 10 minutes, and then transfer it to a wire rack to cool completely.

Mastering Sourdough Sandwich Bread
Technique
Techniques matter when making sourdough sandwich bread. Kneading transforms the dough, developing gluten that contributes to the structure. Make sure to knead until the dough is smooth and elastic.
Pay careful attention to the first and second rises. The first rise allows flavors to develop and the dough to rise properly, while the second rise ensures that your loaf has the right texture. During the second rise, avoid rushing; giving the dough ample time to expand leads to a lighter crumb.
Temperature plays a pivotal role in fermentation. A warm environment will hasten the yeast’s activity, while a cooler setting may slow it down, which can be beneficial if you want to extend the fermentation time for additional flavor.
Tips/tricks
Achieving the perfect sourdough sandwich bread requires a bit of finesse. Consider these tips and tricks to enhance your baking experience.
Using a kitchen scale for precise ingredient measurements delivers more consistent results. Small discrepancies in flour or water quantity can lead to a significantly different loaf.
Experiment with the hydration level by adjusting the amount of water slightly. Different flours absorb water differently, and a wetter dough generally creates a fluffier bread.
Keep your workspace clean and organized to ensure that your bread-making process flows smoothly. Using a bench scraper can help manage sticky dough and keep everything tidy.
Lastly, have fun during the baking process. Embrace the imperfections, and enjoy the delicious creations coming from your kitchen.
Perfecting Your Sourdough Sandwich Bread
Perfecting results
To perfect your sourdough sandwich bread, consistently check your fermentation times and kneading methods. Master these, and your bread will be incredible every time.
Testing your bread for doneness can be achieved by looking for a golden-brown color and listening for a hollow sound when tapping the bottom of the loaf. Also, checking the internal temperature helps; it should reach around 190°F (88°C) for optimal results.
Practicing patience is key. The sourdough process takes time, and rushing it may compromise the final product, while patience allows for the development of flavors fully.
Troubleshooting/variations
Sometimes, things don’t always go as planned. Should your bread fail to rise adequately, check the activity level of your starter. An inactive starter can lead to inadequate fermentation.
If the bread appears too dense, consider adjusting the ratios of flour and water. Too much flour can result in a heavy loaf, while too little will affect the structure.
Always keep notes of your baking sessions. Documenting ingredients, temperatures, and times leads to more reliable results and adjustments in future baking endeavors.
The beauty of sourdough is its adaptability. Try adding herbs, seeds, or grains to customize flavors without affecting the bread’s integrity.
Serving and Storing Your Sourdough Sandwich Bread
Serving/presentation
Sourdough sandwich bread deserves to shine when served. Present it on a wooden cutting board, showcasing its beautiful crust and texture. Slicing it just before serving provides a delightful experience.
Consider pairing it with quality spreads. Creamy butter enhances the bread’s flavor, making it even more irresistible.
Use it as a base for sandwiches filled with hearty ingredients. Whether it’s turkey, vegetables, or your favorite spreads, sourdough enhances the taste with every bite.
Pairings/storage
Sourdough sandwich bread pairs beautifully with an array of meals. Serve it alongside soups and salads for a wholesome meal. As for storage, ensure you wrap the loaf in a clean kitchen towel or place it in a paper bag to maintain the crust’s integrity.
Avoid using plastic wraps; they can cause the crust to become chewy. For longer storage, slice the cooled loaf and freeze it. Just be sure to use parchment paper between slices to make thawing effortless.
With proper care, this delicious loaf remains a comforting presence in your kitchen. The journey of baking and enjoying sourdough sandwich bread brings satisfaction and warmth to any gathering or meal.
Making this recipe a staple enriches your culinary repertoire. Embrace the process, experiment with flavors, and share warmth through these delightful creations. Now, let’s make sourdough a regular celebration in your home.
Print
Easy Sourdough Sandwich Bread (Super Soft)
- Prep Time: 240 minutes
- Cook Time: 35 minutes
- Total Time: 275 minutes
- Yield: 1 loaf
- Category: Bread
- Method: Baking
- Cuisine: American
- Diet: Vegetarian
Description
Transform a simple loaf into a delightful sourdough sandwich bread with a perfect balance of crust and softness, ideal for any meal.
Ingredients
- 65 grams active sourdough starter (active + bubbly)
- 300 grams lukewarm water
- 12 grams salt (2 teaspoons)
- 14 grams sugar
- 15 grams oil (avocado or olive) (1 tablespoon, plus more for coating the pan)
- 400 grams bread flour
- 100 grams all-purpose flour
Instructions
- Mix the active sourdough starter with lukewarm water in a large bowl.
- Gradually add the bread flour and all-purpose flour, mixing until no dry bits remain.
- Add salt, sugar, and oil. Mix until fully incorporated and a sticky dough forms.
- Knead the dough for about 10 minutes on a floured surface until smooth and elastic.
- Place the dough into a lightly oiled bowl, cover it, and let it rise until doubled in size, about 2-3 hours.
- Once the dough has risen, gently punch it down to release excess gas, then shape it into a loaf.
- Place the shaped dough into a greased loaf pan, cover, and allow it to rise again for about 1-2 hours.
- Preheat your oven to 425°F (220°C).
- Bake for 30-35 minutes or until golden brown and the bread sounds hollow when tapped.
- Remove from the oven, let it cool in the pan for 10 minutes, and then transfer it to a wire rack to cool completely.
Notes
Using a kitchen scale for precise ingredient measurements is recommended. Experiment with hydration levels for varied texture.
