

📑 Table of Contents ▶
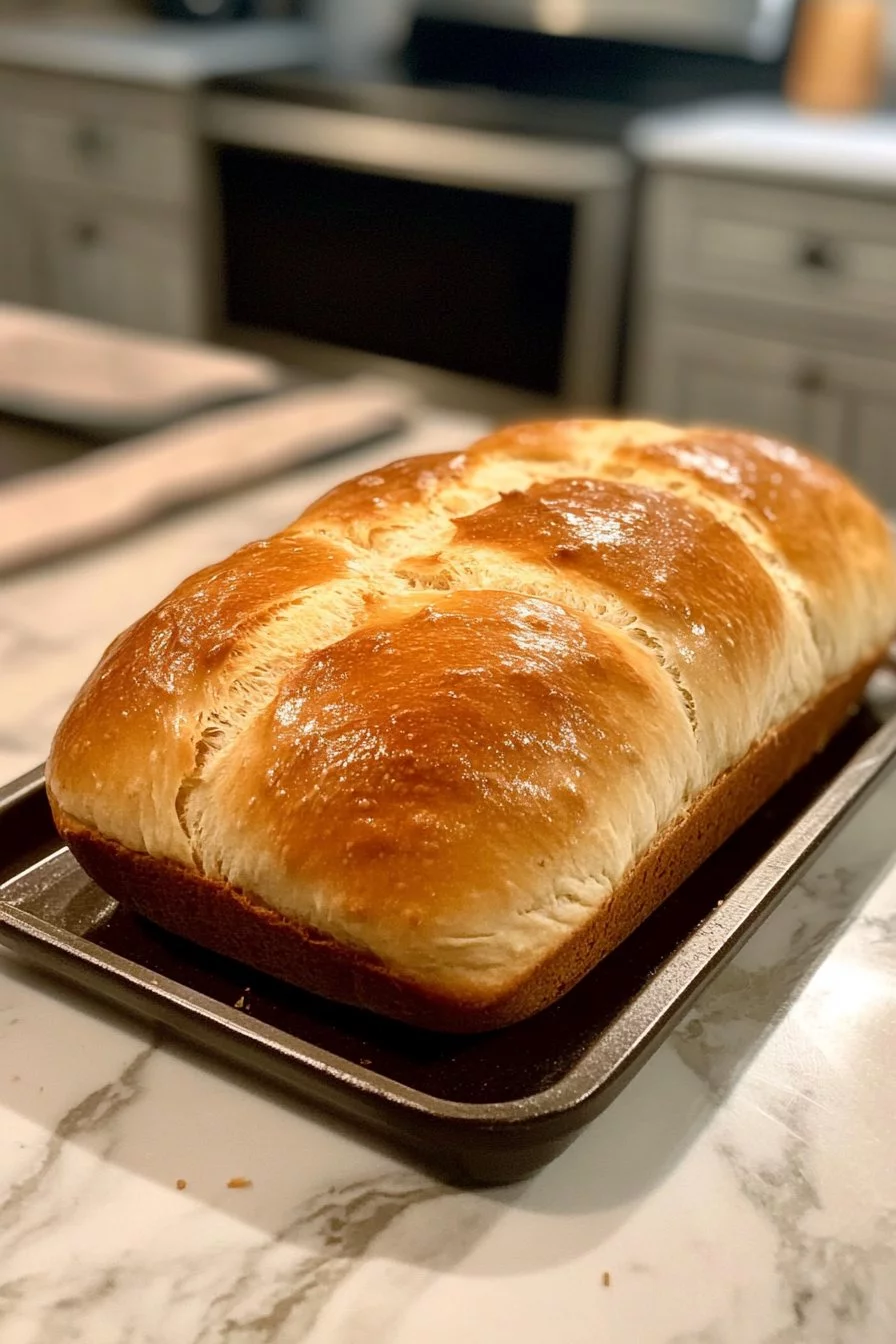
Easy Milk Bread
The aroma of freshly baked bread evokes memories of cozy kitchens and family gatherings. Easy milk bread holds a special place in my heart, reminding me of the time I discovered the joy of baking during a rainy afternoon. I wanted to create something simple yet delicious, and this delightful bread became my go-to recipe.
Just the act of blending warm milk with yeast set off a chain reaction of anticipation. Kneading the dough felt therapeutic, and watching it rise was like witnessing magic unfold. It transformed from a simple mixture into a pillowy loaf that filled my home with warmth. The best part? Slicing into that loaf and enjoying it fresh out of the oven. Baking easy milk bread doesn’t just fill stomachs; it fills hearts with a sense of accomplishment.
The simplicity of this bread recipe empowers even novice bakers. With everyday ingredients like flour, milk, and yeast, one can create something extraordinary. Each bite showcases the love and warmth that go into making this easy milk bread.
Part 1 — The Perfect Milk Bread
Fundamentals
Easy milk bread serves as a fantastic introduction to the world of baking. This versatile recipe includes basic ingredients like all-purpose flour, yeast, warm milk, sugar, and salt. Each component plays a vital role in achieving the perfect texture and flavor.
All-purpose flour provides the backbone of the bread, contributing to its structure. Active dry yeast works magic by fermenting and creating gas that causes the dough to rise. Warm milk hydrates the ingredients, enriches the flavor, and lends to a soft crumb. Balancing the sweetness with sugar and seasoning with salt enhances the overall taste.
Preparation/setup
Starting with a well-organized workspace simplifies the baking process significantly. Gather all the ingredients first; it streamlines everything. Measure out 2 cups of all-purpose flour, one cup of warm milk, and the necessary yeast, sugar, and salt.
Consider using a large mixing bowl for combining the flour, sugar, and salt, creating an excellent foundation for the dough. A smaller bowl becomes essential for the yeast mixture, allowing it to froth perfectly. This simple yet effective preparation eliminates confusion and sets the stage for impressive results.
Ingredients
- 2 cups all-purpose flour
- 1 cup warm milk
- 1 teaspoon active dry yeast
- 2 tablespoons sugar
- 1 teaspoon salt
- 2 tablespoons butter (optional)
Each ingredient serves a purpose. The butter adds richness to the bread, while the sugar acts as food for the yeast, enhancing its effectiveness. Keep everything measured and ready; it sets the tone for a successful baking experience.
Directions
- In a small bowl, dissolve the yeast in warm milk with a teaspoon of sugar. Let it sit for about 5-10 minutes until frothy.
- In a large mixing bowl, combine the flour, remaining sugar, and salt.
- Add the yeast mixture and butter (if using) to the dry ingredients, and mix until a dough forms.
- Knead the dough on a floured surface for about 10 minutes until smooth and elastic.
- Place the dough in an oiled bowl, cover with a cloth, and let it rise in a warm place for about 1 hour or until doubled in size.
- Preheat the oven to 350°F (175°C).
- Punch down the risen dough and shape it into a loaf. Place it in a greased loaf pan.
- Allow the dough to rise again for about 30 minutes.
- Bake in the preheated oven for 25-30 minutes, until golden brown.
- Let it cool slightly before slicing.
Part 2 — Baking Mastery
Technique
Baking easy milk bread is about mastering a few techniques. One critical step is kneading the dough. This technique develops the gluten, providing structure and elasticity. The right kneading method requires patience and practice. Knead the dough for about 10 minutes until it feels smooth and elastic.
Using the right temperature for the yeast is crucial as well. Too hot can kill the yeast, while too cold won’t activate it adequately. Utilize a thermometer to ensure the milk temperature is just right—about 110°F (43°C) works well.
Tips/tricks
Baking bread can be intimidating, but some essential tips can ease the anxiety. A warm, draft-free place for letting the dough rise is key. Consider placing it near a sunny window or preheating the oven briefly, then turning it off. Cover the dough with a clean towel to retain warmth and moisture.
Another tip involves incorporating butter. While optional, it enhances flavor for a richer loaf. If you’re looking for a slightly sweeter bread, consider increasing the sugar slightly to suit your taste.
Part 3 — Perfecting Results
Perfecting results
Achieving the perfect loaf of easy milk bread is a rewarding experience. Ensuring your ingredients are fresh contributes significantly to the outcome. Using fresh yeast and high-quality flour makes a notable difference in texture and flavor.
Once out of the oven, allow the bread to cool slightly on a wire rack. This state prevents the bread from becoming gummy. Assess its texture by giving it a gentle squeeze; a soft, pillowy feel indicates success.
Troubleshooting/variations
Even experienced bakers encounter challenges. If the dough doesn’t rise, verify the yeast’s viability. Conduct a simple test by activating it with warm water and sugar. If it doesn’t froth, consider getting a new packet.
Variations can elevate the basic recipe. Adding herbs or spices offers excitement to the flavor profile. Try including garlic powder or dried rosemary for a twist, making your easy milk bread uniquely yours.
Part 4 — Presentation and Experience
Serving/presentation
Milk bread shines when served warm. Slice it thick for an indulgent experience, and consider adding toppings like butter or jam. A rustic cutting board enhances presentation while inviting others to enjoy the deliciousness you’ve created.
Pair your milk bread with soups or salads for a complete meal. Its light, soft texture complements a variety of dishes, making it versatile for breakfast, lunch, or dinner.
Pairings/storage
While easy milk bread pairs beautifully with many dishes, consider enjoying it alongside a hearty soup or a fresh salad. You’ll find it a delightful companion to various meals.
For storage, wrap the bread in plastic wrap once cool. This keeps it fresh for several days. For longer preservation, slice and freeze it in an airtight bag, allowing easy access to your homemade treasure anytime.
Conclusion
The joy of creating easy milk bread stems from the simple act of mixing everyday ingredients to produce something extraordinary. The process connects bakers to their roots, celebrating time-honored traditions that bring a sense of belonging and satisfaction. Whether savoring a slice fresh from the oven or enjoying it later, this bread embodies comfort and creativity in every bite.
Print
Easy Milk Bread
- Prep Time: 15 minutes
- Cook Time: 30 minutes
- Total Time: 45 minutes
- Yield: 1 loaf
- Category: Bread
- Method: Baking
- Cuisine: General
- Diet: Vegetarian
Description
A cozy and delightful milk bread recipe that’s simple enough for novice bakers, yet delicious for everyone.
Ingredients
- 2 cups all-purpose flour
- 1 cup warm milk
- 1 teaspoon active dry yeast
- 2 tablespoons sugar
- 1 teaspoon salt
- 2 tablespoons butter (optional)
Instructions
- Dissolve the yeast in warm milk with a teaspoon of sugar in a small bowl and let it sit for about 5-10 minutes until frothy.
- In a large mixing bowl, combine the flour, remaining sugar, and salt.
- Add the yeast mixture and butter (if using) to the dry ingredients, and mix until a dough forms.
- Knead the dough on a floured surface for about 10 minutes until smooth and elastic.
- Place the dough in an oiled bowl, cover with a cloth, and let it rise in a warm place for about 1 hour or until doubled in size.
- Preheat the oven to 350°F (175°C).
- Punch down the risen dough and shape it into a loaf, placing it in a greased loaf pan.
- Allow the dough to rise again for about 30 minutes.
- Bake in the preheated oven for 25-30 minutes, until golden brown.
- Let it cool slightly before slicing.
Notes
For a slightly richer flavor, consider adding butter. Ensure your ingredients are fresh for the best results.
