
📑 Table of Contents ▶
- Easy Cherry Pie Bars: A Delicious Delight
- Fundamentals
- Preparation/setup
- Directions
- Techniques for Perfect Cherry Pie Bars
- Technique
- Tips and Tricks
- Perfecting Your Cherry Pie Bars
- Perfecting Results
- Troubleshooting and Variations
- Presenting and Storing Your Cherry Pie Bars
- Serving and Presentation
- Pairings and Storage
- Easy Cherry Pie Bars
Easy Cherry Pie Bars: A Simple Cherry Dessert to Savor
Baking has always held a special place in my heart, particularly when it comes to cherry pie bars. One of my fondest memories revolves around my grandmother, who filled her kitchen with the sweet aroma of cherries and warm butter. These Easy Cherry Pie Bars remind me of those moments, providing a simple yet satisfying way to enjoy cherries in dessert form.
Every time I prepare this cherry dessert, I find myself transported back to those sunny afternoons. The process of mixing ingredients brings a sense of joy as I encourage friends and family to gather and share in the sweet experience. The layers of buttery goodness, combined with a rich cherry filling, create a treat that everyone loves.
These Easy Cherry Pie Bars offer not just a dessert but a chance to create memories. The vibrant flavors of almond and vanilla match perfectly with the cherries, creating more than just a snack; it’s an experience. Each bite captures the essence of home and warmth, bringing smiles and conversations around the table.
Exploring this delightful recipe proves simple, making it the perfect addition to any gathering or special occasion. Let’s dive into the delightful world of Easy Cherry Pie Bars and start your baking journey today.
Easy Cherry Pie Bars: A Delicious Delight
Fundamentals
Creating the perfect Easy Cherry Pie Bars begins with understanding the fundamentals of the ingredients involved. This dessert relies on a neat balance of flavors and textures. The butter serves as the rich foundation, ensuring a luscious mouthfeel. Pair this with sugar, which sweetens the experience and enhances the flavor profile of cherries.
Two large eggs contribute to the bars’ structure, while the room-temperature eggs help bind the ingredients together. The almond and vanilla extracts add depth, transforming simple bites into something memorable. All-purpose flour and salt round out the base, creating a lovely texture that holds the cherry filling beautifully.
Understanding these elements lays the groundwork for a successful baking experience. Every ingredient plays a crucial role in finalizing the delightful cherry pie bars. Embrace these fundamentals, and allow yourself to savor the joy of making this cherry dessert.
Preparation/setup
Preparing your kitchen for Easy Cherry Pie Bars makes the process enjoyable and efficient. Begin by preheating your oven to 350°F (175°C). This step ensures your bars bake evenly.
Gather all necessary tools and ingredients to streamline your workflow. Use a mixing bowl for creaming your butter and sugar; a spatula makes it easier to mix in the eggs and extracts later. Having measuring cups and spoons handy minimizes errors and speeds up the preparation time.
Once you have everything in place, soften the butter to room temperature. This action allows for easier mixing with sugar, creating the creamy texture essential for your cherry bars. Prepare a baking pan by greasing it lightly, ensuring the bars come out effortlessly.
With the setup ready, you can focus entirely on the joyful process of baking. This preparation phase makes your stretch into the world of Easy Cherry Pie Bars inviting and fun.
Ingredients
Gather the following ingredients to create your Easy Cherry Pie Bars:
- 1 cup softened butter
- 1 cup sugar
- 2 large eggs, room temp
- 1 tsp almond extract
- 1 tsp vanilla extract
- 2 ½ cups all-purpose flour
- ½ tsp salt
- 1 (21 oz) can premium cherry pie filling
For the glaze, you will need:
- 1 cup confectioners’ sugar
- 1 tsp almond extract
- ½ tsp vanilla
- Milk as needed
These ingredients combine to form a cake-like texture, layered with cherry filling. The glaze adds a sweet touch, complementing the cherry flavors wonderfully. Each item contributes to the mouthwatering outcome, ensuring your baking experience remains straightforward and delicious.
Directions
- Preheat your oven to 350°F (175°C).
- Cream the softened butter and sugar together until light and fluffy.
- Add the eggs, almond extract, and vanilla extract to the mixture, blending well.
- Sift together the flour and salt, then gradually incorporate into the wet mixture.
- Press half of the dough into the prepared baking pan, creating a base layer.
- Spread the cherry filling evenly over the dough, ensuring it covers the surface.
- Dollop the remaining dough on top of the cherry filling, creating a rustic appearance.
- Bake for 35–40 minutes, or until golden brown.
- Allow the dessert to cool completely before drizzling with glaze.

Techniques for Perfect Cherry Pie Bars
Technique
The techniques one employs while baking can greatly influence the outcome of Easy Cherry Pie Bars. The creaming method, used to blend the butter and sugar, creates a vital airy texture. The lightness in the batter ultimately allows for a more enjoyable eating experience.
Handling the dough with care is essential. Do not over mix it once you add the flour. Overworking can lead to tough bars instead of the tender texture everyone craves.
When dolloping the remaining dough over the cherry filling, keep the rustic vibe. This approach allows for a delightful haphazard look that adds charm to your dessert. Don’t sweat the presentation; embrace the imperfect!
Tips and Tricks
To achieve the best results while making Easy Cherry Pie Bars, consider these tips and tricks. Ensure you always use room-temperature ingredients. This little detail guarantees smoother mixing and improves the overall texture of your bars.
If you don’t have almond extract, vanilla will work splendidly on its own. Feel free to experiment with other extracts if desired. Make adjustments to the sweetness by tasting the cherry filling before spreading it on the base. Each brand may differ in sweetness levels.
When cutting the bars after cooling, use a sharp knife for clean edges. This technique enhances the visual appeal when serving your delightful cherry dessert.
Perfecting Your Cherry Pie Bars
Perfecting Results
Perfecting your Easy Cherry Pie Bars hinges on a few key components. Pay attention to the baking time; opening the oven door can lead to uneven cooking. Use a toothpick to check for doneness: it should come out clean or with a few moist crumbs attached.
Cooling is equally critical. Allow the bars to cool fully for the best texture before drizzling the glaze. The glaze will adhere better to cooled bars, creating a beautiful finish.
Consider variations based on your palate. Adding a sprinkle of cinnamon or nutmeg can enhance the cherry filling further. These spices can elevate the flavors, resulting in a distinct take on your Easy Cherry Pie Bars.
Troubleshooting and Variations
Even with careful preparation, baking can sometimes lead to unexpected results. If your bars remain too soft after baking, they likely require a bit more time in the oven. Alternatively, if they emerge too dry, consider reducing the baking time in future batches.
For a change, substitute the cherry pie filling for another fruit variety, such as blueberry or apple. The base recipe remains the same, but the flavor transforms, offering opportunities for year-round enjoyment.
Experimentation leads to creativity. Individuals can add different extracts, toppings, or glazes to make these bars their own.
Presenting and Storing Your Cherry Pie Bars
Serving and Presentation
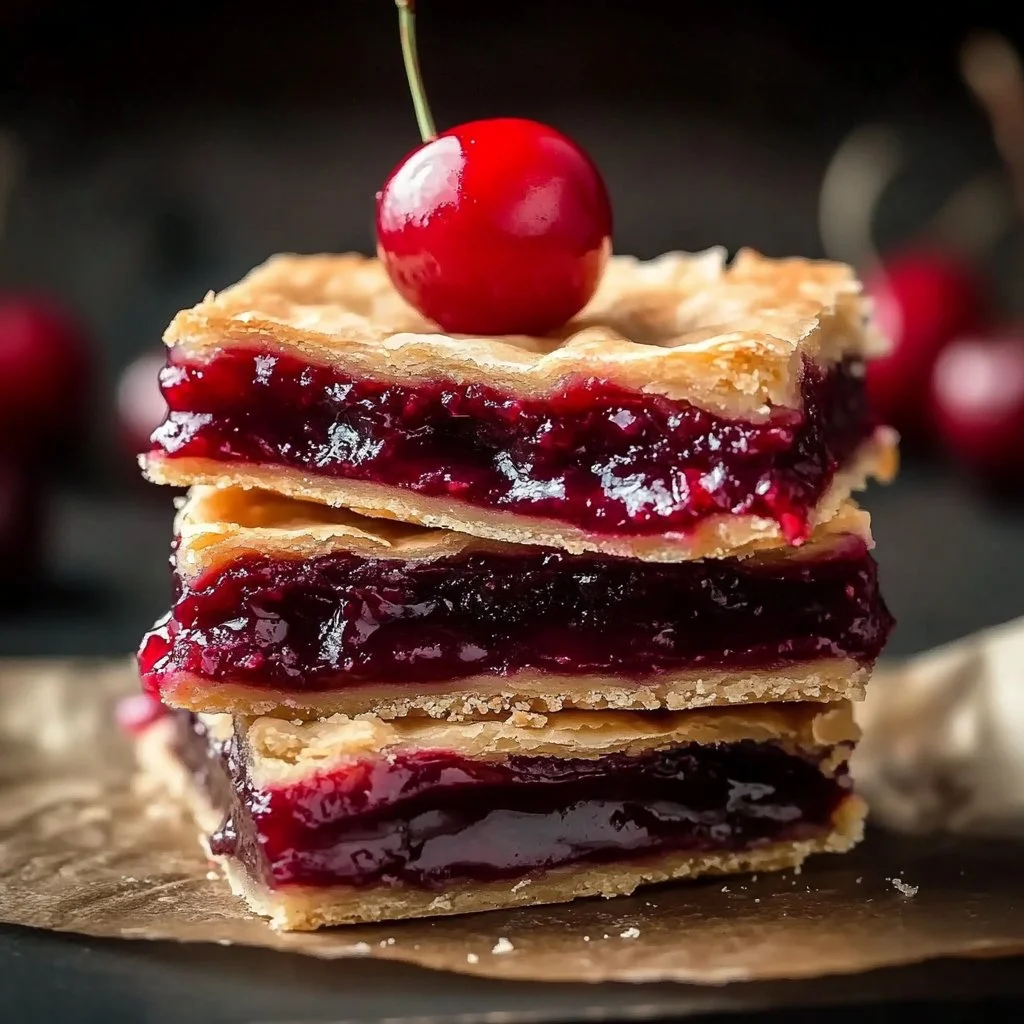
When it comes to serving your Easy Cherry Pie Bars, presentation plays a crucial role. Slice the bars into squares and arrange them neatly on a platter. A touch of fresh cherries or mint leaves can enhance the visual appeal.
Dust some confectioners’ sugar over the top for a beautiful finish. This simple addition reveals a professional touch, impressing guests with minimal effort. Plating is an opportunity to elevate your cherry dessert beyond its humble origins.
Pairings and Storage
These bars pair wonderfully with a dollop of whipped cream or a scoop of vanilla ice cream. The creamy elements contrast beautifully with the cherry filling, balancing flavors harmoniously.
Store leftover Easy Cherry Pie Bars in an airtight container at room temperature for up to three days. Refrigeration can extend their shelf life but may alter the texture slightly. Allow the bars to come to room temperature before serving again for the best experience.
Creating Easy Cherry Pie Bars embodies the spirit of home baking. The recipe requires simple ingredients and a few essential techniques to produce delicious results. Embrace experimenting with flavors and variations to keep this dessert fresh and exciting. Whether enjoyed at gatherings or quiet nights at home, these bars radiate warmth and joy. Make them a staple in your kitchen and cherish the simple pleasure they bring.
Print
Easy Cherry Pie Bars
- Prep Time: 15 minutes
- Cook Time: 40 minutes
- Total Time: 55 minutes
- Yield: 12 servings
- Category: Dessert
- Method: Baking
- Cuisine: American
- Diet: Vegetarian
Description
Delicious cherry pie bars made with a buttery base and sweet cherry filling, perfect for any gathering.
Ingredients
- 1 cup softened butter
- 1 cup sugar
- 2 large eggs, room temp
- 1 tsp almond extract
- 1 tsp vanilla extract
- 2 ½ cups all-purpose flour
- ½ tsp salt
- 1 (21 oz) can premium cherry pie filling
- 1 cup confectioners’ sugar (for glaze)
- 1 tsp almond extract (for glaze)
- ½ tsp vanilla (for glaze)
- Milk as needed (for glaze)
Instructions
- Preheat your oven to 350°F (175°C).
- Cream the softened butter and sugar together until light and fluffy.
- Add the eggs, almond extract, and vanilla extract to the mixture, blending well.
- Sift together the flour and salt, then gradually incorporate into the wet mixture.
- Press half of the dough into the prepared baking pan, creating a base layer.
- Spread the cherry filling evenly over the dough, ensuring it covers the surface.
- Dollop the remaining dough on top of the cherry filling, creating a rustic appearance.
- Bake for 35–40 minutes, or until golden brown.
- Allow the dessert to cool completely before drizzling with glaze.
Notes
For best results, use room temperature ingredients. You can substitute the almond extract with more vanilla if desired.
