

📑 Table of Contents ▶
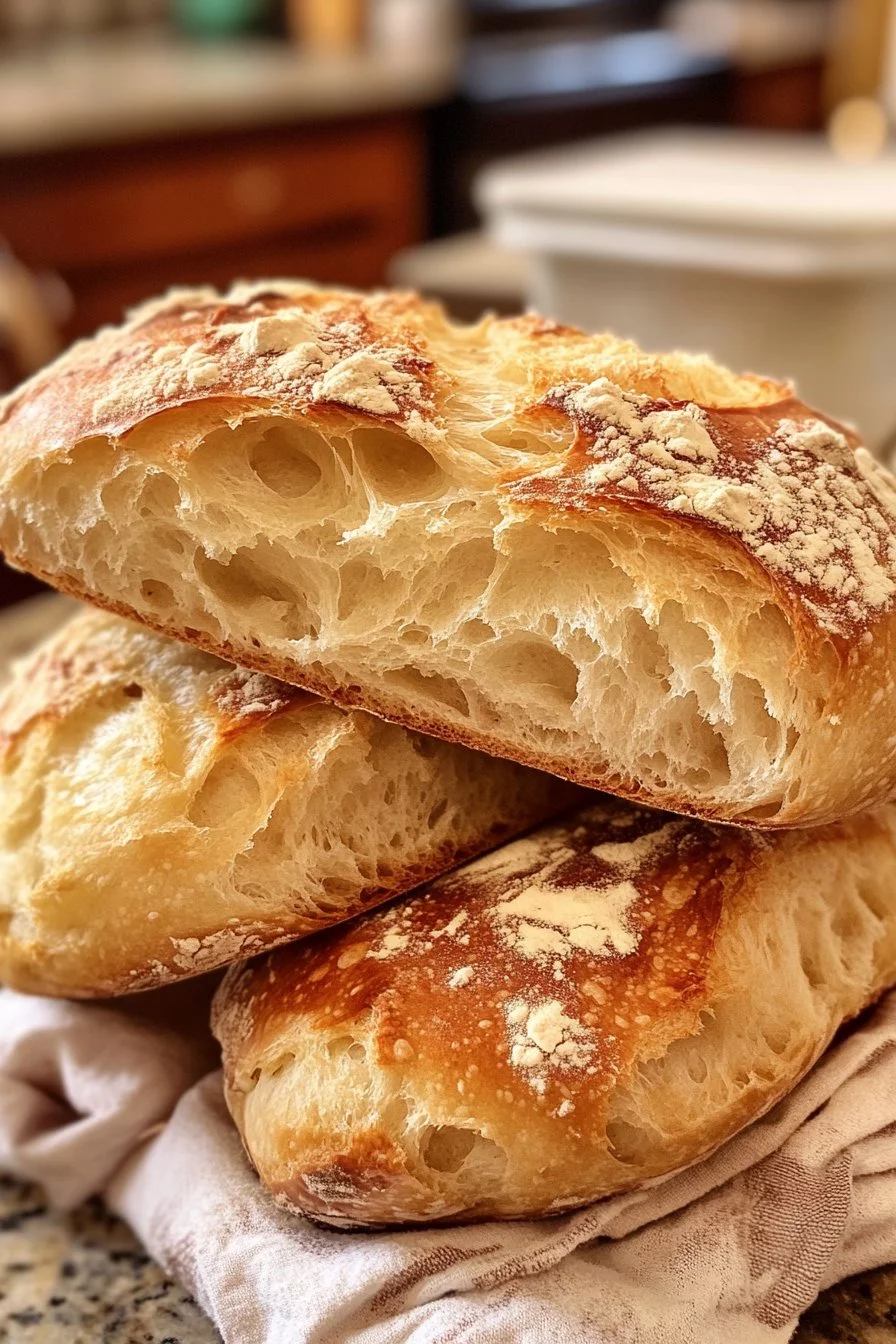
Crusty Italian Bread
The aroma of freshly baked bread wafting through the house transports me back to my grandmother’s kitchen. As a child, I spent countless weekends watching her craft the perfect crusty Italian bread from scratch. The flour dust danced in the air while she kneaded the dough, weaving in love and tradition. I can still hear the sounds of laughter as family gathered around the table to enjoy her wholesome creations.
This crusty Italian bread became a family staple, a tactile memory of comfort and connection. There’s something magical about the way bread rises, transforming simple ingredients into something extraordinary. Just a few basic components come together to create a loaf that’s perfect for slicing, toasting, or serving alongside a hearty soup.
Making crusty Italian bread at home feels just as special now as it did back then. With a few straightforward steps, you can bring that same joy into your kitchen. This recipe yields a beautifully crusty exterior and a soft, airy interior. Gather your ingredients, roll up your sleeves, and get ready to create an irresistible bread that will warm your heart and home.
Part 1 — Crusty Italian Bread
Fundamentals
Creating crusty Italian bread starts with understanding the basics of bread-making. The primary ingredients are all-purpose flour, salt, sugar, yeast, olive oil, and warm water. Each component plays a crucial role in the development of flavor and texture.
The active dry yeast serves as the leavening agent, helping the dough to rise. Sugar nourishes the yeast, allowing it to activate and create that delightful rise. Salt enhances flavor while controlling yeast activity, ensuring that your loaf doesn’t overproof. Olive oil contributes to a moist crumb and a beautiful crust.
The combination of these ingredients results in a bread that boasts a crispy exterior and a fluffy interior. This classic loaf embodies the simplicity of traditional Italian baking.
Preparation/setup
Before diving into the baking process, it is essential to set up your kitchen. Select a large mixing bowl to combine your ingredients and a floured surface for kneading. Have your baking stone or an inverted baking sheet ready in the oven for that perfect crust.
Make sure to cover your dough during the rising phases to protect it from drafts. A warm spot in your kitchen ideal for rising helps ensure the dough reaches its full potential. Prepare parchment paper to transfer the shaped loaf onto, making it easier to slide onto the baking stone.
Ingredients
To make your crusty Italian bread, you’ll need the following ingredients:
- 3 1/2 cups all-purpose flour
- 1 1/2 teaspoons salt
- 1 teaspoon sugar
- 1 packet (2 1/4 teaspoons) active dry yeast
- 1 1/4 cups warm water (about 110°F)
- 2 tablespoons olive oil
Directions
- In a large mixing bowl, combine warm water, sugar, and yeast. Let sit for about 5 minutes until frothy.
- Add flour, salt, and olive oil. Stir until a rough dough forms.
- Turn the dough onto a floured surface. Knead for 8-10 minutes until smooth and elastic.
- Place the dough in a greased bowl, cover, and let rise in a warm place for 1 to 1.5 hours until doubled.
- Preheat the oven to 450°F. Place a baking stone or inverted baking sheet in the oven to heat.
- Punch down the risen dough. Shape it into a round loaf and place it on parchment paper.
- Cover and let rise for another 30 minutes.
- Score the top with a sharp knife. Transfer the loaf (on parchment) to the hot stone or sheet. Bake for 25-30 minutes until golden brown and sounds hollow when tapped.
- Cool on a wire rack before slicing.
Part 2 — Crafting the Perfect Loaf
Technique
Creating the ideal crusty Italian bread requires attention to technique. Start with the right water temperature to ensure optimal yeast activation. Water that is too hot can kill the yeast, while water that is too cold will slow down activation.
Knead the dough thoroughly to develop gluten, which gives bread its structure and elasticity. Incorporate your ingredients gently but purposefully, ensuring even distribution of salt and oil for balanced flavor.
After the first rise, converting the dough into a loaf is exciting. Carefully shape the dough while preserving its gases. This step retains air bubbles, contributing to the lightness of the finished bread.
Tips/tricks
A few tips can enhance your bread-making experience. Always check the expiration date on your yeast to ensure it’s active. If you’re unsure, activate it in warm water with a bit of sugar before mixing with dry ingredients.
For additional flavor, consider adding herbs or garlic powder to your flour. Experimenting with different flours, such as whole wheat or bread flour, can yield varying textures.
Create steam in your oven during the initial baking phase by placing a pan of water on the bottom rack. This method helps achieve that lovely crust.
Part 3 — Perfecting Results
Perfecting results
After your first few baking attempts, achieving the perfect crusty Italian bread is within reach. Monitor your dough carefully during each rise. If it doesn’t double in size, give it more time. The warmth of your kitchen is key for proper fermentation.
Another essential aspect is how the loaf sounds when tapped. A hollow sound indicates that it’s fully baked. Additionally, cooling the loaf on a wire rack prevents sogginess on the bottom, maintaining that crucial crunch.
If you want to elevate your skills, consider mastering your oven settings. The heat distribution can vary by oven, and understanding your appliance will lead to more consistent results.
Troubleshooting/variations
Common challenges arise in homemade bread-making, but many have straightforward solutions. If the bread lacks height, examine the yeast activation process. A longer kneading session might also develop gluten properly.
If your crust is too hard, consider reducing the baking time slightly or lowering the oven temperature a bit. This approach can create a softer crust while retaining the desired interior texture.
Don’t hesitate to explore variations. Try adding cheese or olives to the dough for additional flavor or experimenting with pre-ferments for more complexity.
Part 4 — Serving Crusty Italian Bread
Serving/presentation
Crusty Italian bread deserves a beautiful presentation. Serve it warm, sliced generously, with butter or olive oil for dipping. Presentation matters; consider placing the loaf on a cutting board surrounded by fresh herbs or a bowl of robust olives.
Pair this bread with a fresh salad, hearty soups, or as a foundation for bruschetta. The crispness of the crust complements many meals. Utilize simple and elegant serving platters to elevate your dining experience.
Pairings/storage
Store any leftover crusty Italian bread in a paper bag at room temperature. Avoid plastic bags, which can make the crust soft. For longer storage, slice and freeze portions in an airtight container, allowing easy access for future meals.
To revive day-old bread, sprinkle with water and heat it in the oven for a few minutes. This method restores the crust’s crispness, making it taste freshly baked.
Conclusion
The creation of crusty Italian bread is a joyful endeavor that connects us to our culinary heritage. Each loaf is a reminder of the warmth and love baked into every home. With practice, anyone can master this beautiful bread, pulling off that earthy crust and fluffy interior. Embrace the art of bread-making, as it enriches not only your kitchen but also your heart. Enjoy every slice of your homemade goodness.
Print
Crusty Italian Bread
- Prep Time: 15 minutes
- Cook Time: 30 minutes
- Total Time: 45 minutes
- Yield: 1 loaf
- Category: Bread
- Method: Baking
- Cuisine: Italian
- Diet: Vegetarian
Description
A classic recipe for crusty Italian bread, perfect for slicing, toasting, or serving with hearty soups.
Ingredients
- 3 1/2 cups all-purpose flour
- 1 1/2 teaspoons salt
- 1 teaspoon sugar
- 1 packet (2 1/4 teaspoons) active dry yeast
- 1 1/4 cups warm water (about 110°F)
- 2 tablespoons olive oil
Instructions
- In a large mixing bowl, combine warm water, sugar, and yeast. Let sit for about 5 minutes until frothy.
- Add flour, salt, and olive oil. Stir until a rough dough forms.
- Turn the dough onto a floured surface. Knead for 8-10 minutes until smooth and elastic.
- Place the dough in a greased bowl, cover, and let rise in a warm place for 1 to 1.5 hours until doubled.
- Preheat the oven to 450°F. Place a baking stone or inverted baking sheet in the oven to heat.
- Punch down the risen dough. Shape it into a round loaf and place it on parchment paper.
- Cover and let rise for another 30 minutes.
- Score the top with a sharp knife. Transfer the loaf (on parchment) to the hot stone or sheet. Bake for 25-30 minutes until golden brown and sounds hollow when tapped.
- Cool on a wire rack before slicing.
Notes
For a soft crust, reduce baking time slightly or lower the oven temperature. Store leftovers in a paper bag at room temperature.
