
📑 Table of Contents ▶
Cherry Cake
Baking a cherry cake always reminds me of my childhood. My grandmother would whip up the most delightful cherry cakes for family gatherings, filling the kitchen with an irresistible aroma. The vibrant red of the cherries contrasting with the golden cake always drew everyone in. Every slice was a piece of joy, bringing laughter and stories together. The balance of sweetness, paired with the tart cherry flavor, created an experience that felt infinitely comforting.
When I decided to recreate her famous cherry cake, I discovered how simple it can be to bring those sweet memories back to life. Using just a package of cherry gelatin and a box of cake mix turned into a delightful adventure. It offers a chance to play with flavors while keeping the essence of my grandmother’s original recipe. Cherry cake isn’t just a dessert; it holds the power to bring people together with each bite.
In this article, I will guide you through preparing the perfect cherry cake, ensuring that every slice carries a taste of nostalgia. Let’s explore the simple steps to create a cherry cake that evokes fond memories and fills your home with warmth.
Cherry Cake: A Classic Delight
Fundamentals
Baking a cherry cake starts with understanding its foundation. This cake blends the sweet and tart flavors of cherries with a soft, fluffy cake. The cherry gelatin adds both color and richness, enhancing the overall flavor. It’s essential to choose a cake mix flavor that complements the cherries, whether it’s vanilla, chocolate, or even a lush butter cake.
Preparing your workspace is crucial. Gather your ingredients ahead of time to streamline the process. You’ll need a large mixing bowl, a whisk or an electric mixer, a measuring cup, and a greased cake pan. Proper preparation not only keeps the kitchen organized but also fuels your excitement as you bake.
Preparation/setup
Begin by reading through the instructions on your cake mix package. Preheating the oven is crucial since it ensures even baking. That way, the cake rises beautifully without any awkward textures. Aim for the temperature the package specifies, usually around 350°F.
While the oven heats, take a moment to gather all your ingredients. You’ll need the cake mix, cherry gelatin, eggs, oil (or melted butter), and water. If you plan to add cherries and whipped cream for topping later, have those ready too. This setup prepares you mentally and physically, making the baking process smooth and enjoyable.
Ingredients
The star ingredient for this cherry cake is undoubtedly the cherry gelatin. It infuses the cake with vibrant color and rich flavor. Here’s a breakdown of what you will need:
- 1 package of cherry gelatin
- 1 box of cake mix (your choice of flavor)
- Eggs (as required by cake mix)
- Oil or butter (as required by cake mix)
- Water (as required by cake mix)
- Cherries (fresh or canned for topping, optional)
- Whipped cream (for serving, optional)
This combination of ingredients makes for a moist, flavorful cake that’s perfect for any occasion. The simplicity doesn’t take away from the delightful outcome, showcasing how easy it is to create something special.
Directions
- Preheat your oven according to the cake mix package instructions.
- In a large mixing bowl, combine the cake mix with the cherry gelatin, and mix thoroughly.
- Add the required eggs, oil (or melted butter), and water as per the cake mix instructions.
- Stir until well combined, ensuring there are no lumps.
- Pour the batter into a greased cake pan.
- Bake for the time recommended on the cake mix package, checking for doneness with a toothpick.
- Allow the cake to cool completely.
- Optional: Top with cherries and whipped cream before serving.
Mastering Cherry Cake
Technique
Creating the perfect cherry cake involves understanding some key techniques. The way you mix the ingredients significantly affects the final texture. Overmixing can lead to a dense cake, so it’s important to stir until just combined. Using an electric mixer speeds up the process, but be cautious not to over-whip the batter.
While pouring the batter into the greased pan, use a spatula to smooth the top. This ensures an even surface, helping the cake bake uniformly. Timing is essential. Use a toothpick to check for doneness; if it comes out clean, your cake is ready.
Tips/tricks
Here are a few handy tips to elevate your cherry cake game. First, consider adding a pinch of salt to balance the sweetness. This enhances the flavor profile and keeps the cake from becoming overly sugary.
If you want to introduce an additional layer of flavor, adding almond extract complements the cherry notes beautifully. Experimenting with different cake mixes can yield delightful surprises, opening the door to unique taste combinations.
Lastly, after cooling the cake, let it sit for a few hours before frosting. This resting period allows the flavors to develop fully, resulting in a better-tasting cake.
Refining Your Cherry Cake
Perfecting results
To perfect your cherry cake, pay attention to detail during baking. Ensure your oven is calibrated to the right temperature to avoid underbaking or burning. Using a light-colored cake pan promotes even baking, while dark pans can sometimes lead to a crusty exterior.
After baking, cooling the cake properly is key. Allow it to rest in the pan for about ten minutes before transferring it to a wire rack. This prevents it from becoming soggy from steam trapped in the pan.
Troubleshooting/variations
Not every attempt will go as planned, and that’s perfectly fine. If your cake turns out too dense, it’s likely due to overmixing. Next time, mix just until combined. If your cake sinks in the middle, ensure you’re using the correct oven temperature and that your leavening agents (like baking powder) are fresh.
Consider variations, such as incorporating chocolate chips or swirling in some fruit puree. Experimenting with flavors can lead to delightful new takes on this classic cherry cake.
Serving Cherry Cake
Serving/presentation
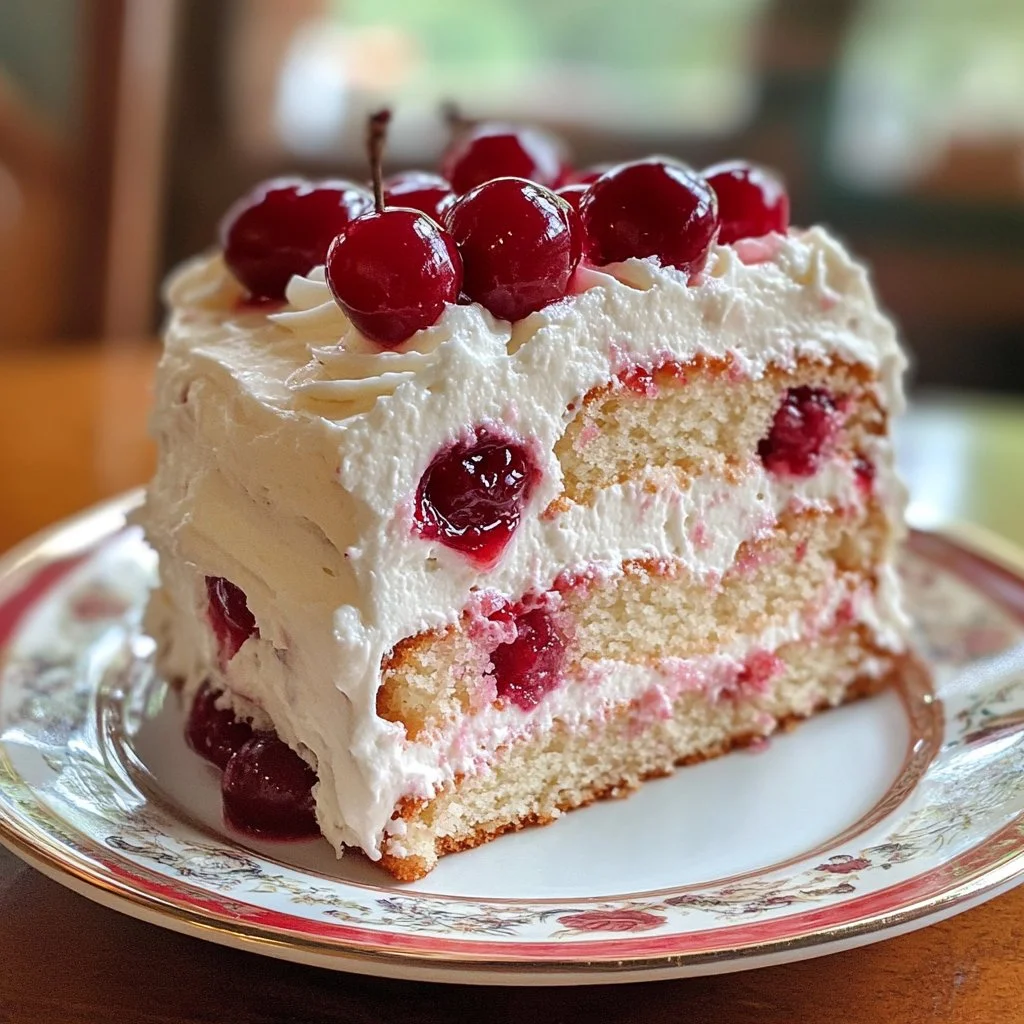
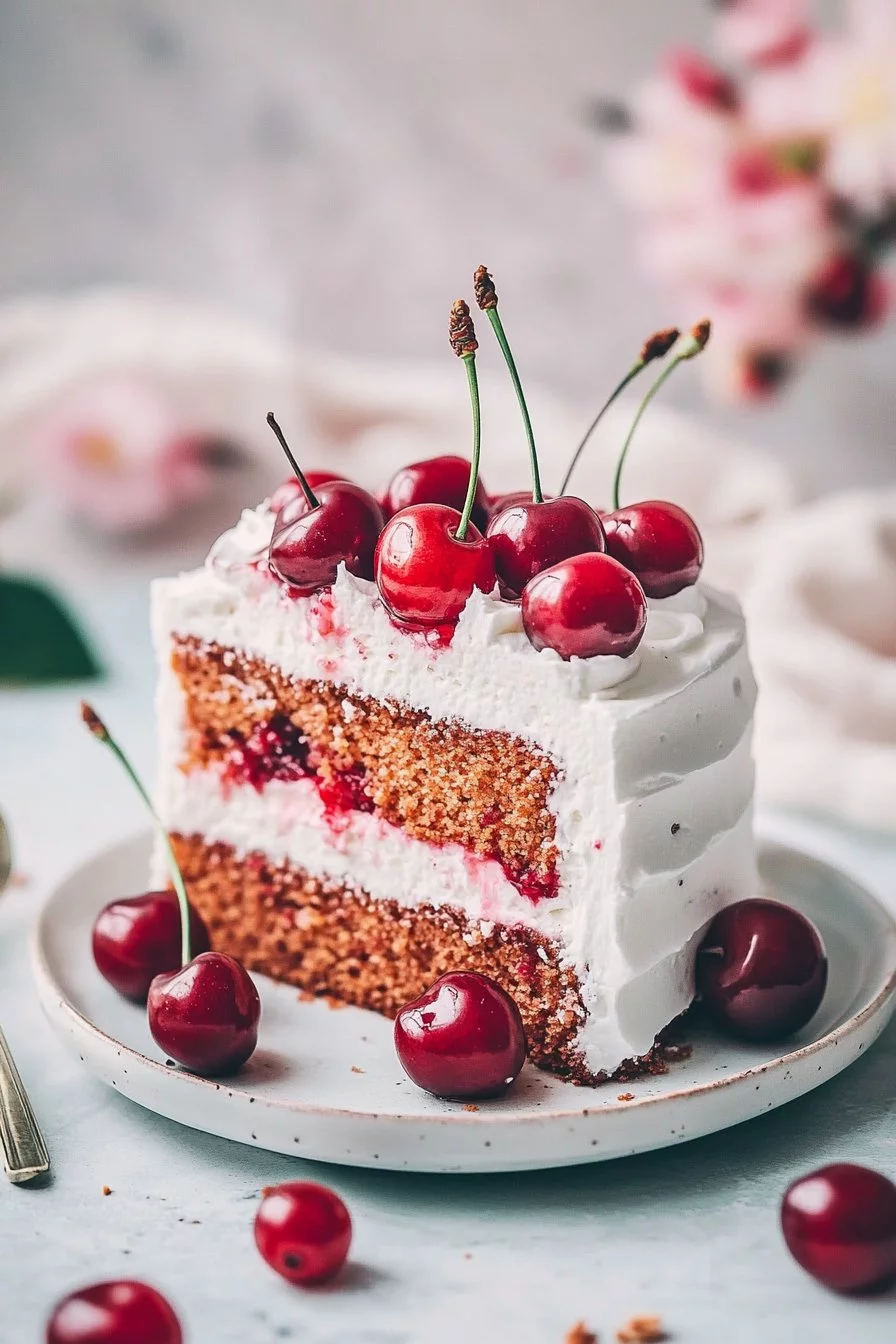
Presentation plays a big role in how your cherry cake is received. Once cooled, placing the cake on a decorative platter adds a touch of elegance. If you opt for the optional cherries and whipped cream, arrange them skillfully atop the cake. Fresh cherries add a beautiful, vibrant look that’s hard to resist.
Serving warm slices with a dollop of whipped cream enhances the experience, making it even more indulgent. Don’t shy away from garnishing with mint leaves for an additional pop of color.
Pairings/storage
While many enjoy cherry cake on its own, it pairs wonderfully with a scoop of vanilla ice cream or even a drizzle of chocolate sauce. For storage, lightly cover the cake with plastic wrap or place it in an airtight container to keep it fresh for up to three days.
If you plan on storing leftovers, ensure they cool completely before covering them. This prevents condensation, keeping the cake moist and delicious for future enjoyment.
Cherry cake is more than just a dessert; it’s a treasure trove of memories and flavors. With simple ingredients and techniques, anyone can recreate this delightful treat. Enjoy making and sharing it with others, bringing everyone a taste of nostalgia in every bite.
Print
Cherry Cake
- Prep Time: 15 minutes
- Cook Time: 30 minutes
- Total Time: 45 minutes
- Yield: 8 servings
- Category: Dessert
- Method: Baking
- Cuisine: American
- Diet: Vegetarian
Description
A delightful cherry cake that combines sweet and tart flavors, perfect for family gatherings and evoking fond memories.
Ingredients
- 1 package of cherry gelatin
- 1 box of cake mix (your choice of flavor)
- Eggs (as required by cake mix)
- Oil or melted butter (as required by cake mix)
- Water (as required by cake mix)
- Cherries (fresh or canned for topping, optional)
- Whipped cream (for serving, optional)
Instructions
- Preheat your oven according to the cake mix package instructions.
- In a large mixing bowl, combine the cake mix with the cherry gelatin, and mix thoroughly.
- Add the required eggs, oil (or melted butter), and water as per the cake mix instructions.
- Stir until well combined, ensuring there are no lumps.
- Pour the batter into a greased cake pan.
- Bake for the time recommended on the cake mix package, checking for doneness with a toothpick.
- Allow the cake to cool completely.
- Optional: Top with cherries and whipped cream before serving.
Notes
For added flavor, consider incorporating a pinch of salt or almond extract. Let the cake sit for a few hours before frosting for the best taste.
