
📑 Table of Contents ▶
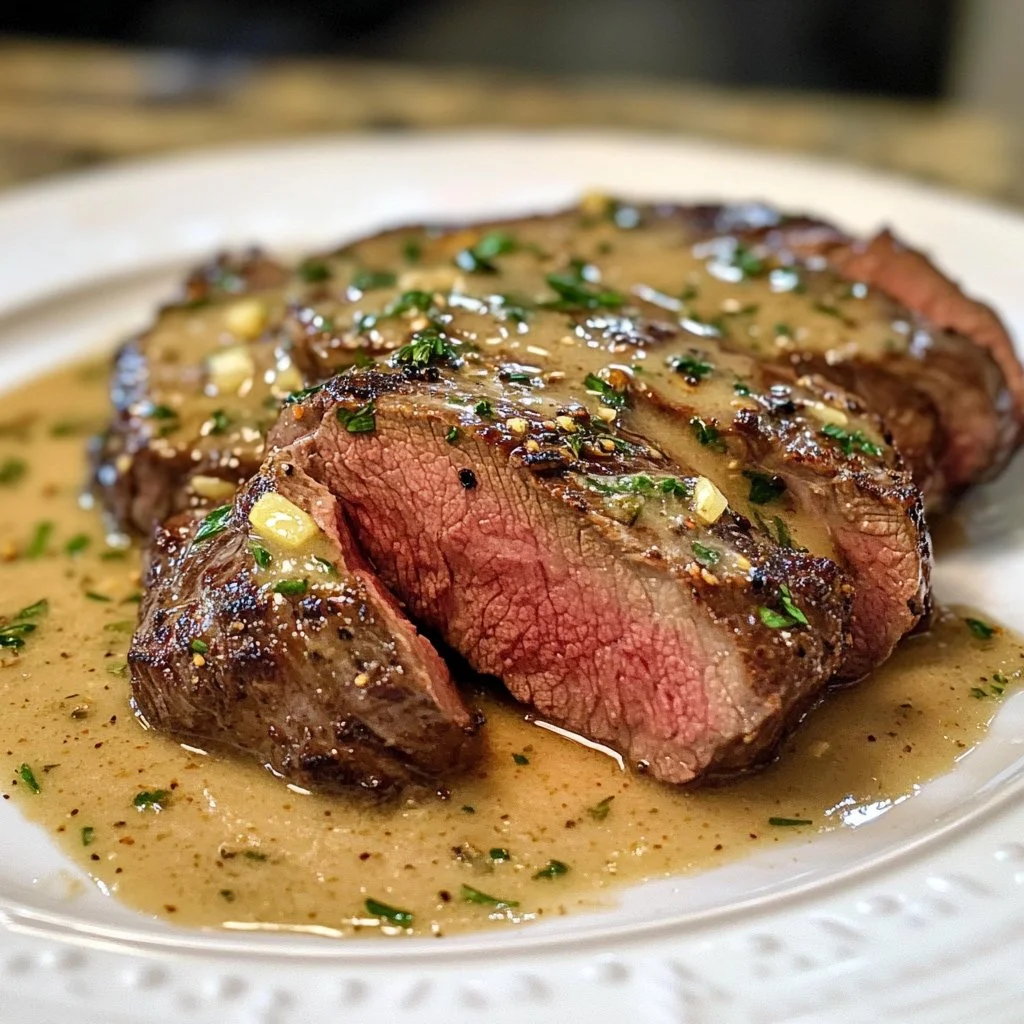
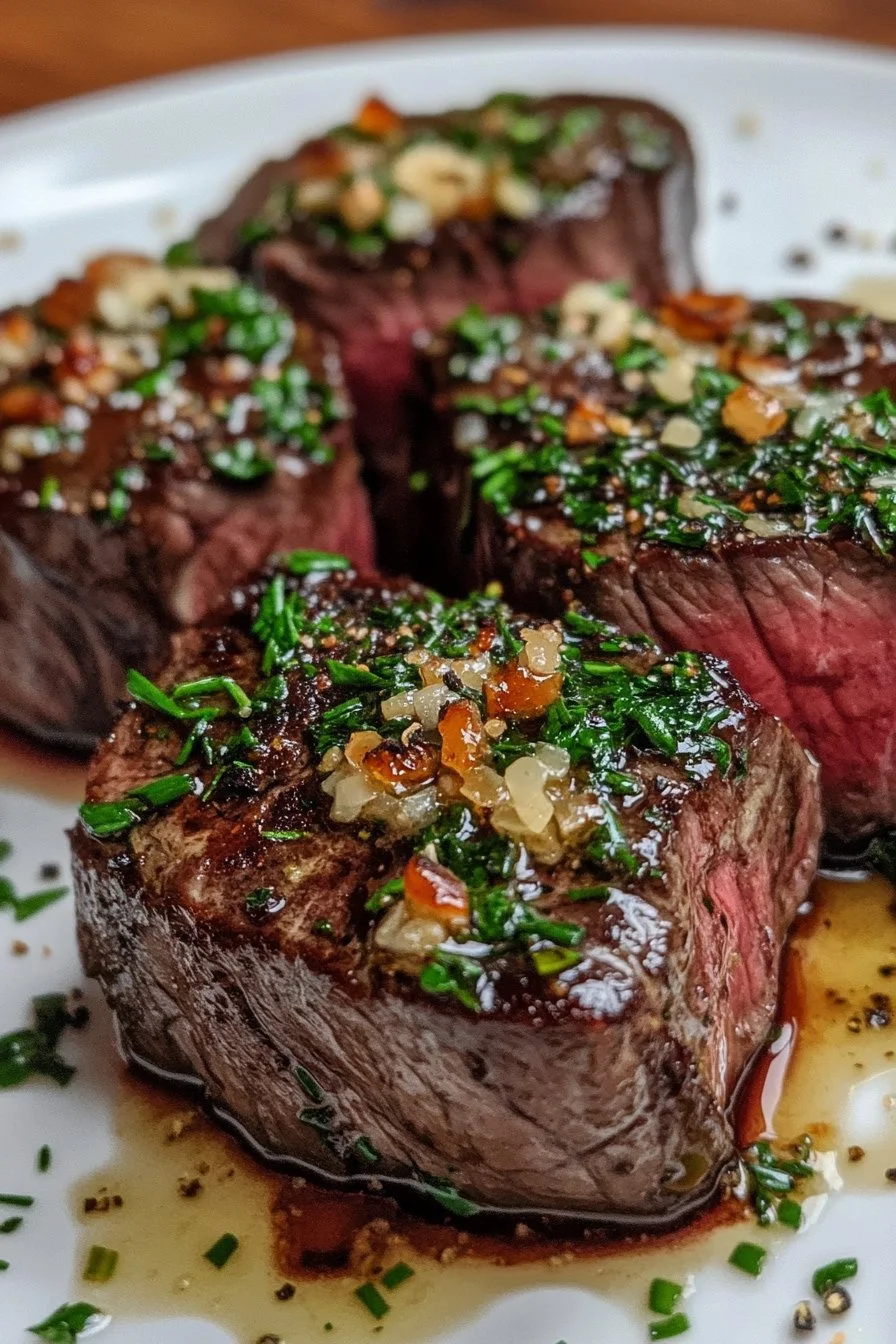
Venison Backstrap with Garlic Butter Sauce
The first time I cooked venison backstrap was a memorable experience. I remember the excitement of preparing this tender cut, a highlight of any game meat feast. I wanted to make it special, so I decided on a garlic butter sauce for an extra flavor kick.
With its rich, gamey flavor, venison backstrap deserves attention. The gentle notes of garlic and the brightness of fresh lemon juice complement the meat beautifully. This dish transformed a simple gathering into an unforgettable culinary adventure.
Crafting venison backstrap with garlic butter sauce is an incredible way to impress loved ones. The key lies in the balance of flavors and textures. With just a handful of ingredients, you can create a gourmet dish perfect for any occasion.
Throughout this article, I’ll guide you through the steps to achieve flavorful venison backstrap, ensuring a delicious meal that becomes a staple in your recipe repertoire.
Venison Backstrap: The Essentials
Fundamentals
Understanding the basics of venison backstrap lays the foundation for a successful dish. This cut, sourced from the back of the deer, is renowned for its tenderness and rich flavor. It often requires minimal preparation and enhances any meal with its unique taste.
Proper handling and cooking of venison backstrap ensure the best results. The meat’s low fat content means overcooking can lead to dryness. With a few techniques, you can achieve the perfect balance of juiciness and flavor in your cooking.
Preparation/Setup
Getting ready to cook venison backstrap involves a few crucial steps. Start by selecting quality meat. Look for a rich red color and a firm texture; these are indicators of freshness.
Next, gather the ingredients you need. With the right mindset, cooking becomes a joyful process. You’ll require olive oil, salt, black pepper, unsalted butter, garlic, fresh lemon juice, and parsley. Keep these ingredients handy to streamline your cooking.
Ingredients
Before diving in, let’s recap the necessary components to create this scrumptious venison backstrap:
- 2 lbs venison backstrap (907 g)
- 2 tablespoons olive oil (30 ml)
- 1 teaspoon salt (5 g)
- 1/2 teaspoon black pepper (1 g)
- 4 tablespoons unsalted butter (57 g)
- 4 cloves garlic, minced
- 1 tablespoon fresh lemon juice (15 ml)
- 1 tablespoon chopped fresh parsley (15 g)
Having fresh ingredients contributes to better flavor in your finished dish.
Directions
- Preheat your oven to 400°F (200°C).
- Pat the venison backstrap dry with paper towels.
- Rub the backstrap with olive oil, salt, and black pepper.
- Heat a skillet over medium-high heat.
- Sear the venison in the skillet for 2-3 minutes on each side.
- Transfer the skillet to the preheated oven.
- Roast the venison for 10-12 minutes, or until desired doneness.
- Remove the skillet from the oven and let the meat rest for 5 minutes.
- In a small saucepan, melt the butter over low heat.
- Add minced garlic to the butter and sauté for 1-2 minutes.
- Stir in the fresh lemon juice and chopped parsley.
- Slice the venison backstrap into medallions.
- Drizzle the garlic butter sauce over the sliced venison.
- Serve immediately.
Creating Perfect Venison Backstrap
Technique
Cooking venison backstrap requires a few techniques to maximize flavor and tenderness. Start by seasoning well. The salt and pepper enhance the meat’s natural taste.
Searing in a hot skillet creates a flavorful crust. This step helps lock in moisture while adding a rich layer of flavor. Remember, patience is key; let the meat develop a good sear before flipping it.
Tips/Tricks
Use these tips to elevate your venison backstrap experience. Always let the meat rest after cooking. This allows juices to redistribute, enhancing flavor and tenderness.
Experiment with the garlic butter sauce too. Add herbs like thyme or rosemary for added depth. Adjust the lemon juice according to personal taste; some appreciate a brighter flavor, while others prefer a subtler note.
Perfecting Your Venison Backstrap
Perfecting Results
To achieve perfect results, pay attention to cooking time and internal temperature. Aim for medium-rare, around 130°F (54°C). This ensures a juicier bite, representative of the meat’s best qualities.
Avoid cooking it too long to prevent dryness. Start checking the temperature a few minutes before the suggested cooking time to ensure a successful outcome.
Troubleshooting/Variations
Even experienced cooks encounter challenges. If the backstrap feels tough, it could be due to overcooking. Always trust a good meat thermometer to prevent this.
Feel free to adapt the garlic butter sauce. Consider adding a splash of soy sauce for a touch of umami or even a hint of heat with chili flakes. Explore your culinary creativity to inspire your variations.
Serving Venison Backstrap
Serving/Presentation
How you present venison backstrap can heighten its appeal. Colorful vegetables or a side salad make an excellent accompaniment. Place the sliced medallions on a warm plate and drizzle the garlic butter sauce artistically. A sprinkle of fresh parsley adds vibrant color and a fragrant finish.
Pairings/Storage
For side dishes, consider roasted vegetables or creamy mashed potatoes. A fresh green salad complements the rich flavors perfectly.
When it comes to storage, keep leftover venison backstrap in an airtight container in the refrigerator. Consume within 2-3 days for the best quality. If possible, freeze the leftovers for longer storage, ensuring you wrap them tightly to avoid freezer burn.
Venison Backstrap with Garlic Butter Sauce
The sheer delight of cooking venison backstrap with garlic butter sauce transforms both simple meals and special occasions. Mastering the fundamentals of preparation, techniques, and presentation leads to mouthwatering results.
Cooking venison backstrap becomes more than just a meal; it evolves into a cherished experience that brings people together around the dining table. Crafting this dish allows you to showcase your skills while indulging in a flavorful adventure. Enjoying each bite becomes a moment of celebration.
Print
Venison Backstrap with Garlic Butter Sauce
- Prep Time: 15 minutes
- Cook Time: 20 minutes
- Total Time: 35 minutes
- Yield: 4 servings
- Category: Main Course
- Method: Searing and Roasting
- Cuisine: Game
- Diet: Paleo
Description
A tender venison backstrap enhanced with a rich garlic butter sauce for an unforgettable culinary experience.
Ingredients
- 2 lbs venison backstrap (907 g)
- 2 tablespoons olive oil (30 ml)
- 1 teaspoon salt (5 g)
- 1/2 teaspoon black pepper (1 g)
- 4 tablespoons unsalted butter (57 g)
- 4 cloves garlic, minced
- 1 tablespoon fresh lemon juice (15 ml)
- 1 tablespoon chopped fresh parsley (15 g)
Instructions
- Preheat your oven to 400°F (200°C).
- Pat the venison backstrap dry with paper towels.
- Rub the backstrap with olive oil, salt, and black pepper.
- Heat a skillet over medium-high heat.
- Sear the venison in the skillet for 2-3 minutes on each side.
- Transfer the skillet to the preheated oven.
- Roast the venison for 10-12 minutes, or until desired doneness.
- Remove the skillet from the oven and let the meat rest for 5 minutes.
- In a small saucepan, melt the butter over low heat.
- Add minced garlic to the butter and sauté for 1-2 minutes.
- Stir in the fresh lemon juice and chopped parsley.
- Slice the venison backstrap into medallions.
- Drizzle the garlic butter sauce over the sliced venison.
- Serve immediately.
Notes
Always let the meat rest after cooking to enhance flavor and tenderness. Experiment with the garlic butter sauce by adding herbs for extra depth.
