
📑 Table of Contents ▶
- Easy Sourdough Sandwich Bread Fundamentals
- Fundamentals
- Preparation/setup
- Directions
- Tips for Perfecting Easy Sourdough Sandwich Bread
- Technique
- Tips/tricks
- Perfecting Results with Easy Sourdough Bread
- Perfecting results
- Troubleshooting/variations
- Serving and Storing Easy Sourdough Sandwich Bread
- Serving/presentation
- Pairings/storage
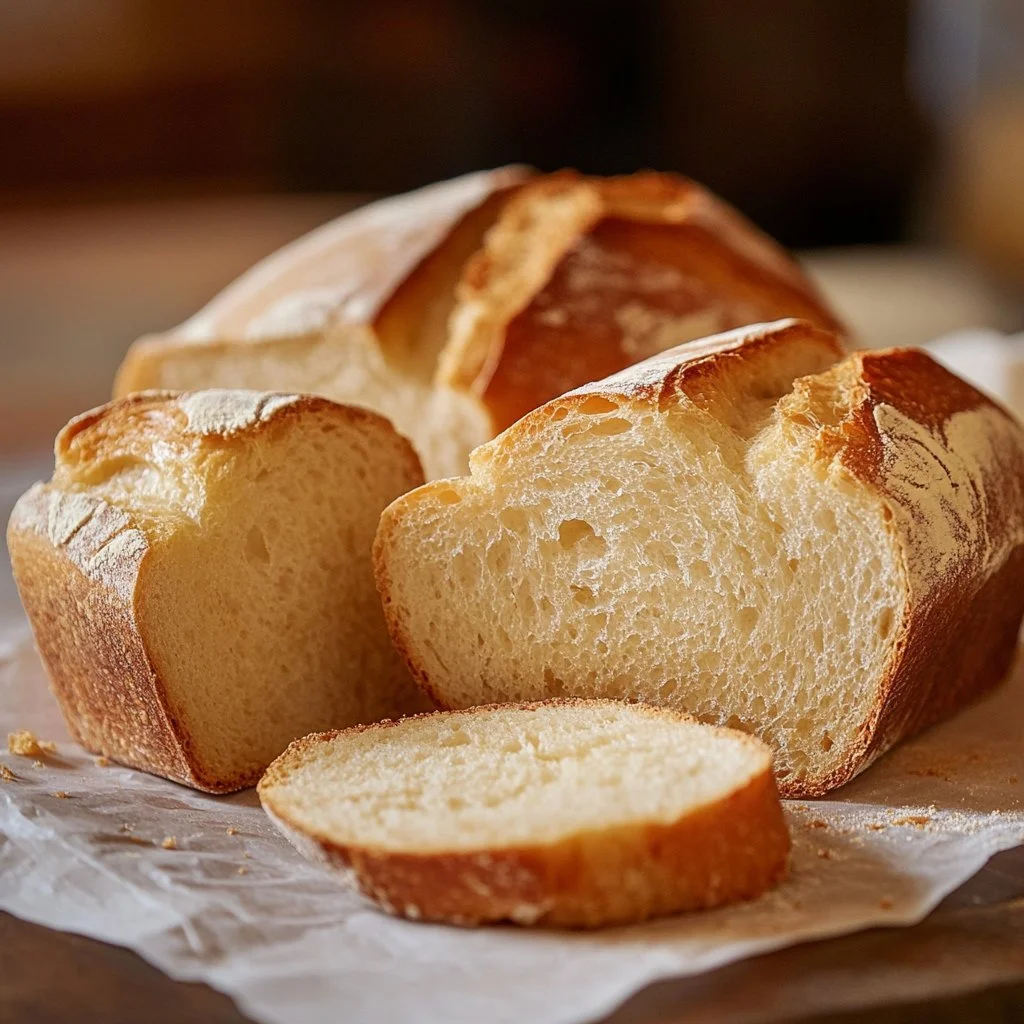
Easy Sourdough Sandwich Bread (Super Soft)
Making sourdough bread always feels like a celebration in my kitchen. There’s something magical about nurturing a simple mixture of flour and water into a bubbling starter that transforms a loaf into something extraordinary. I remember the first time I pulled warm, fragrant slices from the oven, my kitchen filled with the comforting aroma of freshly baked bread. The soft, pillowy texture and subtle tang served as a reminder of the effort that brought it to life.
Creating easy sourdough sandwich bread offers a wonderful opportunity to feed the family with wholesome goodness. You can’t help but feel a sense of pride as you slice into a loaf, the soft crumb revealing itself like a cozy blanket. This bread captures the simplicity of homemade baking while yielding delicious results perfect for any meal. Each bite offers a delightful balance of flavor and texture, making this easy sourdough sandwich bread a favorite in many households.
The secret to achieving that soft texture lies in the careful selection of ingredients and the patience in the process. Whether you’re an experienced baker or a novice, this recipe welcomes everyone to the world of sourdough. The rhythm of dough making, rising, and baking creates a satisfying culinary experience that is well worth the time and effort.
Easy Sourdough Sandwich Bread Fundamentals
Fundamentals
Understanding the basics of sourdough bread-making sets the stage for success. At its core, sourdough involves fermentation that creates both flavor and structure. Active sourdough starter contributes natural yeast, which helps the dough rise and develop its characteristic tang. The hydration level in the dough plays a unique role in texture – the more water, the softer the crumb.
When making easy sourdough sandwich bread, attention to detail ensures optimal results. The combination of bread flour and all-purpose flour creates a balance of strength and tenderness. Bread flour boasts more protein, contributing to a chewy texture, while all-purpose flour enhances softness. The result is a loaf that is soft enough for sandwiches yet sturdy enough to hold its shape.
Preparation/setup
Getting organized before diving into the dough-making process makes the journey smoother. Start by setting aside your ingredients: 65 grams of active sourdough starter, 300 grams of lukewarm water, 12 grams of salt, 14 grams of sugar, 15 grams of oil, 400 grams of bread flour, and 100 grams of all-purpose flour. Ensure your starter is bubbly and thriving; feeding it 4-8 hours before beginning this recipe guarantees it’s at its peak.
Consider your workspace as well. A clean countertop and a large mixing bowl will make the process easier. Make sure to coat your bread pan with oil to prevent sticking later on. The bread pan, often overlooked, plays a crucial role in shaping the loaf and creating a beautifully baked exterior.
Ingredients
The beauty of easy sourdough sandwich bread lies in its simplicity. Here’s what you need:
- 65 grams active sourdough starter (active + bubbly): The heart of your dough, giving it life and flavor.
- 300 grams lukewarm water: This hydrates the flour, activating the gluten and yeast.
- 12 grams salt (2 teaspoons): Enhances flavor and regulates the fermentation process.
- 14 grams sugar: A touch of sweetness helps balance the flavors and aids in browning.
- 15 grams oil (avocado or olive) (1 tablespoon, plus more for coating the pan): Adds moisture and contributes to the soft texture.
- 400 grams bread flour: Provides strength and structure.
- 100 grams all-purpose flour: Creates a soft, tender crumb.
Directions
-
Feed Starter: Ensure your sourdough starter is vibrant by feeding it 4-8 hours before you start. It should be active and bubbly.
-
Mix the Dough: In a large mixing bowl, combine the active sourdough starter with lukewarm water, sugar, and oil. Stir gently until well combined.
-
Add Flours: Gradually add the bread flour and all-purpose flour to the bowl, mixing until no dry flour remains. The mixture will be sticky.
-
Add Salt: Sprinkle in the salt and incorporate it thoroughly into the dough. This step is crucial for flavor.
-
Knead: Turn the dough onto a lightly floured surface. Knead for about 10 minutes or until the dough is smooth and elastic.
-
First Rise: Place the dough in a greased bowl, cover it loosely with a damp cloth or plastic wrap, and let it rise in a warm place for 4-6 hours or until doubled in size.
-
Shaping: Gently deflate the dough and turn it out onto a lightly floured surface. Shape it into a loaf by flattening it out and then folding it into thirds before rolling it into a log.
-
Second Rise: Place the shaped dough into the prepared bread pan. Cover it again and let it rise for another 2-3 hours or until it’s puffed and nearly doubled.
-
Bake: Preheat the oven to 375°F (190°C). Bake the bread for 30-35 minutes, until golden brown and when tapped, it sounds hollow. Cool on a wire rack before slicing.

Tips for Perfecting Easy Sourdough Sandwich Bread
Technique
A successful bread-making experience comes from understanding and applying the right techniques. After mixing the ingredients, let the dough rest for a short period before kneading. This rests the gluten and makes the kneading process easier. Use a bench scraper to handle sticky dough, and keep a bowl of water nearby to wet your hands when necessary.
During the first rise, place the bowl in a slightly warm area. The ideal temperature encourages yeast activity and speeds up fermentation. If your kitchen is cool, consider using a proofing box or warming drawer.
Tips/tricks
Timing is key throughout the bread-making process. The first rise usually takes longer than expected, particularly in cooler conditions. Don’t rush it. Patience rewards you with airy, flavorful bread.
If you want to enhance the crust’s color, apply an egg wash before baking. This creates a beautiful golden finish. Store any leftover dough for later: refrigerate it to prolong its life or freeze it for up to three months.
Perfecting Results with Easy Sourdough Bread
Perfecting results
Achieving the perfect loaf comes with practice. Monitor the crust as it bakes, adjusting your oven rack as necessary to avoid browning too quickly. If the top darkens too much, tent it with aluminum foil to shield it from direct heat.
The internal temperature of the bread should be around 200°F (93°C) when cooked through. Use a digital thermometer for precise readings, especially if you’re new to sourdough baking.
Troubleshooting/variations
Several factors can affect the outcome of your easy sourdough sandwich bread. If the loaf doesn’t rise, revisit your starter’s activity level. A lack of bubbles indicates it may require more feeding or time.
If the crumb appears too dense, consider increasing the hydration slightly next time. More water creates steam during baking, enhancing the final texture. Experimenting with different flours can also lead to delightful variations, adding whole grains or seeds for added nutrition.
Serving and Storing Easy Sourdough Sandwich Bread
Serving/presentation
Presentation adds to the experience of homemade bread. Serve slices alongside soups, salads, or dips, or use them to create toasted sandwiches. This easy sourdough sandwich bread shines in versatility, fulfilling cravings for both savory and sweet toppings alike.
Consider cutting the bread into various shapes for special occasions or gatherings. A rustic, homemade loaf can elevate any dinner table, inviting guests to savor the delicious offerings.
Pairings/storage
This loaf pairs beautifully with spreadable butters or savory dips. For storage, wrap the cooled bread in a clean kitchen towel or place it in a paper bag, preserving its crusty exterior. Avoid plastic wrap to prevent sogginess.
If not consumed within a few days, freeze slices in an airtight container. Let them thaw at room temperature and toast them for a quick breakfast or snack.
Creating easy sourdough sandwich bread is not just about the ingredients. It’s about the journey, the anticipation, and the many delicious moments that follow. Each loaf is a chance to gather around the table and share stories, laughter, and delicious bites. Enjoy the process and the results!
Print
Easy Sourdough Sandwich Bread (Super Soft)
- Prep Time: 15 minutes
- Cook Time: 35 minutes
- Total Time: 180 minutes
- Yield: 1 loaf
- Category: Bread
- Method: Baking
- Cuisine: American
- Diet: Vegetarian
Description
A delightful and easy sourdough sandwich bread recipe that yields soft, pillowy slices perfect for any meal.
Ingredients
- 65 grams active sourdough starter
- 300 grams lukewarm water
- 12 grams salt (2 teaspoons)
- 14 grams sugar
- 15 grams oil (avocado or olive) (1 tablespoon)
- 400 grams bread flour
- 100 grams all-purpose flour
Instructions
- Feed your sourdough starter 4-8 hours prior to starting, ensuring it’s active and bubbly.
- In a large mixing bowl, combine the active sourdough starter with lukewarm water, sugar, and oil. Stir gently until well combined.
- Gradually add the bread flour and all-purpose flour to the bowl, mixing until no dry flour remains. The mixture will be sticky.
- Sprinkle in the salt and incorporate thoroughly into the dough.
- Turn the dough onto a lightly floured surface and knead for about 10 minutes until smooth and elastic.
- Place the dough in a greased bowl, cover loosely, and let it rise in a warm place for 4-6 hours or until doubled in size.
- Gently deflate the dough, shape it into a loaf by flattening and folding it into thirds, then rolling it into a log.
- Place the shaped dough into a prepared bread pan, cover again, and let it rise for another 2-3 hours or until puffed and nearly doubled.
- Preheat the oven to 375°F (190°C) and bake the bread for 30-35 minutes, until golden brown and it sounds hollow when tapped. Cool on a wire rack before slicing.
Notes
Consider applying an egg wash before baking for a beautiful golden crust. Store leftover dough in the refrigerator or freeze for up to three months.
